-
Door
Cat Mate/Dog Mate Pet Doors
4-9
5.75
234 Basic
https://www.petdoors.com/products/catmate-234-235?variant=33932715819146
-
Door
Cat Mate/Dog Mate Pet Doors
5-10
7
221 Deluxe
https://www.petdoors.com/products/catmate-door?variant=44709847367915
-
Door
Cat Mate/Dog Mate Pet Doors
8-16
8.75
Medium
https://www.petdoors.com/products/dogmate-215-216?variant=33932144607370
-
Door
Cat Mate/Dog Mate Pet Doors
8-22
11.75
Large
https://www.petdoors.com/products/dogmate-215-216?variant=33932715720842
-
Door
Cat Mate/Dog Mate Pet Doors
4-9
5.75
Original
https://www.petdoors.com/products/catmate-electronic
-
Door
Cat Mate/Dog Mate Pet Doors
4-9
6
Original
https://www.petdoors.com/products/catmate-elite-305?variant=33932738101386
-
Door
Cat Mate/Dog Mate Pet Doors
4-9
5.75
235 Deluxe
https://www.petdoors.com/products/catmate-door?variant=44709847466219
-
Door
Cat Mate/Dog Mate Pet Doors
4-9
6
Original
https://www.petdoors.com/products/catmate-elite-355?variant=33932697370762
-
Door
Cat Mate/Dog Mate Pet Doors
4-9
6
Original
https://www.petdoors.com/products/catmate-rotary
-
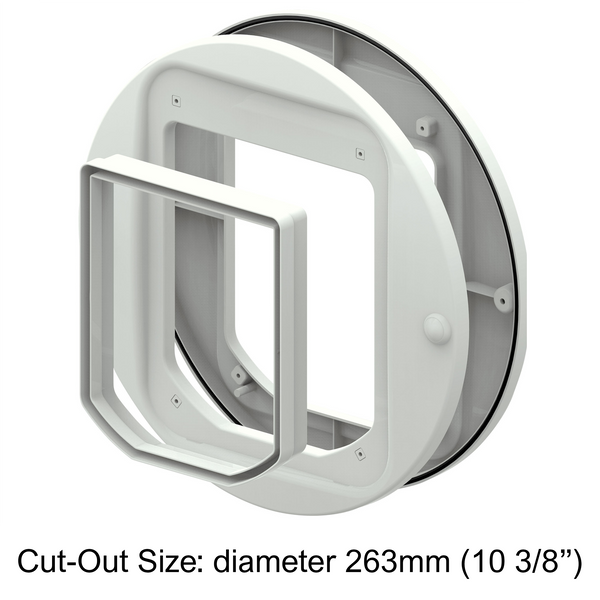
Wall
Cat Mate/Dog Mate Pet Doors
4-9
5.75
Original
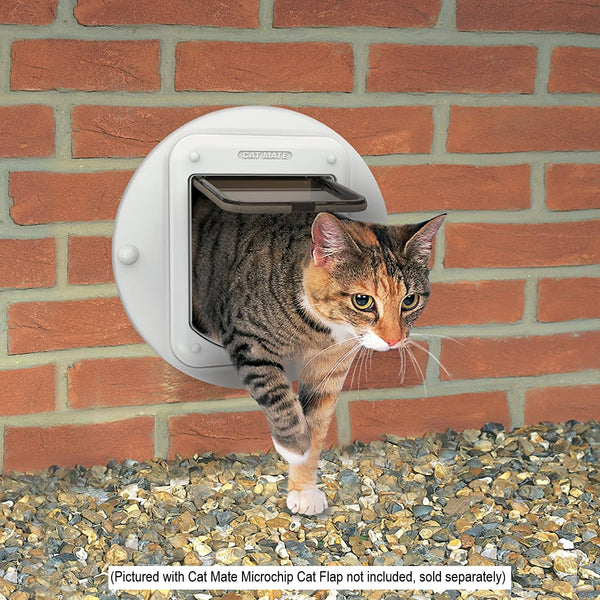
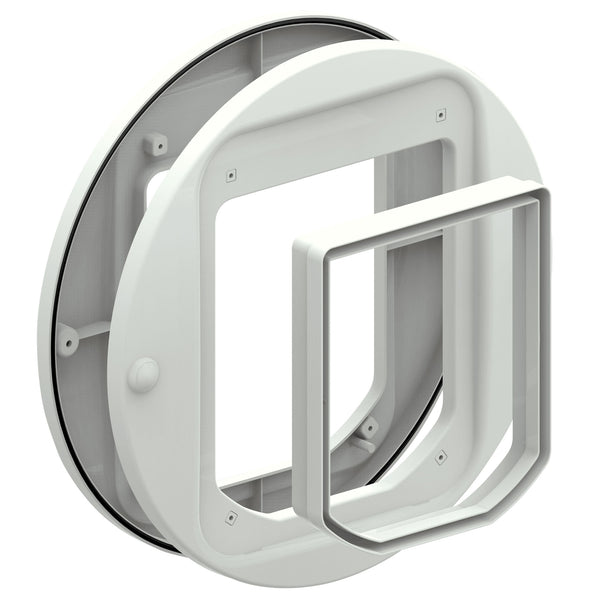
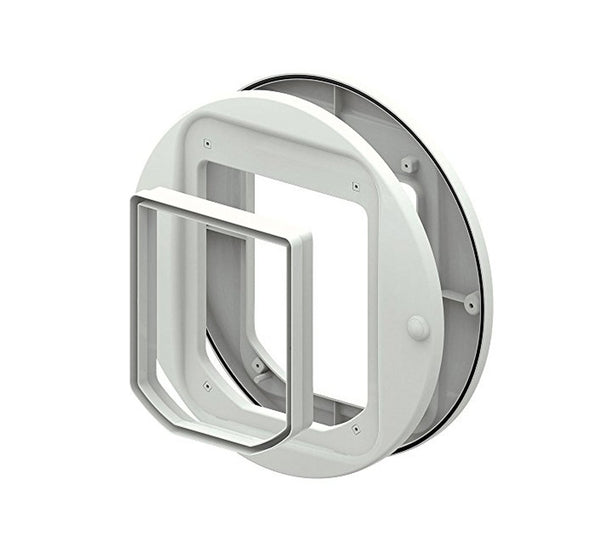
https://www.petdoors.com/products/catmate-microchip
-
Wall
Cat Mate/Dog Mate Pet Doors
4-9
6
Original
https://www.petdoors.com/products/catmate-305-wall-collar-key?variant=33932623970442
-
Wall
Cat Mate/Dog Mate Pet Doors
4-9
5.75
Orignal
https://www.petdoors.com/products/catmate-wall?variant=33932149260426
-
Door
Dragon Pet Door
11-17
7.0625
Medium
https://www.petdoors.com/products/dragon?variant=34579152208037
-
Door
Dragon Pet Door
11-23
9.375
Large
https://www.petdoors.com/products/dragon?variant=39700193083557
-
Sliding Glass Door
Dragon Pet Door
9-12
5.375
Small
https://www.petdoors.com/products/dragon-aluminum-slider?variant=44000062505195
-
Sliding Glass Door
Dragon Pet Door
11-16
7.0625
Medium
https://www.petdoors.com/products/dragon-aluminum-slider?variant=35272836186277
-
Sliding Glass Door
Dragon Pet Door
11-22
9.375
Large
https://www.petdoors.com/products/dragon-aluminum-slider?variant=39700180238501
-
Sliding Glass Door
Dragon Pet Door
9-12
5.375
Small
https://www.petdoors.com/products/dragon-vinyl?variant=44000062275819
-
Sliding Glass Door
Dragon Pet Door
11-16
7.0625
Medium
https://www.petdoors.com/products/dragon-vinyl?variant=35272814592165
-
Sliding Glass Door
Dragon Pet Door
11-22
9.375
Large
https://www.petdoors.com/products/dragon-vinyl?variant=39700181188773
-
Wall
Dragon Pet Door
11-17
7
Medium
https://www.petdoors.com/products/dragon-wall?variant=34579152142501
-
Wall
Dragon Pet Door
11-23
9.4
Large
https://www.petdoors.com/products/dragon-wall?variant=39700188922021
-
Window
Dragon Pet Door
9-12
5.375
Small
https://www.petdoors.com/products/dragon-sash?variant=44000062832875
-
Window
Dragon Pet Door
11-16
7.0625
Medium
https://www.petdoors.com/products/dragon-sash?variant=44047078883563
-
Window
Dragon Pet Door
11-22
9.375
Large
https://www.petdoors.com/products/dragon-sash?variant=44047081046251
-
Window
Dragon Pet Door
9-12
5.375
Small
https://www.petdoors.com/products/dragon-window-double?variant=44021691351275
-
Window
Dragon Pet Door
11-16
7.0625
Medium
https://www.petdoors.com/products/dragon-window-double?variant=34579151388837
-
Window
Dragon Pet Door
11-22
9.375
Large
https://www.petdoors.com/products/dragon-window-double?variant=39700185088165
-
Window
Dragon Pet Door
9-12
5.375
Small
https://www.petdoors.com/products/dragon-window?variant=44000063127787
-
Window
Dragon Pet Door
11-16
7.0625
Medium
https://www.petdoors.com/products/dragon-window?variant=35272860696741
-
Window
Dragon Pet Door
11-22
9.375
Large
https://www.petdoors.com/products/dragon-window?variant=39700177780901
-
Door
Gun Dog House Door
8-16
14.25
Medium
https://www.petdoors.com/products/gun-dog?variant=33932145131658
-
Door
Gun Dog House Door
8-20
17.5
Large
https://www.petdoors.com/products/gun-dog?variant=33932733644938
-
Sliding Glass Door
Whiskers and Windows
4-8
6
Small
https://www.petdoors.com/products/whiskers-window-slider-cat-door?variant=34579451478181
-
Sliding Glass Door
Whiskers and Windows
4-10
7
Large
https://www.petdoors.com/products/whiskers-window-slider-cat-door?variant=34579451609253
-
Window
Whiskers and Windows
4-8
6
Small
https://www.petdoors.com/products/whiskers-windows-sliding-window?variant=35762832474277
-
Window
Whiskers and Windows
4-10
7
Large
https://www.petdoors.com/products/whiskers-windows-sliding-window?variant=35762832638117
-
Door
Hale Pet Door
5-11
5.5
Small
https://www.petdoors.com/products/hale-door?variant=33932752519306
-
Door
Hale Pet Door
5-14
6.5
Small Medium
https://www.petdoors.com/products/hale-door?variant=33932752846986
-
Door
Hale Pet Door
5-19
8.5
Medium
https://www.petdoors.com/products/hale-door?variant=33932753076362
-
Door
Hale Pet Door
5-23
8.5
Tall Medium
https://www.petdoors.com/products/hale-door?variant=33932753404042
-
Door
Hale Pet Door
5-24
11
Large
https://www.petdoors.com/products/hale-door?variant=33932753698954
-
Door
Hale Pet Door
5-29
11
Tall Large
https://www.petdoors.com/products/hale-door?variant=33932753961098
-
Door
Hale Pet Door
5-34
11
Tall Large Plus
https://www.petdoors.com/products/hale-door?variant=33932754223242
-
Door
Hale Pet Door
5-44
15.5
Giant
https://www.petdoors.com/products/hale-door?variant=33932755501194
-
Screen Door
Hale Pet Door
5-11
5.5
Small
https://www.petdoors.com/products/hale-screen?variant=33932714180746
-
Screen Door
Hale Pet Door
5-14
6.5
Small Medium
https://www.petdoors.com/products/hale-screen?variant=33932714180746
-
Screen Door
Hale Pet Door
5-19
8.5
Medium
https://www.petdoors.com/products/hale-screen?variant=33932714377354
-
Screen Door
Hale Pet Door
5-23
8.5
Tall Medium
https://www.petdoors.com/products/hale-screen?variant=33932714475658
-
Screen Door
Hale Pet Door
5-24
11
Large
https://www.petdoors.com/products/hale-screen?variant=33932714573962
-
Screen Door
Hale Pet Door
5-29
11
Tall Large
https://www.petdoors.com/products/hale-screen?variant=33932714672266
-
Screen Door
Hale Pet Door
5-34
11
Tall Large Plus
https://www.petdoors.com/products/hale-screen?variant=33932714770570
-
Screen Door
Hale Pet Door
5-44
15.5
Giant
https://www.petdoors.com/products/hale-screen?variant=33932715163786
-
Sliding Glass Door
Hale Pet Door
5-14
6.5
Small Medium
https://www.petdoors.com/products/hale-through-the-glass?variant=43846747947243
-
Sliding Glass Door
Hale Pet Door
5-19
8.5
Medium
https://www.petdoors.com/products/hale-through-the-glass?variant=43846747980011
-
Sliding Glass Door
Hale Pet Door
5-23
8.5
Tall Medium
https://www.petdoors.com/products/hale-through-the-glass?variant=43846748012779
-
Sliding Glass Door
Hale Pet Door
5-24
11
Large
https://www.petdoors.com/products/hale-through-the-glass?variant=43846748045547
-
Sliding Glass Door
Hale Pet Door
5-29
11
Tall Large
https://www.petdoors.com/products/hale-through-the-glass?variant=43846748078315
-
Sliding Glass Door
Hale Pet Door
5-34
11
Tall Large Plus
https://www.petdoors.com/products/hale-through-the-glass?variant=43846748111083
-
Sliding Glass Door
Hale Pet Door
5-44
15.5
Giant
https://www.petdoors.com/products/hale-through-the-glass?variant=43846748242155
-
Sliding Glass Door
Hale Pet Door
3-10
5.5
Small
https://www.petdoors.com/products/hale-omni-panel?variant=42069049049323
-
Sliding Glass Door
Hale Pet Door
3-13
6.5
Small Medium
https://www.petdoors.com/products/hale-omni-panel?variant=42069049049323
-
Sliding Glass Door
Hale Pet Door
3-18
8.5
Medium
https://www.petdoors.com/products/hale-omni-panel?variant=42069049049323
-
Sliding Glass Door
Hale Pet Door
3-22
8.5
Tall Medium
https://www.petdoors.com/products/hale-omni-panel?variant=42069049049323
-
Sliding Glass Door
Hale Pet Door
3-23
11
Large
https://www.petdoors.com/products/hale-omni-panel?variant=42069049049323
-
Sliding Glass Door
Hale Pet Door
3-28
11
Tall Large
https://www.petdoors.com/products/hale-omni-panel?variant=42069049049323
-
Sliding Glass Door
Hale Pet Door
3-33
11
Tall Large Plus
https://www.petdoors.com/products/hale-omni-panel?variant=42069049049323
-
Sliding Glass Door
Hale Pet Door
3-40
15.5
Giant
https://www.petdoors.com/products/hale-omni-panel?variant=42069049049323
-
Sliding Glass Door
Hale Pet Door
3-10
5.5
Small
https://www.petdoors.com/products/hale-standard-slider?variant=40494245839013
-
Sliding Glass Door
Hale Pet Door
3-13
6.5
Small Medium
https://www.petdoors.com/products/hale-standard-slider?variant=40494245839013
-
Sliding Glass Door
Hale Pet Door
3-18
8.5
Medium
https://www.petdoors.com/products/hale-standard-slider?variant=40494245839013
-
Sliding Glass Door
Hale Pet Door
3-22
8.5
Tall Medium
https://www.petdoors.com/products/hale-standard-slider?variant=40494245839013
-
Sliding Glass Door
Hale Pet Door
3-23
11
Large
https://www.petdoors.com/products/hale-standard-slider?variant=40494245839013
-
Sliding Glass Door
Hale Pet Door
3-28
11
Tall Large
https://www.petdoors.com/products/hale-standard-slider?variant=40494245839013
-
Sliding Glass Door
Hale Pet Door
3-29
14
Extra Large
https://www.petdoors.com/products/hale-standard-slider?variant=40494245839013
-
Sliding Glass Door
Hale Pet Door
3-33
11
Tall Large Plus
https://www.petdoors.com/products/hale-standard-slider?variant=40494245839013
-
Sliding Glass Door
Hale Pet Door
3-34
14
Extra Large Plus
https://www.petdoors.com/products/hale-standard-slider?variant=40494245839013
-
Sliding Glass Door
Hale Pet Door
3-40
11
Extra Tall Large
https://www.petdoors.com/products/hale-standard-slider?variant=40494245839013
-
Sliding Glass Door
Hale Pet Door
3-40
15.5
Giant
https://www.petdoors.com/products/hale-standard-slider?variant=40494245839013
-
Wall
Hale Pet Door
5-11
5.5
Small
https://www.petdoors.com/products/hale-wall?variant=33932738789514
-
Wall
Hale Pet Door
5-14
6.5
Small Medium
https://www.petdoors.com/products/hale-wall?variant=33932739084426
-
Wall
Hale Pet Door
5-19
8.5
Medium
https://www.petdoors.com/products/hale-wall?variant=33932739379338
-
Wall
Hale Pet Door
5-23
8.5
Tall Medium
https://www.petdoors.com/products/hale-wall?variant=33932739641482
-
Wall
Hale Pet Door
5-24
11
Large
https://www.petdoors.com/products/hale-wall?variant=33932739936394
-
Wall
Hale Pet Door
5-29
11
Tall Large
https://www.petdoors.com/products/hale-wall?variant=33932740264074
-
Wall
Hale Pet Door
5-34
11
Tall Large Plus
https://www.petdoors.com/products/hale-wall?variant=33932740526218
-
Wall
Hale Pet Door
5-44
15.5
Giant
https://www.petdoors.com/products/hale-wall?variant=33932741673098
-
Wall
Hale Pet Door
5-11
5.5
Small
https://www.petdoors.com/products/hale-thick-wall?variant=34614321741989
-
Wall
Hale Pet Door
5-14
6.5
Small Medium
https://www.petdoors.com/products/hale-thick-wall?variant=34614321741989
-
Wall
Hale Pet Door
5-19
8.5
Medium
https://www.petdoors.com/products/hale-thick-wall?variant=34614321971365
-
Wall
Hale Pet Door
5-23
8.5
Tall Medium
https://www.petdoors.com/products/hale-thick-wall?variant=34614322233509
-
Wall
Hale Pet Door
5-24
11
Large
https://www.petdoors.com/products/hale-thick-wall?variant=34614322495653
-
Wall
Hale Pet Door
5-29
11
Tall Large
https://www.petdoors.com/products/hale-thick-wall?variant=34614322757797
-
Wall
Hale Pet Door
5-34
11
Tall Large Plus
https://www.petdoors.com/products/hale-thick-wall?variant=34614323019941
-
Wall
Hale Pet Door
5-44
15.5
Giant
https://www.petdoors.com/products/hale-thick-wall?variant=34614324035749
-
Window
Hale Pet Door
5-10
5.5
Small
https://www.petdoors.com/products/hale-omni-sash?variant=33932734267530
-
Window
Hale Pet Door
5-11
6.5
Small Medium
https://www.petdoors.com/products/hale-omni-sash?variant=33932734267530
-
Window
Hale Pet Door
5-14
8.5
Medium
https://www.petdoors.com/products/hale-omni-sash?variant=33932734267530
-
Window
Hale Pet Door
5-22
8.5
Tall Medium
https://www.petdoors.com/products/hale-omni-sash?variant=33932734267530
-
Window
Hale Pet Door
5-23
11
Large
https://www.petdoors.com/products/hale-omni-sash?variant=33932734267530
-
Window
Hale Pet Door
5-28
11
Tall Large
https://www.petdoors.com/products/hale-omni-sash?variant=33932734267530
-
Window
Hale Pet Door
5-33
11
Tall Large Plus
https://www.petdoors.com/products/hale-omni-sash?variant=33932734267530
-
Window
Hale Pet Door
5-44
15.5
Giant
https://www.petdoors.com/products/hale-omni-sash?variant=33932734267530
-
Window
Hale Pet Door
5-10
5.5
Small
https://www.petdoors.com/products/hale-omni-cat-sash?variant=33932676956298
-
Window
Hale Pet Door
5-14
6.5
Small Medium
https://www.petdoors.com/products/hale-omni-cat-sash?variant=33932676956298
-
Door
Endura Flap
9 - 16
6
Small
https://www.petdoors.com/products/endura-flap?variant=43303666614507
-
Door
Endura Flap
9-22
8
Medium
https://www.petdoors.com/products/endura-flap?variant=43303666680043
-
Door
Endura Flap
9-28
10
Large
https://www.petdoors.com/products/endura-flap?variant=43303666745579
-
Sliding Glass Door
Endura Flap
8-14
6
Small
https://www.petdoors.com/products/endura-flap-severe-weather-vinyl-slider?variant=34579451838629
-
Sliding Glass Door
Endura Flap
8-21
8
Medium
https://www.petdoors.com/products/endura-flap-severe-weather-vinyl-slider?variant=34579451936933
-
Sliding Glass Door
Endura Flap
8-31
10
Large
https://www.petdoors.com/products/endura-flap-severe-weather-vinyl-slider?variant=34579452035237
-
Sliding Glass Door
Endura Flap
9 - 15
6
Small
https://www.petdoors.com/products/endura-flap-thermo-panel-3e?variant=40784617537701
-
Sliding Glass Door
Endura Flap
9-21
8
Medium
https://www.petdoors.com/products/endura-flap-thermo-panel-3e?variant=35762721194149
-
Sliding Glass Door
Endura Flap
9-27
10
Large
https://www.petdoors.com/products/endura-flap-thermo-panel-3e?variant=35762721489061
-
Sliding Glass Door
Endura Flap
9 - 14
6
Small
https://www.petdoors.com/products/endura-flap-vinyl-slider?variant=40494217953445
-
Sliding Glass Door
Endura Flap
9 - 21
8
Medium
https://www.petdoors.com/products/endura-flap-vinyl-slider?variant=40494217986213
-
Sliding Glass Door
Endura Flap
9 - 32
10
Large
https://www.petdoors.com/products/endura-flap-vinyl-slider?variant=40494218018981
-
Sliding Glass Door
Endura Flap
9 - 15
6
Small
https://www.petdoors.com/products/endura-flap-cat-slider?variant=44116296827115
-
Wall
Endura Flap
9 - 16
6
Small
https://www.petdoors.com/products/endura-flap-wall?variant=42880416579819
-
Wall
Endura Flap
9 - 22
8
Medium
https://www.petdoors.com/products/endura-flap-wall?variant=42880416645355
-
Wall
Endura Flap
9 - 28
10
Large
https://www.petdoors.com/products/endura-flap-wall?variant=42880416710891
-
Wall
Endura Flap
9 - 16
6
Small
https://www.petdoors.com/products/endura-flap-cat-doors-for-walls?variant=33932151816330
-
Window
Endura Flap
9 - 15
6
Small
https://www.petdoors.com/products/endura-flap-cat-door-horizontal-window?variant=35762599559333
-
Window
Endura Flap
9 - 15
6
Small
https://www.petdoors.com/products/thermo-sash-3e-cat-door?variant=33932683280522
-
Window
Endura Flap
9 - 15
6
Small
https://www.petdoors.com/products/thermo-sash-window?variant=34579267846309
-
Window
Endura Flap
9-21
8
Medium
https://www.petdoors.com/products/thermo-sash-window?variant=34579268567205
-
Window
Endura Flap
9-27
10
Large
https://www.petdoors.com/products/thermo-sash-window?variant=34579269255333
-
Door
High Tech Pet Products
8- 15
8.25
Medium
https://www.petdoors.com/products/high-tech-door?variant=44095119294699
-
Door
High Tech Pet Products
8-24
12.25
Large
https://www.petdoors.com/products/high-tech-door?variant=44095119327467
-
Door
High Tech Pet Products
8-15
8.25
Medium
https://www.petdoors.com/products/high-tech-door?variant=44095119294699
-
Door
High Tech Pet Products
8-24
12.25
Large
https://www.petdoors.com/products/high-tech-door?variant=44095119327467
-
Door
High Tech Pet Products
12-19
6.38
Small
https://www.petdoors.com/products/high-tech-armor-flex-for-doors?variant=40271608742053
-
Door
High Tech Pet Products
12-25
8.25
Medium
https://www.petdoors.com/products/high-tech-armor-flex-for-doors?variant=40271608774821
-
Door
High Tech Pet Products
12-31
10.5
Large
https://www.petdoors.com/products/high-tech-armor-flex-for-doors?variant=40271608807589
-
Sliding Glass Door
High Tech Pet Products
8-14
8.25
Medium
https://www.petdoors.com/products/high-tech-slider?variant=44095118377195
-
Sliding Glass Door
High Tech Pet Products
8-23
12.25
Large
https://www.petdoors.com/products/high-tech-slider?variant=44095118442731
-
Sliding Glass Door
High Tech Pet Products
12-18
6.38
Small
https://www.petdoors.com/products/high-tech-armor-flex-patio?variant=40493889061029
-
Sliding Glass Door
High Tech Pet Products
12-24
8.25
Medium
https://www.petdoors.com/products/high-tech-armor-flex-patio?variant=40493889126565
-
Sliding Glass Door
High Tech Pet Products
12-30
10.5
Large
https://www.petdoors.com/products/high-tech-armor-flex-patio?variant=40493889224869
-
Wall
High Tech Pet Products
8-15
8.25
Medium
https://www.petdoors.com/products/high-tech-wall?variant=44095119556843
-
Wall
High Tech Pet Products
8-24
12.25
Large
https://www.petdoors.com/products/high-tech-wall?variant=44095119589611
-
Door
Ideal Pet Products
7-13
5
Small
https://www.petdoors.com/products/ideal-ruff-weather-door?variant=33932148277386
-
Door
Ideal Pet Products
7-19
7.25
Medium
https://www.petdoors.com/products/ideal-ruff-weather-door?variant=33932749570186
-
Door
Ideal Pet Products
7-36
15
Super Large
https://www.petdoors.com/products/ideal-ruff-weather-door?variant=33932749635722
-
Door
Ideal Pet Products
5-17
7
Medium
https://www.petdoors.com/products/ideal-deluxe-door?variant=33932746686602
-
Door
Ideal Pet Products
5-32
15
Super Large
https://www.petdoors.com/products/ideal-deluxe-door?variant=33932746817674
-
Door
Ideal Pet Products
5-10
5
Small
https://www.petdoors.com/products/ideal-designer-series-original
-
Door
Ideal Pet Products
5-17
7
Medium
https://www.petdoors.com/products/ideal-designer-series-original?variant=33932746031242
-
Door
Ideal Pet Products
5-32
15
Super Large
https://www.petdoors.com/products/ideal-designer-series-original?variant=33932746129546
-
Door
Ideal Pet Products
9-17
6.625
Medium
https://www.petdoors.com/products/ideal-ultra-flex?variant=43741630628075
-
Door
Ideal Pet Products
4-9
6.25
Original
https://www.petdoors.com/products/ideal-4-way-locking-cat-door?variant=33932148408458
-
Door
Ideal Pet Products
4-16
7.5
Large
https://www.petdoors.com/products/ideal-4-way-locking-cat-door?variant=33932718538890
-
Door
Ideal Pet Products
13-23
9
Original
https://www.petdoors.com/products/ideal-original-large-plastic-pet-door
-
Door
Ideal Pet Products
9-17
6.625
Medium
https://www.petdoors.com/products/ideal-aluminum-premium-draft-stopper-dog-door
-
Door
Ideal Pet Products
7-13
7
Original
https://www.petdoors.com/products/ideal-ecat
-
Screen Door
Ideal Pet Products
9-17
7
Medium
https://www.petdoors.com/products/ideal-screen-guard?variant=33932155879562
-
Screen Door
Ideal Pet Products
8-16
8.75
Original
https://www.petdoors.com/products/ideal-screen-fit-pet-door
-
Screen Door
Ideal Pet Products
8-15
8.75
Original
https://www.petdoors.com/products/ideal-screen-fit-cat-door
-
Screen Door
Ideal Pet Products
12-20
7.25
Original
https://www.petdoors.com/products/ideal-passage-screen
-
Sliding Glass Door
Ideal Pet Products
5-9
5
Small
https://www.petdoors.com/products/ideal-fast-fit?variant=40494256783525
-
Sliding Glass Door
Ideal Pet Products
5-16
7
Medium
https://www.petdoors.com/products/ideal-fast-fit?variant=44098354741483
-
Sliding Glass Door
Ideal Pet Products
5-30
15
Super Large
https://www.petdoors.com/products/ideal-fast-fit?variant=44100867653867
-
Sliding Glass Door
Ideal Pet Products
4-8
6.25
Cat Flap
https://www.petdoors.com/products/ideal-modular?variant=33932726108298
-
Sliding Glass Door
Ideal Pet Products
4-9
5
Small
https://www.petdoors.com/products/ideal-modular?variant=43741629481195
-
Sliding Glass Door
Ideal Pet Products
4-16
7
Medium
https://www.petdoors.com/products/ideal-modular?variant=43741629481195
-
Sliding Glass Door
Ideal Pet Products
4-30
15
Super Large
https://www.petdoors.com/products/ideal-modular?variant=33932726108298
-
Wall
Ideal Pet Products
7-13
5
Small
https://www.petdoors.com/products/ideal-ruff-weather-wall?variant=33932152242314
-
Wall
Ideal Pet Products
7-19
7.25
Medium
https://www.petdoors.com/products/ideal-ruff-weather-wall?variant=33932694913162
-
Wall
Ideal Pet Products
7-36
15
Super Large
https://www.petdoors.com/products/ideal-ruff-weather-wall?variant=33932694978698
-
Window
Ideal Pet Products
5-9
5
Small
https://www.petdoors.com/products/ideal-fast-sash?variant=40494258978981
-
Window
Ideal Pet Products
5-16
7
Medium
https://www.petdoors.com/products/ideal-fast-sash?variant=40494259175589
-
Screen Door
RCR Screens
8-14
8
Original
https://www.petdoors.com/products/rcr-easy-screen-cat
-
Sliding Glass Door
Dragon Pet Door
11-16
7.0625
Medium
https://www.petdoors.com/products/custom-double-flap-dragon-pet-door-for-aluminum-sliders?variant=43542928916715
-
Sliding Glass Door
Dragon Pet Door
11-22
9.375
Large
https://www.petdoors.com/products/custom-double-flap-dragon-pet-door-for-aluminum-sliders?variant=43542929015019
-
Sliding Glass Door
Whiskers and Windows
4-8
6
Small
https://www.petdoors.com/products/custom-whiskers-windows-panel?variant=43543115366635
-
Sliding Glass Door
Whiskers and Windows
4-10
7
Large
https://www.petdoors.com/products/custom-whiskers-windows-panel?variant=43543115399403
-
Sliding Glass Door
Dragon Pet Door
9-12
5.375
Small
https://www.petdoors.com/products/custom-dragon-aluminum-slider-single-flap?variant=44091999224043
-
Sliding Glass Door
Dragon Pet Door
11-16
7.0625
Medium
https://www.petdoors.com/products/custom-dragon-aluminum-slider-single-flap?variant=43542857449707
-
Sliding Glass Door
Dragon Pet Door
11-22
9.375
Large
https://www.petdoors.com/products/custom-dragon-aluminum-slider-single-flap?variant=43542857744619
-
Sliding Glass Door
Endura Flap
8-14
6
Small
https://www.petdoors.com/products/custom-endura-flap-severe-weather-vinyl?variant=43611180138731
-
Sliding Glass Door
Endura Flap
8-21
8
Medium
https://www.petdoors.com/products/custom-endura-flap-severe-weather-vinyl?variant=43611180171499
-
Sliding Glass Door
Endura Flap
8-27
10
Large
https://www.petdoors.com/products/custom-endura-flap-severe-weather-vinyl?variant=43611180204267
-
wall
Ideal Pet Products
7-19
7.25
Medium
https://www.petdoors.com/products/ideal-plastic-wall-mount?variant=43837313745131
-
Door
Liberty Pet Door
9-16
6
Small
https://www.petdoors.com/products/liberty-door?variant=44424072986859
-
Door
Liberty Pet Door
9-22
8
Medium
https://www.petdoors.com/products/liberty-door?variant=44424073216235
-
Door
Liberty Pet Door
9-28
10
Large
https://www.petdoors.com/products/liberty-door?variant=44424073412843
-
Wall
Liberty Pet Door
9-16
6
Small
https://www.petdoors.com/products/liberty-wall?variant=44424284274923
-
Wall
Liberty Pet Door
9-22
8
Medium
https://www.petdoors.com/products/liberty-wall?variant=44424284471531
-
Wall
Liberty Pet Door
9-28
10
Large
https://www.petdoors.com/products/liberty-wall?variant=44424284668139
-
Sliding Glass Door
Endura Flap
9-15
6
Small
https://www.petdoors.com/products/endura-flap-custom-thermo?variant=40494215823525
-
Sliding Glass Door
Endura Flap
9-21
8
Medium
https://www.petdoors.com/products/endura-flap-custom-thermo?variant=40494215921829
-
Sliding Glass Door
Endura Flap
9-27
10
Large
https://www.petdoors.com/products/endura-flap-custom-thermo?variant=40494216020133


 Product Details


 Difficulty
Moderate
Difficulty
Moderate
 Steps
04
Steps
04
 Time Required
1-2 hours
Time Required
1-2 hours
 Sections
02
Sections
02
 Flags
00
Flags
00