


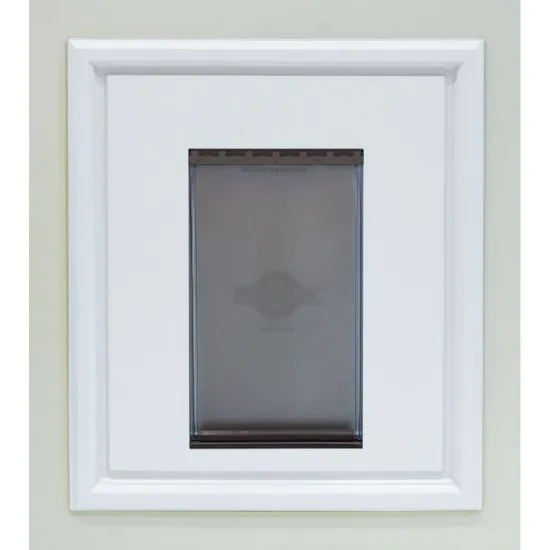
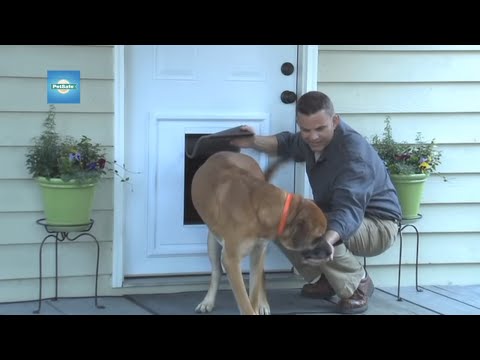
PetSafe Pet Door Insert for Panel Doors


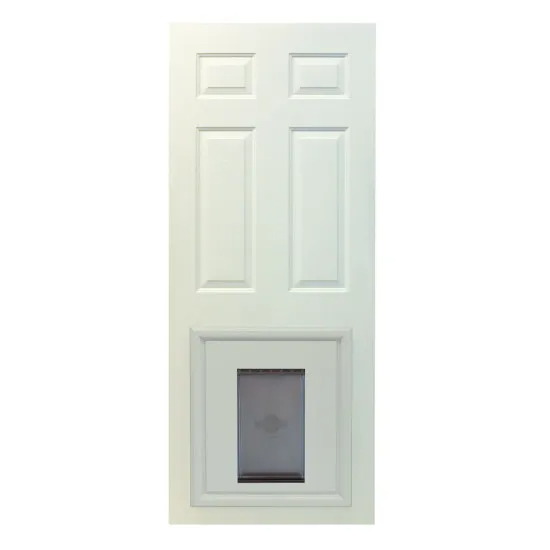

- Fits most 2'8", 2'10", and 3'0" panel doors with 1-3/4" minimum thickness
- Two magnetic vinyl flaps with dimensions of 10 1/8"w x 16 1/2"h
- Available in white (paintable weatherproof material)
- Covers up damage from previous pet doors
- 2 height options: 8" and 10-1/2" for a tailored fit
- Comes with snap-on closing cover to keep pets in your home when needed
 Product Details
Product Details
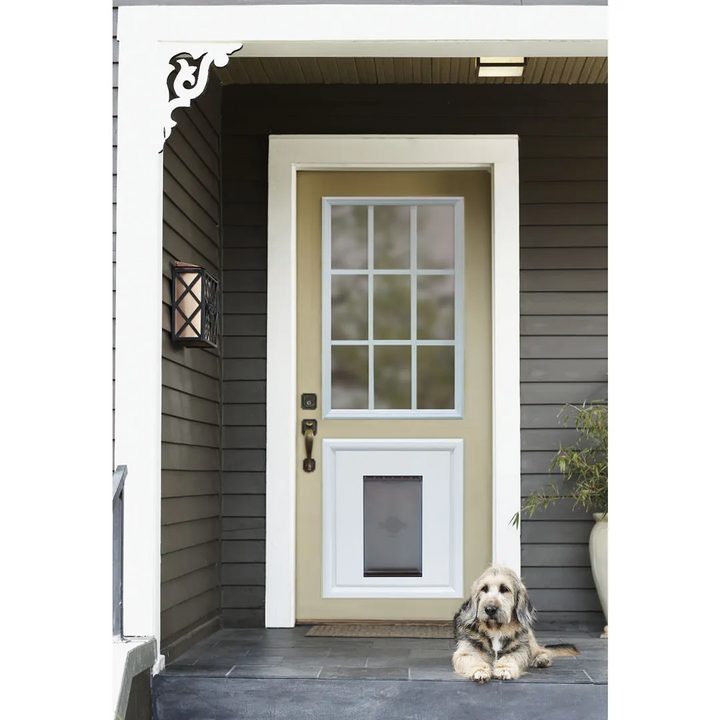
The PetSafe Pet Door Insert for Panel Doors is the perfect solution for giving your pets the freedom they crave. Designed specifically for panel doors with a minimum thickness of 1-3/4", this pet door insert is a clever way to create a flat surface on paneled doors for easy installation. Its dimensions, 10-1/8"w x 16-1/2"h, ensure that it is suitable for most dogs and cats.
This pet door can cover-up existing pet door damage or installation errors. This makes it an excellent choice if you want to give your door a fresh, polished look while also providing your pets with easy access to your home.
Crafted from weatherproof and paintable material, the PetSafe Pet Door Insert is available in white and can be customized to match your home's decor. The magnetic vinyl flaps are designed to keep drafts at bay, making this pet door more energy-efficient than average. The snap-on closing panel allows you to control when your pets can access the door, providing you with peace of mind.
With two height options, 8" and 10 1/2", you can easily find the perfect fit for your dog or cat. Enjoy the convenience and style of the PetSafe Pet Door Insert for Panel Doors while providing your pets with the freedom they deserve. Upgrade your home with this premium pet door that combines functionality and aesthetics for the perfect pet-friendly environment.
Features
- Fits most 2’ 8", 2’ 10" and 3’ 0" doors with basic 2-panel, 4-panel, 6-panel designs
- Ideal solution for paneled doors or covering imperfections
- Weatherproof and resistant to hot and cold temperatures
- Comes with 2 flexible, replaceable vinyl flaps to limit drafts
- Snap-on closing panel to control pet access
- Customizable with paint to match your home decor
Benefits
- Perfect for panel doors or for covering imperfections
- Lets in less drafts than the average pet door
- Great for dogs and cats


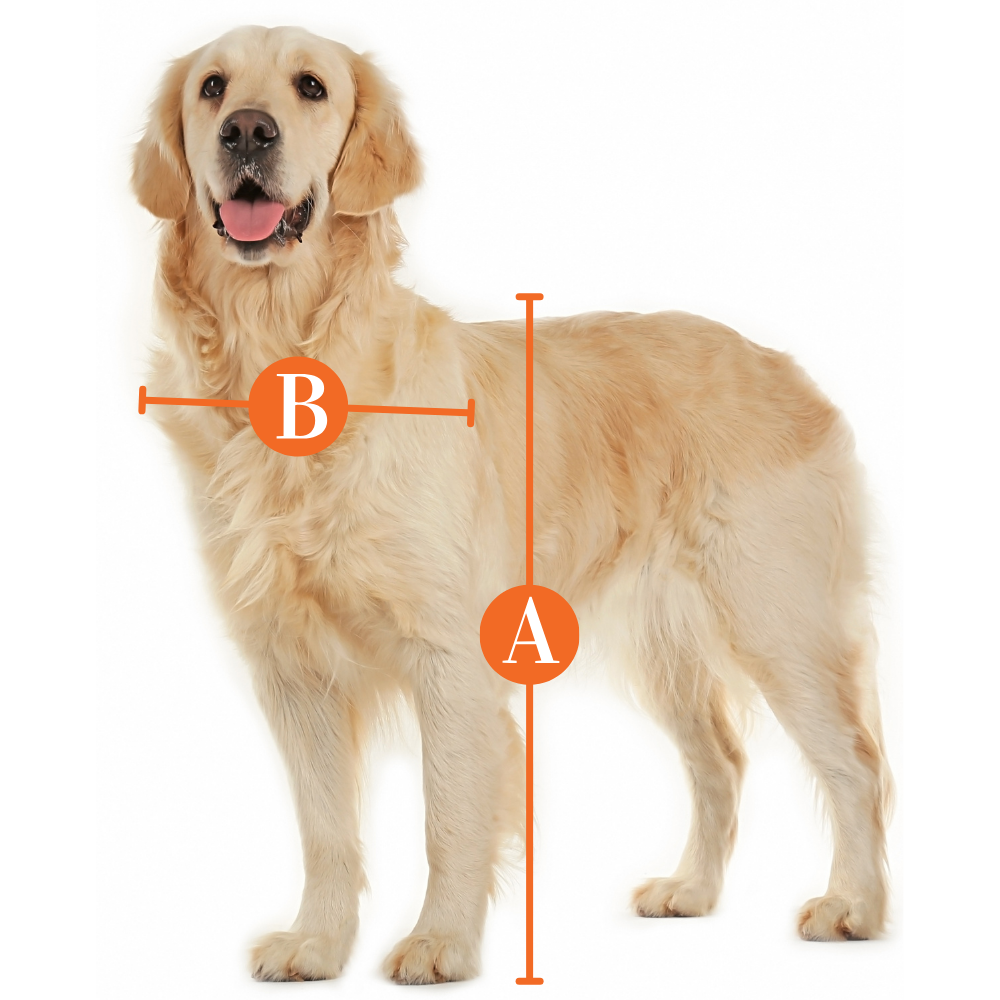
Size Chart
- Petsafe Pet Door Insert for Panel Doors10 1/8"w x 16 1/2h
Flap Dimensions:
10 1/8"w x 16 1/2"h
The entry way your dog goes through.

Rough Cut-Out Dimension:
23"w x 26 1/4"h
The size of the hole needed to fit your pet door into the door.| Flap Size | Flap Opening | Rough Cut Out | Step-Over | Recommended Pet height |
|---|---|---|---|---|
| Orignal | 10 1/8" x 16 1/2" | 23" x 26 1/4" | 8" or 10 1/2" | 14" - 24" |
Do not know which flap size to get? Here is a measurement guide to help you out.
Installation Instructions
See the Printable PDF Version of PetSafe Panel Pet Door Instructions
 Difficulty
Moderate
Difficulty
Moderate
 Steps
07
Steps
07
 Time Required
1-2 hours
Time Required
1-2 hours
 Sections
01
Sections
01
 Flags
02
Flags
02
Parts
- Adjustable hinge plate assembly
- Interior cover plate
- Dual-flap mount with T-grooves
- Exterior cover plate
- 40 Finsihing plugs
- Closing panel
- Flexible flap
- Bottom mount with T-grooves
- Bottom magnets
- Flexible flap
- Interior panel insert
- Exterior panel insert with T-guides
- 10 short screws
- 20 medium screws
- 25 long screws
- Home owner's guide
Tools
- Drill
- Jigsaw
- Drill
- 1/4" drill bit
- Phillips screwdriver
- Tape measure
- Pencil
- Level
Step 1 Make the Rough Cutout

- Begin at least 3" from the bottom of the door, draw a horizontal line.
- Find the center of the door and draw a vertical line crossing the horizontal line.
- Use this centerpoint to cut a 23" x 26-1/4" high cutout.
Step 2 Prepare the Pet Door

- The PetSafe Panel Pet Door Insert is partially assembly for shipping purposes and will need to be detached to get started.
- When removing the screws, set them aside in a safe place to be used later.
- This is a good time to decide the rise orientation. For a short pet, rotate the panel so the 8" rise is on the bottom. For taller pets, place the 10-1/2" rise on the bottom.
- If you plan on painting the insert, we recommend doing it at this point prior to installation.
Step 3 Install the Panels

- Install the interior panel on the inside of the door and the exterior panel on the outside of the door.
- Remove butyl sealant tape at this time.
- Use 25 M3.5 x 1.3 x 20 BT screws to connect the inteior and exterior panels.
Step 4 Attach T-Grooves

- Take the bottom mount and slide the 2 magnets onto the bottom mount, one on each track.
- Match and slide the T-grooves on bottom mount with T-guides on the bottom opening of the exterior panel insert, depending on the rise orientation.
- Use 4 M3.5 x 1.3 x 16 BT screws to complete this part of the install.
Step 5 Prepare Hinge Plate Assemblies

- Prepare both hinge plate assemblies trapping the flap between the lower hinges.
- Use 5 M3.5 x 1.3 x 10 BT screws to attach flap hinges for each hinge plate assembly.
- Make sure the heads of the screws on the lower part of the hinge are facing inboard, to avoid seeing them when the assembly is installed.
Step 6 Install Hinge Plate Assemblies

- Install the first hinge plate assembly to the interior side of the dual-flap mount using 5 M3.5 x 1.3 x 16 BT screws, then attach the interior cover plate with 2 M3.5 x 1.3 x 16 BT screws.
- Tighten the screws only enough to hold the hinge plate assemblies in place, as they will need to be tightened later when adjusting the flap.
- Install the other hinge plate assembly to the exterior side of the dual-flap mount with the exterior cover plate at the same time using 5 M3.5 x 1.3 x 16 BT screws.
- Match and slide the T-grooves on dual-flap mount with the T-guides on the exterior panel insert.
- Before installing the finishing plugs, adjust the flap height (should be just low enough that the bottom mount magnets jump slightly to catch the magnet on the flap.
- Secure the fully assembled dual-flap mount to the exterior panel insert with 4 M3.5 x 1.3 x 16 BT screws. Finish tightening screws.
Step 7 Install Finishing Plugs

- Install 40 finishing plugs into each screw hole.
Warranty
Warranty Type: One Year Non-Transferable Limited Warranty
Duration: Valid for one (1) year from the purchase date for the original retail consumer purchaser only.
Coverage:
PetSafe product will be free from defects in material or workmanship when subject to normal and proper residential use.
Labor and parts are covered for the first year of ownership.
In the event of a defect, PetSafe will replace the part with a new or refurbished part.
Exclusions:
Products represented as used, refurbished, or “as-is”, or not in the original packaging are not covered.
Warranty does not cover damage or defects caused by animals, commercial use, misuse, neglect, improper installation, use of non-PetSafe accessories, events beyond normal residential conditions, and any cause not involving manufacturing defects.
Does not cover labor for removal or installation of parts.
Customer Reviews
Size Chart
- Petsafe Pet Door Insert for Panel Doors10 1/8"w x 16 1/2h
Flap Dimensions:
10 1/8"w x 16 1/2"h
The entry way your dog goes through. Rough Cut-Out Dimension:
23"w x 26 1/4"h
The size of the hole needed to fit your pet door into the door.| Flap Size | Flap Opening | Rough Cut Out | Step-Over | Recommended Pet height |
|---|---|---|---|---|
| Orignal | 10 1/8" x 16 1/2" | 23" x 26 1/4" | 8" or 10 1/2" | 14" - 24" |
Do not know which flap size to get? Here is a measurement guide to help you out.
Installation Instructions
See the Printable PDF Version of PetSafe Panel Pet Door Instructions
Difficulty
Moderate
Steps
07
Time Required
1-2 hours
Sections
01
Flags
02
Parts
- Adjustable hinge plate assembly
- Interior cover plate
- Dual-flap mount with T-grooves
- Exterior cover plate
- 40 Finsihing plugs
- Closing panel
- Flexible flap
- Bottom mount with T-grooves
- Bottom magnets
- Flexible flap
- Interior panel insert
- Exterior panel insert with T-guides
- 10 short screws
- 20 medium screws
- 25 long screws
- Home owner's guide
Tools
- Drill
- Jigsaw
- Drill
- 1/4" drill bit
- Phillips screwdriver
- Tape measure
- Pencil
- Level
Step 1 Make the Rough Cutout
- Begin at least 3" from the bottom of the door, draw a horizontal line.
- Find the center of the door and draw a vertical line crossing the horizontal line.
- Use this centerpoint to cut a 23" x 26-1/4" high cutout.
Step 2 Prepare the Pet Door
- The PetSafe Panel Pet Door Insert is partially assembly for shipping purposes and will need to be detached to get started.
- When removing the screws, set them aside in a safe place to be used later.
- This is a good time to decide the rise orientation. For a short pet, rotate the panel so the 8" rise is on the bottom. For taller pets, place the 10-1/2" rise on the bottom.
- If you plan on painting the insert, we recommend doing it at this point prior to installation.
Step 3 Install the Panels
- Install the interior panel on the inside of the door and the exterior panel on the outside of the door.
- Remove butyl sealant tape at this time.
- Use 25 M3.5 x 1.3 x 20 BT screws to connect the inteior and exterior panels.
Step 4 Attach T-Grooves
- Take the bottom mount and slide the 2 magnets onto the bottom mount, one on each track.
- Match and slide the T-grooves on bottom mount with T-guides on the bottom opening of the exterior panel insert, depending on the rise orientation.
- Use 4 M3.5 x 1.3 x 16 BT screws to complete this part of the install.
Step 5 Prepare Hinge Plate Assemblies
- Prepare both hinge plate assemblies trapping the flap between the lower hinges.
- Use 5 M3.5 x 1.3 x 10 BT screws to attach flap hinges for each hinge plate assembly.
- Make sure the heads of the screws on the lower part of the hinge are facing inboard, to avoid seeing them when the assembly is installed.
Step 6 Install Hinge Plate Assemblies
- Install the first hinge plate assembly to the interior side of the dual-flap mount using 5 M3.5 x 1.3 x 16 BT screws, then attach the interior cover plate with 2 M3.5 x 1.3 x 16 BT screws.
- Tighten the screws only enough to hold the hinge plate assemblies in place, as they will need to be tightened later when adjusting the flap.
- Install the other hinge plate assembly to the exterior side of the dual-flap mount with the exterior cover plate at the same time using 5 M3.5 x 1.3 x 16 BT screws.
- Match and slide the T-grooves on dual-flap mount with the T-guides on the exterior panel insert.
- Before installing the finishing plugs, adjust the flap height (should be just low enough that the bottom mount magnets jump slightly to catch the magnet on the flap.
- Secure the fully assembled dual-flap mount to the exterior panel insert with 4 M3.5 x 1.3 x 16 BT screws. Finish tightening screws.
Step 7 Install Finishing Plugs
- Install 40 finishing plugs into each screw hole.
Warranty
Warranty Type: One Year Non-Transferable Limited Warranty
Duration: Valid for one (1) year from the purchase date for the original retail consumer purchaser only.
Coverage:
PetSafe product will be free from defects in material or workmanship when subject to normal and proper residential use.
Labor and parts are covered for the first year of ownership.
In the event of a defect, PetSafe will replace the part with a new or refurbished part.
Exclusions:
Products represented as used, refurbished, or “as-is”, or not in the original packaging are not covered.
Warranty does not cover damage or defects caused by animals, commercial use, misuse, neglect, improper installation, use of non-PetSafe accessories, events beyond normal residential conditions, and any cause not involving manufacturing defects.
Does not cover labor for removal or installation of parts.