FIND THE BEST PET DOOR SIZE FOR MY PET

Where To Install:


A
inchesB
inchesPlease fill the above fields.
-
Door
Cat Mate/Dog Mate Pet Doors
4-9
5.75
234 Basic
https://www.petdoors.com/products/catmate-234-235?variant=33932715819146
-
Door
Cat Mate/Dog Mate Pet Doors
5-10
7
221 Deluxe
https://www.petdoors.com/products/catmate-door?variant=44709847367915
-
Door
Cat Mate/Dog Mate Pet Doors
8-16
8.75
Medium
https://www.petdoors.com/products/dogmate-215-216?variant=33932144607370
-
Door
Cat Mate/Dog Mate Pet Doors
8-22
11.75
Large
https://www.petdoors.com/products/dogmate-215-216?variant=33932715720842
-
Door
Cat Mate/Dog Mate Pet Doors
4-9
5.75
Original
https://www.petdoors.com/products/catmate-electronic
-
Door
Cat Mate/Dog Mate Pet Doors
4-9
6
Original
https://www.petdoors.com/products/catmate-elite-305?variant=33932738101386
-
Door
Cat Mate/Dog Mate Pet Doors
4-9
5.75
235 Deluxe
https://www.petdoors.com/products/catmate-door?variant=44709847466219
-
Door
Cat Mate/Dog Mate Pet Doors
4-9
6
Original
https://www.petdoors.com/products/catmate-elite-355?variant=33932697370762
-
Door
Cat Mate/Dog Mate Pet Doors
4-9
6
Original
https://www.petdoors.com/products/catmate-rotary
-
Wall
Cat Mate/Dog Mate Pet Doors
4-9
5.75
Original
https://www.petdoors.com/products/catmate-microchip
-
Wall
Cat Mate/Dog Mate Pet Doors
4-9
6
Original
https://www.petdoors.com/products/catmate-305-wall-collar-key?variant=33932623970442
-
Wall
Cat Mate/Dog Mate Pet Doors
4-9
5.75
Orignal
https://www.petdoors.com/products/catmate-wall?variant=33932149260426
-
Door
Dragon Pet Door
11-17
7.0625
Medium
https://www.petdoors.com/products/dragon?variant=34579152208037
-
Door
Dragon Pet Door
11-23
9.375
Large
https://www.petdoors.com/products/dragon?variant=39700193083557
-
Sliding Glass Door
Dragon Pet Door
9-12
5.375
Small
https://www.petdoors.com/products/dragon-aluminum-slider?variant=44000062505195
-
Sliding Glass Door
Dragon Pet Door
11-16
7.0625
Medium
https://www.petdoors.com/products/dragon-aluminum-slider?variant=35272836186277
-
Sliding Glass Door
Dragon Pet Door
11-22
9.375
Large
https://www.petdoors.com/products/dragon-aluminum-slider?variant=39700180238501
-
Sliding Glass Door
Dragon Pet Door
9-12
5.375
Small
https://www.petdoors.com/products/dragon-vinyl?variant=44000062275819
-
Sliding Glass Door
Dragon Pet Door
11-16
7.0625
Medium
https://www.petdoors.com/products/dragon-vinyl?variant=35272814592165
-
Sliding Glass Door
Dragon Pet Door
11-22
9.375
Large
https://www.petdoors.com/products/dragon-vinyl?variant=39700181188773
-
Wall
Dragon Pet Door
11-17
7
Medium
https://www.petdoors.com/products/dragon-wall?variant=34579152142501
-
Wall
Dragon Pet Door
11-23
9.4
Large
https://www.petdoors.com/products/dragon-wall?variant=39700188922021
-
Window
Dragon Pet Door
9-12
5.375
Small
https://www.petdoors.com/products/dragon-sash?variant=44000062832875
-
Window
Dragon Pet Door
11-16
7.0625
Medium
https://www.petdoors.com/products/dragon-sash?variant=44047078883563
-
Window
Dragon Pet Door
11-22
9.375
Large
https://www.petdoors.com/products/dragon-sash?variant=44047081046251
-
Window
Dragon Pet Door
9-12
5.375
Small
https://www.petdoors.com/products/dragon-window-double?variant=44021691351275
-
Window
Dragon Pet Door
11-16
7.0625
Medium
https://www.petdoors.com/products/dragon-window-double?variant=34579151388837
-
Window
Dragon Pet Door
11-22
9.375
Large
https://www.petdoors.com/products/dragon-window-double?variant=39700185088165
-
Window
Dragon Pet Door
9-12
5.375
Small
https://www.petdoors.com/products/dragon-window?variant=44000063127787
-
Window
Dragon Pet Door
11-16
7.0625
Medium
https://www.petdoors.com/products/dragon-window?variant=35272860696741
-
Window
Dragon Pet Door
11-22
9.375
Large
https://www.petdoors.com/products/dragon-window?variant=39700177780901
-
Door
Gun Dog House Door
8-16
14.25
Medium
https://www.petdoors.com/products/gun-dog?variant=33932145131658
-
Door
Gun Dog House Door
8-20
17.5
Large
https://www.petdoors.com/products/gun-dog?variant=33932733644938
-
Door
Gun Dog House Door
8-27
16.5
Extra Large
https://www.petdoors.com/products/gun-dog?variant=44682807640299
-
Sliding Glass Door
Whiskers and Windows
4-8
6
Small
https://www.petdoors.com/products/whiskers-window-slider-cat-door?variant=34579451478181
-
Sliding Glass Door
Whiskers and Windows
4-10
7
Large
https://www.petdoors.com/products/whiskers-window-slider-cat-door?variant=34579451609253
-
Window
Whiskers and Windows
4-8
6
Small
https://www.petdoors.com/products/whiskers-windows-sliding-window?variant=35762832474277
-
Window
Whiskers and Windows
4-10
7
Large
https://www.petdoors.com/products/whiskers-windows-sliding-window?variant=35762832638117
-
Door
Hale Pet Door
5-11
5.5
Small
https://www.petdoors.com/products/hale-door?variant=33932752519306
-
Door
Hale Pet Door
5-14
6.5
Small Medium
https://www.petdoors.com/products/hale-door?variant=33932752846986
-
Door
Hale Pet Door
5-19
8.5
Medium
https://www.petdoors.com/products/hale-door?variant=33932753076362
-
Door
Hale Pet Door
5-23
8.5
Tall Medium
https://www.petdoors.com/products/hale-door?variant=33932753404042
-
Door
Hale Pet Door
5-24
11
Large
https://www.petdoors.com/products/hale-door?variant=33932753698954
-
Door
Hale Pet Door
5-29
11
Tall Large
https://www.petdoors.com/products/hale-door?variant=33932753961098
-
Door
Hale Pet Door
5-31
14
Extra Large
https://www.petdoors.com/products/hale-door?variant=33932754944138
-
Door
Hale Pet Door
5-34
11
Tall Large Plus
https://www.petdoors.com/products/hale-door?variant=33932754223242
-
Door
Hale Pet Door
5-36
14
Extra Large Plus
https://www.petdoors.com/products/hale-door?variant=33932755239050
-
Door
Hale Pet Door
5-42
11
Extra Tall Large
https://www.petdoors.com/products/hale-door?variant=33932754485386
-
Door
Hale Pet Door
5-44
15.5
Giant
https://www.petdoors.com/products/hale-door?variant=33932755501194
-
Screen Door
Hale Pet Door
5-11
5.5
Small
https://www.petdoors.com/products/hale-screen?variant=33932714180746
-
Screen Door
Hale Pet Door
5-14
6.5
Small Medium
https://www.petdoors.com/products/hale-screen?variant=33932714180746
-
Screen Door
Hale Pet Door
5-19
8.5
Medium
https://www.petdoors.com/products/hale-screen?variant=33932714377354
-
Screen Door
Hale Pet Door
5-23
8.5
Tall Medium
https://www.petdoors.com/products/hale-screen?variant=33932714475658
-
Screen Door
Hale Pet Door
5-24
11
Large
https://www.petdoors.com/products/hale-screen?variant=33932714573962
-
Screen Door
Hale Pet Door
5-29
11
Tall Large
https://www.petdoors.com/products/hale-screen?variant=33932714672266
-
Screen Door
Hale Pet Door
5-31
14
Extra Large
https://www.petdoors.com/products/hale-screen?variant=33932714967178
-
Screen Door
Hale Pet Door
5-34
11
Tall Large Plus
https://www.petdoors.com/products/hale-screen?variant=33932714770570
-
Screen Door
Hale Pet Door
5-36
14
Extra Large Plus
https://www.petdoors.com/products/hale-screen?variant=33932715065482
-
Screen Door
Hale Pet Door
5-42
11
Extra Tall Large
https://www.petdoors.com/products/hale-screen?variant=33932714868874
-
Screen Door
Hale Pet Door
5-44
15.5
Giant
https://www.petdoors.com/products/hale-screen?variant=33932715163786
-
Sliding Glass Door
Hale Pet Door
5-14
6.5
Small Medium
https://www.petdoors.com/products/hale-through-the-glass?variant=43846747947243
-
Sliding Glass Door
Hale Pet Door
5-19
8.5
Medium
https://www.petdoors.com/products/hale-through-the-glass?variant=43846747980011
-
Sliding Glass Door
Hale Pet Door
5-23
8.5
Tall Medium
https://www.petdoors.com/products/hale-through-the-glass?variant=43846748012779
-
Sliding Glass Door
Hale Pet Door
5-24
11
Large
https://www.petdoors.com/products/hale-through-the-glass?variant=43846748045547
-
Sliding Glass Door
Hale Pet Door
5-29
11
Tall Large
https://www.petdoors.com/products/hale-through-the-glass?variant=43846748078315
-
Sliding Glass Door
Hale Pet Door
5-31
14
Extra Large
https://www.petdoors.com/products/hale-through-the-glass?variant=43846748176619
-
Sliding Glass Door
Hale Pet Door
5-34
11
Tall Large Plus
https://www.petdoors.com/products/hale-through-the-glass?variant=43846748111083
-
Sliding Glass Door
Hale Pet Door
5-36
14
Extra Large Plus
https://www.petdoors.com/products/hale-through-the-glass?variant=43846748209387
-
Sliding Glass Door
Hale Pet Door
5-42
11
Extra Tall Large
https://www.petdoors.com/products/hale-through-the-glass?variant=43846748143851
-
Sliding Glass Door
Hale Pet Door
5-44
15.5
Giant
https://www.petdoors.com/products/hale-through-the-glass?variant=43846748242155
-
Sliding Glass Door
Hale Pet Door
3-10
5.5
Small
https://www.petdoors.com/products/hale-omni-panel?variant=42069049049323
-
Sliding Glass Door
Hale Pet Door
3-13
6.5
Small Medium
https://www.petdoors.com/products/hale-omni-panel?variant=42069049049323
-
Sliding Glass Door
Hale Pet Door
3-18
8.5
Medium
https://www.petdoors.com/products/hale-omni-panel?variant=42069049049323
-
Sliding Glass Door
Hale Pet Door
3-22
8.5
Tall Medium
https://www.petdoors.com/products/hale-omni-panel?variant=42069049049323
-
Sliding Glass Door
Hale Pet Door
3-23
11
Large
https://www.petdoors.com/products/hale-omni-panel?variant=42069049049323
-
Sliding Glass Door
Hale Pet Door
3-28
11
Tall Large
https://www.petdoors.com/products/hale-omni-panel?variant=42069049049323
-
Sliding Glass Door
Hale Pet Door
3-29
14
Extra Large
https://www.petdoors.com/products/hale-omni-panel?variant=42069049049323
-
Sliding Glass Door
Hale Pet Door
3-33
11
Tall Large Plus
https://www.petdoors.com/products/hale-omni-panel?variant=42069049049323
-
Sliding Glass Door
Hale Pet Door
3-34
14
Extra Large Plus
https://www.petdoors.com/products/hale-omni-panel?variant=42069049049323
-
Sliding Glass Door
Hale Pet Door
3-40
11
Extra Tall Large
https://www.petdoors.com/products/hale-omni-panel?variant=42069049049323
-
Sliding Glass Door
Hale Pet Door
3-40
15.5
Giant
https://www.petdoors.com/products/hale-omni-panel?variant=42069049049323
-
Sliding Glass Door
Hale Pet Door
3-10
5.5
Small
https://www.petdoors.com/products/hale-standard-slider?variant=40494245839013
-
Sliding Glass Door
Hale Pet Door
3-13
6.5
Small Medium
https://www.petdoors.com/products/hale-standard-slider?variant=40494245839013
-
Sliding Glass Door
Hale Pet Door
3-18
8.5
Medium
https://www.petdoors.com/products/hale-standard-slider?variant=40494245839013
-
Sliding Glass Door
Hale Pet Door
3-22
8.5
Tall Medium
https://www.petdoors.com/products/hale-standard-slider?variant=40494245839013
-
Sliding Glass Door
Hale Pet Door
3-23
11
Large
https://www.petdoors.com/products/hale-standard-slider?variant=40494245839013
-
Sliding Glass Door
Hale Pet Door
3-28
11
Tall Large
https://www.petdoors.com/products/hale-standard-slider?variant=40494245839013
-
Sliding Glass Door
Hale Pet Door
3-29
14
Extra Large
https://www.petdoors.com/products/hale-standard-slider?variant=40494245839013
-
Sliding Glass Door
Hale Pet Door
3-33
11
Tall Large Plus
https://www.petdoors.com/products/hale-standard-slider?variant=40494245839013
-
Sliding Glass Door
Hale Pet Door
3-34
14
Extra Large Plus
https://www.petdoors.com/products/hale-standard-slider?variant=40494245839013
-
Sliding Glass Door
Hale Pet Door
3-40
11
Extra Tall Large
https://www.petdoors.com/products/hale-standard-slider?variant=40494245839013
-
Sliding Glass Door
Hale Pet Door
3-40
15.5
Giant
https://www.petdoors.com/products/hale-standard-slider?variant=40494245839013
-
Wall
Hale Pet Door
5-11
5.5
Small
https://www.petdoors.com/products/hale-wall?variant=33932738789514
-
Wall
Hale Pet Door
5-14
6.5
Small Medium
https://www.petdoors.com/products/hale-wall?variant=33932739084426
-
Wall
Hale Pet Door
5-19
8.5
Medium
https://www.petdoors.com/products/hale-wall?variant=33932739379338
-
Wall
Hale Pet Door
5-23
8.5
Tall Medium
https://www.petdoors.com/products/hale-wall?variant=33932739641482
-
Wall
Hale Pet Door
5-24
11
Large
https://www.petdoors.com/products/hale-wall?variant=33932739936394
-
Wall
Hale Pet Door
5-29
11
Tall Large
https://www.petdoors.com/products/hale-wall?variant=33932740264074
-
Wall
Hale Pet Door
5-31
14
Extra Large
https://www.petdoors.com/products/hale-wall?variant=33932741836938
-
Wall
Hale Pet Door
5-34
11
Tall Large Plus
https://www.petdoors.com/products/hale-wall?variant=33932740526218
-
Wall
Hale Pet Door
5-36
14
Extra Large Plus
https://www.petdoors.com/products/hale-wall?variant=33932741378186
-
Wall
Hale Pet Door
5-42
11
Extra Tall Large
https://www.petdoors.com/products/hale-wall?variant=33932740853898
-
Wall
Hale Pet Door
5-44
15.5
Giant
https://www.petdoors.com/products/hale-wall?variant=33932741673098
-
Wall
Hale Pet Door
5-11
5.5
Small
https://www.petdoors.com/products/hale-thick-wall?variant=34614321741989
-
Wall
Hale Pet Door
5-14
6.5
Small Medium
https://www.petdoors.com/products/hale-thick-wall?variant=34614321741989
-
Wall
Hale Pet Door
5-19
8.5
Medium
https://www.petdoors.com/products/hale-thick-wall?variant=34614321971365
-
Wall
Hale Pet Door
5-23
8.5
Tall Medium
https://www.petdoors.com/products/hale-thick-wall?variant=34614322233509
-
Wall
Hale Pet Door
5-24
11
Large
https://www.petdoors.com/products/hale-thick-wall?variant=34614322495653
-
Wall
Hale Pet Door
5-29
11
Tall Large
https://www.petdoors.com/products/hale-thick-wall?variant=34614322757797
-
Wall
Hale Pet Door
5-31
14
Extra Large
https://www.petdoors.com/products/hale-thick-wall?variant=34614324363429
-
Wall
Hale Pet Door
5-34
11
Tall Large Plus
https://www.petdoors.com/products/hale-thick-wall?variant=34614323019941
-
Wall
Hale Pet Door
5-36
14
Extra Large Plus
https://www.petdoors.com/products/hale-thick-wall?variant=34614323773605
-
Wall
Hale Pet Door
5-42
11
Extra Tall Large
https://www.petdoors.com/products/hale-thick-wall?variant=34614323282085
-
Wall
Hale Pet Door
5-44
15.5
Giant
https://www.petdoors.com/products/hale-thick-wall?variant=34614324035749
-
Window
Hale Pet Door
5-10
5.5
Small
https://www.petdoors.com/products/hale-omni-sash?variant=33932734267530
-
Window
Hale Pet Door
5-11
6.5
Small Medium
https://www.petdoors.com/products/hale-omni-sash?variant=33932734267530
-
Window
Hale Pet Door
5-14
8.5
Medium
https://www.petdoors.com/products/hale-omni-sash?variant=33932734267530
-
Window
Hale Pet Door
5-22
8.5
Tall Medium
https://www.petdoors.com/products/hale-omni-sash?variant=33932734267530
-
Window
Hale Pet Door
5-23
11
Large
https://www.petdoors.com/products/hale-omni-sash?variant=33932734267530
-
Window
Hale Pet Door
5-28
11
Tall Large
https://www.petdoors.com/products/hale-omni-sash?variant=33932734267530
-
Window
Hale Pet Door
5-29
14
Extra Large
https://www.petdoors.com/products/hale-omni-sash?variant=33932734267530
-
Window
Hale Pet Door
5-33
11
Tall Large Plus
https://www.petdoors.com/products/hale-omni-sash?variant=33932734267530
-
Window
Hale Pet Door
5-34
14
Extra Large Plus
https://www.petdoors.com/products/hale-omni-sash?variant=33932734267530
-
Window
Hale Pet Door
5-40
11
Extra Tall Large
https://www.petdoors.com/products/hale-omni-sash?variant=33932734267530
-
Window
Hale Pet Door
5-44
15.5
Giant
https://www.petdoors.com/products/hale-omni-sash?variant=33932734267530
-
Window
Hale Pet Door
5-10
5.5
Small
https://www.petdoors.com/products/hale-omni-cat-sash?variant=33932676956298
-
Window
Hale Pet Door
5-14
6.5
Small Medium
https://www.petdoors.com/products/hale-omni-cat-sash?variant=33932676956298
-
Door
Endura Flap
9 - 16
6
Small
https://www.petdoors.com/products/endura-flap?variant=43303666614507
-
Door
Endura Flap
9-22
8
Medium
https://www.petdoors.com/products/endura-flap?variant=43303666680043
-
Door
Endura Flap
9-28
10
Large
https://www.petdoors.com/products/endura-flap?variant=43303666745579
-
Door
Endura Flap
9-36
12
Extra-Large
https://www.petdoors.com/products/endura-flap?variant=43303666811115
-
Sliding Glass Door
Endura Flap
8-14
6
Small
https://www.petdoors.com/products/endura-flap-severe-weather-vinyl-slider?variant=34579451838629
-
Sliding Glass Door
Endura Flap
8-21
8
Medium
https://www.petdoors.com/products/endura-flap-severe-weather-vinyl-slider?variant=34579451936933
-
Sliding Glass Door
Endura Flap
8-31
10
Large
https://www.petdoors.com/products/endura-flap-severe-weather-vinyl-slider?variant=34579452035237
-
Sliding Glass Door
Endura Flap
8-36
12
Extra-Large
https://www.petdoors.com/products/endura-flap-severe-weather-vinyl-slider?variant=34579452133541
-
Sliding Glass Door
Endura Flap
9 - 15
6
Small
https://www.petdoors.com/products/endura-flap-thermo-panel-3e?variant=40784617537701
-
Sliding Glass Door
Endura Flap
9-21
8
Medium
https://www.petdoors.com/products/endura-flap-thermo-panel-3e?variant=35762721194149
-
Sliding Glass Door
Endura Flap
9-27
10
Large
https://www.petdoors.com/products/endura-flap-thermo-panel-3e?variant=35762721489061
-
Sliding Glass Door
Endura Flap
9-34
12
Extra-Large
https://www.petdoors.com/products/endura-flap-thermo-panel-3e?variant=35762721849509
-
Sliding Glass Door
Endura Flap
9 - 14
6
Small
https://www.petdoors.com/products/endura-flap-vinyl-slider?variant=40494217953445
-
Sliding Glass Door
Endura Flap
9 - 21
8
Medium
https://www.petdoors.com/products/endura-flap-vinyl-slider?variant=40494217986213
-
Sliding Glass Door
Endura Flap
9 - 32
10
Large
https://www.petdoors.com/products/endura-flap-vinyl-slider?variant=40494218018981
-
Sliding Glass Door
Endura Flap
9 - 38
12
Extra-Large
https://www.petdoors.com/products/endura-flap-vinyl-slider?variant=40494218084517
-
Sliding Glass Door
Endura Flap
9 - 15
6
Small
https://www.petdoors.com/products/endura-flap-cat-slider?variant=44116296827115
-
Wall
Endura Flap
9 - 16
6
Small
https://www.petdoors.com/products/endura-flap-wall?variant=42880416579819
-
Wall
Endura Flap
9 - 22
8
Medium
https://www.petdoors.com/products/endura-flap-wall?variant=42880416645355
-
Wall
Endura Flap
9 - 28
10
Large
https://www.petdoors.com/products/endura-flap-wall?variant=42880416710891
-
Wall
Endura Flap
9 - 36
12
Extra-Large
https://www.petdoors.com/products/endura-flap-wall?variant=42880416776427
-
Wall
Endura Flap
9 - 16
6
Small
https://www.petdoors.com/products/endura-flap-cat-doors-for-walls?variant=33932151816330
-
Window
Endura Flap
9 - 15
6
Small
https://www.petdoors.com/products/endura-flap-cat-door-horizontal-window?variant=35762599559333
-
Window
Endura Flap
9 - 15
6
Small
https://www.petdoors.com/products/thermo-sash-3e-cat-door?variant=33932683280522
-
Window
Endura Flap
9 - 15
6
Small
https://www.petdoors.com/products/thermo-sash-window?variant=34579267846309
-
Window
Endura Flap
9-21
8
Medium
https://www.petdoors.com/products/thermo-sash-window?variant=34579268567205
-
Window
Endura Flap
9-27
10
Large
https://www.petdoors.com/products/thermo-sash-window?variant=34579269255333
-
Window
Endura Flap
9 - 34
12
Extra-Large
https://www.petdoors.com/products/thermo-sash-window?variant=43628744311019
-
Door
High Tech Pet Products
8- 15
8.25
Medium
https://www.petdoors.com/products/high-tech-door?variant=44095119294699
-
Door
High Tech Pet Products
8-24
12.25
Large
https://www.petdoors.com/products/high-tech-door?variant=44095119327467
-
Door
High Tech Pet Products
8-15
8.25
Medium
https://www.petdoors.com/products/high-tech-door?variant=44095119294699
-
Door
High Tech Pet Products
8-24
12.25
Large
https://www.petdoors.com/products/high-tech-door?variant=44095119327467
-
Door
High Tech Pet Products
12-19
6.38
Small
https://www.petdoors.com/products/high-tech-armor-flex-for-doors?variant=40271608742053
-
Door
High Tech Pet Products
12-25
8.25
Medium
https://www.petdoors.com/products/high-tech-armor-flex-for-doors?variant=40271608774821
-
Door
High Tech Pet Products
12-31
10.5
Large
https://www.petdoors.com/products/high-tech-armor-flex-for-doors?variant=40271608807589
-
Door
High Tech Pet Products
12-38
12.5
Extra-Large
https://www.petdoors.com/products/high-tech-armor-flex-for-doors?variant=40271608840357
-
Sliding Glass Door
High Tech Pet Products
8-14
8.25
Medium
https://www.petdoors.com/products/high-tech-slider?variant=44095118377195
-
Sliding Glass Door
High Tech Pet Products
8-23
12.25
Large
https://www.petdoors.com/products/high-tech-slider?variant=44095118442731
-
Sliding Glass Door
High Tech Pet Products
12-18
6.38
Small
https://www.petdoors.com/products/high-tech-armor-flex-patio?variant=40493889061029
-
Sliding Glass Door
High Tech Pet Products
12-24
8.25
Medium
https://www.petdoors.com/products/high-tech-armor-flex-patio?variant=40493889126565
-
Sliding Glass Door
High Tech Pet Products
12-30
10.5
Large
https://www.petdoors.com/products/high-tech-armor-flex-patio?variant=40493889224869
-
Sliding Glass Door
High Tech Pet Products
12-36
12.5
Extra-Large
https://www.petdoors.com/products/high-tech-armor-flex-patio?variant=40493889290405
-
Wall
High Tech Pet Products
8-15
8.25
Medium
https://www.petdoors.com/products/high-tech-wall?variant=44095119556843
-
Wall
High Tech Pet Products
8-24
12.25
Large
https://www.petdoors.com/products/high-tech-wall?variant=44095119589611
-
Door
Ideal Pet Products
7-13
5
Small
https://www.petdoors.com/products/ideal-ruff-weather-door?variant=33932148277386
-
Door
Ideal Pet Products
7-19
7.25
Medium
https://www.petdoors.com/products/ideal-ruff-weather-door?variant=33932749570186
-
Door
Ideal Pet Products
7-26
9.75
Extra Large
https://www.petdoors.com/products/ideal-ruff-weather-door?variant=33932749602954
-
Door
Ideal Pet Products
7-36
15
Super Large
https://www.petdoors.com/products/ideal-ruff-weather-door?variant=33932749635722
-
Door
Ideal Pet Products
5-17
7
Medium
https://www.petdoors.com/products/ideal-deluxe-door?variant=33932746686602
-
Door
Ideal Pet Products
5-23
10.5
Extra Large
https://www.petdoors.com/products/ideal-deluxe-door?variant=33932746752138
-
Door
Ideal Pet Products
5-32
15
Super Large
https://www.petdoors.com/products/ideal-deluxe-door?variant=33932746817674
-
Door
Ideal Pet Products
5-10
5
Small
https://www.petdoors.com/products/ideal-designer-series-original
-
Door
Ideal Pet Products
5-17
7
Medium
https://www.petdoors.com/products/ideal-designer-series-original?variant=33932746031242
-
Door
Ideal Pet Products
5-23
10.5
Extra Large
https://www.petdoors.com/products/ideal-designer-series-original?variant=33932746064010
-
Door
Ideal Pet Products
5-32
15
Super Large
https://www.petdoors.com/products/ideal-designer-series-original?variant=33932746129546
-
Door
Ideal Pet Products
9-17
6.625
Medium
https://www.petdoors.com/products/ideal-ultra-flex?variant=43741630628075
-
Door
Ideal Pet Products
9-24
10.25
Large / Extra Large
https://www.petdoors.com/products/ideal-ultra-flex?variant=43741630660843
-
Door
Ideal Pet Products
4-9
6.25
Original
https://www.petdoors.com/products/ideal-4-way-locking-cat-door?variant=33932148408458
-
Door
Ideal Pet Products
4-16
7.5
Large
https://www.petdoors.com/products/ideal-4-way-locking-cat-door?variant=33932718538890
-
Door
Ideal Pet Products
13-23
9
Original
https://www.petdoors.com/products/ideal-original-large-plastic-pet-door
-
Door
Ideal Pet Products
9-17
6.625
Medium
https://www.petdoors.com/products/ideal-aluminum-premium-draft-stopper-dog-door
-
Door
Ideal Pet Products
7-13
7
Original
https://www.petdoors.com/products/ideal-ecat
-
Screen Door
Ideal Pet Products
9-17
7
Medium
https://www.petdoors.com/products/ideal-screen-guard?variant=33932155879562
-
Screen Door
Ideal Pet Products
9-23
10.5
Extra Large
https://www.petdoors.com/products/ideal-screen-guard?variant=33932697075850
-
Screen Door
Ideal Pet Products
8-16
8.75
Original
https://www.petdoors.com/products/ideal-screen-fit-pet-door
-
Screen Door
Ideal Pet Products
8-15
8.75
Original
https://www.petdoors.com/products/ideal-screen-fit-cat-door
-
Screen Door
Ideal Pet Products
12-20
7.25
Original
https://www.petdoors.com/products/ideal-passage-screen
-
Sliding Glass Door
Ideal Pet Products
5-9
5
Small
https://www.petdoors.com/products/ideal-fast-fit?variant=40494256783525
-
Sliding Glass Door
Ideal Pet Products
5-16
7
Medium
https://www.petdoors.com/products/ideal-fast-fit?variant=44098354741483
-
Sliding Glass Door
Ideal Pet Products
5-22
10.5
Extra Large
https://www.petdoors.com/products/ideal-fast-fit?variant=44100867358955
-
Sliding Glass Door
Ideal Pet Products
5-30
15
Super Large
https://www.petdoors.com/products/ideal-fast-fit?variant=44100867653867
-
Sliding Glass Door
Ideal Pet Products
4-8
6.25
Cat Flap
https://www.petdoors.com/products/ideal-modular?variant=33932726108298
-
Sliding Glass Door
Ideal Pet Products
4-9
5
Small
https://www.petdoors.com/products/ideal-modular?variant=43741629481195
-
Sliding Glass Door
Ideal Pet Products
4-16
7
Medium
https://www.petdoors.com/products/ideal-modular?variant=43741629481195
-
Sliding Glass Door
Ideal Pet Products
4-22
10.5
Extra Large
https://www.petdoors.com/products/ideal-modular?variant=43829177188587
-
Sliding Glass Door
Ideal Pet Products
4-30
15
Super Large
https://www.petdoors.com/products/ideal-modular?variant=33932726108298
-
Wall
Ideal Pet Products
7-13
5
Small
https://www.petdoors.com/products/ideal-ruff-weather-wall?variant=33932152242314
-
Wall
Ideal Pet Products
7-19
7.25
Medium
https://www.petdoors.com/products/ideal-ruff-weather-wall?variant=33932694913162
-
Wall
Ideal Pet Products
7-26
9.75
Extra Large
https://www.petdoors.com/products/ideal-ruff-weather-wall?variant=33932694945930
-
Wall
Ideal Pet Products
7-36
15
Super Large
https://www.petdoors.com/products/ideal-ruff-weather-wall?variant=33932694978698
-
Window
Ideal Pet Products
5-9
5
Small
https://www.petdoors.com/products/ideal-fast-sash?variant=40494258978981
-
Window
Ideal Pet Products
5-16
7
Medium
https://www.petdoors.com/products/ideal-fast-sash?variant=40494259175589
-
Screen Door
RCR Screens
8-14
8
Original
https://www.petdoors.com/products/rcr-easy-screen-cat
-
Sliding Glass Door
Dragon Pet Door
11-16
7.0625
Medium
https://www.petdoors.com/products/custom-double-flap-dragon-pet-door-for-aluminum-sliders?variant=43542928916715
-
Sliding Glass Door
Dragon Pet Door
11-22
9.375
Large
https://www.petdoors.com/products/custom-double-flap-dragon-pet-door-for-aluminum-sliders?variant=43542929015019
-
Sliding Glass Door
Whiskers and Windows
4-8
6
Small
https://www.petdoors.com/products/custom-whiskers-windows-panel?variant=43543115366635
-
Sliding Glass Door
Whiskers and Windows
4-10
7
Large
https://www.petdoors.com/products/custom-whiskers-windows-panel?variant=43543115399403
-
Sliding Glass Door
Dragon Pet Door
9-12
5.375
Small
https://www.petdoors.com/products/custom-dragon-aluminum-slider-single-flap?variant=44091999224043
-
Sliding Glass Door
Dragon Pet Door
11-16
7.0625
Medium
https://www.petdoors.com/products/custom-dragon-aluminum-slider-single-flap?variant=43542857449707
-
Sliding Glass Door
Dragon Pet Door
11-22
9.375
Large
https://www.petdoors.com/products/custom-dragon-aluminum-slider-single-flap?variant=43542857744619
-
Sliding Glass Door
Endura Flap
8-14
6
Small
https://www.petdoors.com/products/custom-endura-flap-severe-weather-vinyl?variant=43611180138731
-
Sliding Glass Door
Endura Flap
8-21
8
Medium
https://www.petdoors.com/products/custom-endura-flap-severe-weather-vinyl?variant=43611180171499
-
Sliding Glass Door
Endura Flap
8-27
10
Large
https://www.petdoors.com/products/custom-endura-flap-severe-weather-vinyl?variant=43611180204267
-
Sliding Glass Door
Endura Flap
8-34
12
Extra-Large
https://www.petdoors.com/products/custom-endura-flap-severe-weather-vinyl?variant=43611180237035
-
wall
Ideal Pet Products
7-19
7.25
Medium
https://www.petdoors.com/products/ideal-plastic-wall-mount?variant=43837313745131
-
wall
Ideal Pet Products
7-26
9.75
Extra-Large
https://www.petdoors.com/ideal-plastic-wall-mount?variant=43837313777899
-
Door
Liberty Pet Door
9-16
6
Small
https://www.petdoors.com/products/liberty-door?variant=44424072986859
-
Door
Liberty Pet Door
9-22
8
Medium
https://www.petdoors.com/products/liberty-door?variant=44424073216235
-
Door
Liberty Pet Door
9-28
10
Large
https://www.petdoors.com/products/liberty-door?variant=44424073412843
-
Door
Liberty Pet Door
9-36
12
Extra Large
https://www.petdoors.com/products/liberty-door?variant=44432515465451
-
Wall
Liberty Pet Door
9-16
6
Small
https://www.petdoors.com/products/liberty-wall?variant=44424284274923
-
Wall
Liberty Pet Door
9-22
8
Medium
https://www.petdoors.com/products/liberty-wall?variant=44424284471531
-
Wall
Liberty Pet Door
9-28
10
Large
https://www.petdoors.com/products/liberty-wall?variant=44424284668139
-
Wall
Liberty Pet Door
9-36
12
Extra Large
https://www.petdoors.com/products/liberty-wall?variant=44432516055275
-
Sliding Glass Door
Endura Flap
9-15
6
Small
https://www.petdoors.com/products/endura-flap-custom-thermo?variant=40494215823525
-
Sliding Glass Door
Endura Flap
9-21
8
Medium
https://www.petdoors.com/products/endura-flap-custom-thermo?variant=40494215921829
-
Sliding Glass Door
Endura Flap
9-27
10
Large
https://www.petdoors.com/products/endura-flap-custom-thermo?variant=40494216020133
-
Sliding Glass Door
Endurs Flap
9-34
12
Extra Large
https://www.petdoors.com/products/endura-flap-custom-thermo?variant=40494216118437
-
Door
Endura Flap
9-16
6
Small
https://www.petdoors.com/products/endura-flap-single-flap-pet-door-for-thin-doors-2022-design?variant=43616813023467
-
Door
Endura Flap
9-22
8
Medium
https://www.petdoors.com/products/endura-flap-single-flap-pet-door-for-thin-doors-2022-design?variant=43616813056235
-
Door
Endura Flap
9-28
10
Large
https://www.petdoors.com/products/endura-flap-single-flap-pet-door-for-thin-doors-2022-design?variant=43616813089003
-
Door
Endura Flap
9-36
12
Extra-Large
https://www.petdoors.com/products/endura-flap-single-flap-pet-door-for-thin-doors-2022-design?variant=43616813121771
-
Window
Ideal Pet Products
5-23
10.5
Extra Large
https://www.petdoors.com/products/ideal-fast-sash?variant=40494259339429
-
Window
Ideal Pet Products
4-8
6.25
Cat Flap
https://www.petdoors.com/products/ideal-cat-sash?variant=40494258520229
-
Window
Ideal Pet Products
4-15
7.5
Large Cat Flap
https://www.petdoors.com/products/ideal-cat-sash?variant=40494258684069
-
Door
Mason Company
14-23
9.375
B
https://www.petdoors.com/products/mason-pickwick?variant=40494255898789
-
Door
Mason Company
14-24
12.625
A
https://www.petdoors.com/products/mason-pickwick?variant=40494255931557
-
Door
Mason Company
14-28
11.625
D
https://www.petdoors.com/products/mason-pickwick?variant=40494255964325
-
Door
Mason Company
14-29
11
E
https://www.petdoors.com/products/mason-pickwick?variant=40494255997093
-
Door
Mason Company
14-32
12.75
F
https://www.petdoors.com/products/mason-pickwick?variant=40494256029861
-
Door
Mason Company
14-40
13
C
https://www.petdoors.com/products/mason-pickwick?variant=40494256062629
-
Door
Petsafe Pet Doors
6-12
5.25
Small
https://www.petdoors.com/products/petsafe-freedom?variant=33932147851402
-
Door
Petsafe Pet Doors
6-18
8.25
Medium
https://www.petdoors.com/products/petsafe-freedom?variant=33932747276426
-
Door
Petsafe Pet Doors
6-25
10.25
Large
https://www.petdoors.com/products/petsafe-freedom?variant=33932747309194
-
Door
Petsafe Pet Doors
6-37
13.75
Extra Large
https://www.petdoors.com/products/petsafe-freedom?variant=33932747341962
-
Door
Petsafe Pet Doors
6-12
5.125
Small
https://www.petdoors.com/products/petsafe-extreme-weather?variant=33932147392650
-
Door
Petsafe Pet Doors
6-18
8.125
Medium
https://www.petdoors.com/products/petsafe-extreme-weather?variant=33932750651530
-
Door
Petsafe Pet Doors
6-25
10.125
Large
https://www.petdoors.com/products/petsafe-extreme-weather?variant=33932750815370
-
Door
Petsafe Pet Doors
6-12
5.125
Small
https://www.petdoors.com/products/petsafe-plastic?variant=33932147589258
-
Door
Petsafe Pet Doors
6-18
8.125
Medium
https://www.petdoors.com/products/petsafe-plastic?variant=33932718342282
-
Door
Petsafe Pet Doors
6-25
10.125
Large
https://www.petdoors.com/products/petsafe-plastic?variant=33932718375050
-
Door
Petsafe Pet Doors
6-37
13.625
Extra Large
https://www.petdoors.com/products/petsafe-plastic?variant=33932718407818
-
Door
Petsafe Pet Doors
5-11
5.5
Small
https://www.petdoors.com/products/petsafe-smart-door?variant=33932166168714
-
Door
Petsafe Pet Doors
5-24
11
Large
https://www.petdoors.com/products/petsafe-smart-door?variant=33932738363530
-
Door
Petsafe Pet Doors
4-9
5.75
Original
https://www.petdoors.com/products/petsafe-cat-flap?variant=33932147425418
-
Screen Door
Petsafe Pet Doors
8-15
8
Small - Medium
https://www.petdoors.com/products/petsafe-pet-screen-door?variant=34834553700517
-
Screen Door
Petsafe Pet Doors
8-26
10.25
Large
https://www.petdoors.com/products/petsafe-pet-screen-door?variant=34834553733285
-
Sliding Glass Door
Petsafe Pet Doors
6-9
5.25
Small
https://www.petdoors.com/products/petsafe-freedom-slider?variant=40494250819749
-
Sliding Glass Door
Petsafe Pet Doors
6-12
8.25
Medium
https://www.petdoors.com/products/petsafe-freedom-slider?variant=40494250852517
-
Sliding Glass Door
Petsafe Pet Doors
8-19
10.25
Large
https://www.petdoors.com/products/petsafe-freedom-slider?variant=40494250885285
-
Sliding Glass Door
Petsafe Pet Doors
12-23
10.25
Tall Large
https://www.petdoors.com/products/petsafe-freedom-slider?variant=40494250918053
-
Wall
Petsafe Pet Doors
5-11
5.25
Small
https://www.petdoors.com/products/petsafe-wall?variant=33932151947402
-
Wall
Petsafe Pet Doors
5-17
8.25
Medium
https://www.petdoors.com/products/petsafe-wall?variant=33932608995466
-
Wall
Petsafe Pet Doors
5-23
10.25
Large
https://www.petdoors.com/products/petsafe-wall?variant=33932609028234
-
Wall
Petsafe Pet Doors
6-12
5.5
Small
https://www.petdoors.com/products/petsafe-smart-wall?variant=33932152045706
-
Wall
Petsafe Pet Doors
6-24
11
Large
https://www.petdoors.com/products/petsafe-smart-wall?variant=33932671058058
-
Window
Petsafe Pet Doors
6-11
5.125
Small
https://www.petdoors.com/products/petsafe-window?variant=33932163219594
-
Window
Petsafe Pet Doors
6-12
5.125
Original
https://www.petdoors.com/products/petsafe-sash
-
Door
Pride Pet Products
5-10
4.75
Small
https://www.petdoors.com/products/pride-door?variant=33932748128394
-
Door
Pride Pet Products
5-19
8.5
Medium
https://www.petdoors.com/products/pride-door?variant=33932748357770
-
Door
Pride Pet Products
5-26
11.5
Large
https://www.petdoors.com/products/pride-door?variant=33932748554378
-
Door
Pride Pet Products
5-31
14.5
Extra-Large
https://www.petdoors.com/products/pride-door?variant=33932748750986
-
Screen Door
Pride Pet Products
5-10
4.75
Small
https://www.petdoors.com/products/pride-screen?variant=33932156567690
-
Screen Door
Pride Pet Products
5-19
8.5
Medium
https://www.petdoors.com/products/pride-screen?variant=33932661031050
-
Screen Door
Pride Pet Products
5-26
11.5
Large
https://www.petdoors.com/products/pride-screen?variant=33932661391498
-
Screen Door
Pride Pet Products
5-31
14.5
Extra-Large
https://www.petdoors.com/products/pride-screen?variant=33932661784714
-
Sliding Glass Door
Pride Pet Products
5-9
4.75
Small
https://www.petdoors.com/products/pride-slider?variant=33932724764810
-
Sliding Glass Door
Pride Pet Products
5-18
8.5
Medium
https://www.petdoors.com/products/pride-slider?variant=33932724764810
-
Sliding Glass Door
Pride Pet Products
5-25
11.5
Large
https://www.petdoors.com/products/pride-slider?variant=33932724764810
-
Screen Door
RCR Screens
8-14
8
Original
https://www.petdoors.com/products/rcr-easy-screen-pet
-
Window
Whiskers & Windows
4-8
6
Cat Flap
https://www.petdoors.com/products/whiskers-window-cat-door-custom?variant=43424752795883
-
Window
Whiskers & Windows
4-10
7
Large Cat Flap
https://www.petdoors.com/products/whiskers-window-cat-door-custom?variant=33932610633866
-
Sliding Glass Door
Petsafe
14-24
10.125
Original
https://www.petdoors.com/products/petsafe-pet-door-insert-for-panel-doors
-
Sliding Glass Door
Petsafe
11-19
8.75
Medium
https://www.petdoors.com/products/petsafe-extreme-weather-panel?variant=42815236571371
-
Sliding Glass Door
Petsafe
11-24
10.25
Large
https://www.petdoors.com/products/petsafe-extreme-weather-panel?variant=42815236604139
-
Door
petdoors
4-9
5.5
Original
https://www.petdoors.com/products/petsafe-4-way-locking-cat-door-for-doors
-
Door
Petsafe
6-12
7.125
Original
https://www.petdoors.com/products/petsafe-4-way-locking-big-cat-door
-
Door
petdoors
4-8
5.91
Original
https://www.petdoors.com/products/petsafe-microchip-cat-door
-
Door
petdoors
6-17
8.25
Medium
https://www.petdoors.com/products/petsafe-extreme-weather-aluminum-pet-door?variant=43827736248555
-
Door
petdoors
6-24
10.25
Large
https://www.petdoors.com/products/petsafe-extreme-weather-aluminum-pet-door?variant=43827736281323
-
Door
petdoors
6-27
13.75
Extra Large
https://www.petdoors.com/products/petsafe-extreme-weather-aluminum-pet-door?variant=43827736314091
-
Door
Petsafe Pet Doors
5-12.5
7.1
Medium
https://www.petdoors.com/products/petsafe-smartdoor-connected-pet-door?variant=43828661911787
-
Door
Petsafe Pet Doors
5-24
11.9
Extra Large
https://www.petdoors.com/products/petsafe-smartdoor-connected-pet-door?variant=43828661944555
-
wall
petdoors
8-14
6
Small
https://www.petdoors.com/products/endura-flap-builder-pro-series-for-walls?variant=43919438577899
-
wall
petdoors
8-21
8
Medium
https://www.petdoors.com/products/endura-flap-builder-pro-series-for-walls?variant=43919438643435
-
wall
petdoors
8-27
10
Large
https://www.petdoors.com/products/endura-flap-builder-pro-series-for-walls?variant=43919438708971
-
wall
petdoors
8-34
12
Exta Large
https://www.petdoors.com/products/endura-flap-builder-pro-series-for-walls?variant=43919438774507
-
wall
petdoors
8-14
6
Small
https://www.petdoors.com/products/endura-flap-builder-series-pet-door-for-walls?variant=43919441494251
-
wall
petdoors
8-21
8
Medium
https://www.petdoors.com/products/endura-flap-builder-series-pet-door-for-walls?variant=43919441559787
-
wall
petdoors
8-27
10
Large
https://www.petdoors.com/products/endura-flap-builder-series-pet-door-for-walls?variant=43919441625323
-
wall
petdoors
8-34
12
Exta Large
https://www.petdoors.com/products/endura-flap-builder-series-pet-door-for-walls?variant=43919441690859
-
Window
Dragon Pet Door
9-12
5.375
Small
https://www.petdoors.com/products/dragon-sash-double?variant=44000061980907
-
Window
Dragon Pet Door
12-16
7.0625
Medium
https://www.petdoors.com/products/dragon-sash-double?variant=34579205193893
-
Window
Dragon Pet Door
12-22
9.375
Large
https://www.petdoors.com/products/dragon-sash-double?variant=44047085404395
-
Window
Dragon Pet Door
9-12
5.375
Small
https://www.petdoors.com/products/dragon-vinyl-window-pet-door?variant=44000063226091
-
Window
Dragon Pet Door
11-16
7.0625
Medium
https://www.petdoors.com/products/dragon-vinyl-window-pet-door?variant=35523067379877
-
Window
Dragon Pet Door
11-22
9.375
Large
https://www.petdoors.com/products/dragon-vinyl-window-pet-door?variant=40494214938789
-
Sliding Glass Door
Dragon Pet Door
9-12
5.375
Small
https://www.petdoors.com/products/dragon-aluminum-slider-double?variant=44000061522155
-
Sliding Glass Door
Dragon Pet Door
11-16
7.0625
Medium
https://www.petdoors.com/products/dragon-aluminum-slider-double?variant=34579205816485
-
Sliding Glass Door
Dragon Pet Door
11-22
9.375
Large
https://www.petdoors.com/products/dragon-aluminum-slider-double?variant=39700186857637
-
Sliding Glass Door
Endura Flap
9-15
6
Small
https://www.petdoors.com/products/endura-flap-custom-slider-dual?variant=43321122357483
-
Sliding Glass Door
Endura Flap
9-21
8
Medium
https://www.petdoors.com/products/endura-flap-custom-slider-dual?variant=43321122455787
-
Sliding Glass Door
Endura Flap
9-27
10
Large
https://www.petdoors.com/products/endura-flap-custom-slider-dual?variant=43321122554091
-
Sliding Glass Door
Endura Flap
9-34
12
Extra Large
https://www.petdoors.com/products/endura-flap-custom-slider-dual?variant=43321122652395
-
Window
Whiskers & Windows
4-10
7
Original
https://www.petdoors.com/products/whiskers-custom-window?variant=33932610764938
-
Sliding Glass Door
Whiskers & Windows
4-10
7
Original
https://www.petdoors.com/products/whiskers-custom-slider?variant=43543152132331
-
Sliding Glass Door
Pet Door Guys
9-15
6
Small
https://www.petdoors.com/products/pet-door-guys-glass?variant=40494257995941
-
Sliding Glass Door
Pet Door Guys
9-21
8
Medium
https://www.petdoors.com/products/pet-door-guys-glass?variant=40494258061477
-
Sliding Glass Door
Endura Flap
9-27
10
Large
https://www.petdoors.com/products/pet-door-guys-glass?variant=40494258127013
-
Sliding Glass Door
Endura Flap
9-34
12
Extra Large
https://www.petdoors.com/products/pet-door-guys-glass?variant=40494258192549
-
Sliding Glass Door
Endura Flap
8-14
6
Small
https://www.petdoors.com/products/endura-flap-custom-severe
-
Sliding Glass Door
Endura Flap
9-21
8
Medium
https://www.petdoors.com/products/endura-flap-custom-severe?variant=44239908667627
-
Sliding Glass Door
Endura Flap
8-31
10
Large
https://www.petdoors.com/products/endura-flap-custom-severe?variant=44239908700395
-
Sliding Glass Door
Endura Flap
8-36
12
Extra Large
https://www.petdoors.com/products/endura-flap-custom-severe?variant=44239908733163
-
Window
Endura Flap
9-15
6
Small
https://www.petdoors.com/products/endura-flap-custom-sash?variant=44105417097451
-
Window
Endura Flap
9-21
8
Medium
https://www.petdoors.com/products/endura-flap-custom-sash?variant=44105417195755
-
Window
Endura Flap
9-27
10
Large
https://www.petdoors.com/products/endura-flap-custom-sash?variant=44105417294059
-
Window
Endura Flap
9-34
12
Extra Large
https://www.petdoors.com/products/endura-flap-custom-sash?variant=44105417294059
-
Sliding Glass Door
Dragon Pet Door
9-12
5
Small
https://www.petdoors.com/products/dragon-custom-slider?variant=44239910797547
-
Sliding Glass Door
Dragon Pet Door
11-16
7
Medium
https://www.petdoors.com/products/dragon-custom-slider?variant=44239910404331
-
Sliding Glass Door
Dragon Pet Door
11-22
9
Large
https://www.petdoors.com/products/dragon-custom-slider?variant=44239910502635
-
Window
Endura Flap
9-15
6
Small
https://www.petdoors.com/products/endura-flap-custom-window?variant=44239947858155
-
Window
Endura Flap
9-15
6
Small
https://www.petdoors.com/products/endura-flap-custom-vinyl-window?variant=44105160818923
-
Window
Whiskers & Windows
4-10
7
Cat Flap
https://www.petdoors.com/products/whiskers-custom-sash?variant=44068976099563
-
Window
Dragon Pet Door
9-12
5
Small
https://www.petdoors.com/products/dragon-custom-vinyl-sash
-
Window
Dragon Pet Door
12-16
7
Medium
https://www.petdoors.com/products/dragon-custom-vinyl-sash?variant=44105376137451
-
Window
Dragon Pet Door
12-22
9
Large
https://www.petdoors.com/products/dragon-custom-vinyl-sash?variant=44105376137451
-
Window
PetSafe
6-11
5
Small
https://www.petdoors.com/products/petsafe-custom-window
-
Sliding Glass Door
Dragon Pet Door
9-12
5
Small
https://www.petdoors.com/products/dragon-custom-vinyl-slider
-
Sliding Glass Door
Dragon Pet Door
11-16
7
Medium
https://www.petdoors.com/products/dragon-custom-vinyl-slider?variant=44110296187115
-
Sliding Glass Door
Dragon Pet Door
11-20.5
9
Large
https://www.petdoors.com/products/dragon-custom-vinyl-slider?variant=44110296383723
-
Sliding Glass Door
Whiskers & Windows
4-12
7
Cat Flap
https://www.petdoors.com/products/dragon-custom-vinyl-slider?variant=44110296383723
-
Sliding Glass Door
Dragon Pet Door
9-12
5
Small
https://www.petdoors.com/products/dragon-custom-double-slider?variant=44521668870379
-
Sliding Glass Door
Dragon Pet Door
11-16
7
Medium
https://www.petdoors.com/products/dragon-custom-double-slider?variant=44239909552363
-
Sliding Glass Door
Dragon Pet Door
11-22
9
Large
https://www.petdoors.com/products/dragon-custom-double-slider?variant=44239909650667
-
Window
Dragon Pet Door
9-12
5
Small
https://www.petdoors.com/products/dragon-custom-window?variant=44105356345579
-
Window
Dragon Pet Door
11-16
7
Medium
https://www.petdoors.com/products/dragon-custom-window?variant=44105356574955
-
Window
Dragon Pet Door
11-22
9
Large
https://www.petdoors.com/products/dragon-custom-window?variant=44105356804331
-
Window
Dragon Pet Door
9-12
5
Small
https://www.petdoors.com/products/dragon-custom-double-sash?variant=44105236480235
-
Window
Dragon Pet Door
12-16
7
Medium
https://www.petdoors.com/products/dragon-custom-double-sash?variant=44105236513003
-
Window
Dragon Pet Door
12-22
9
Large
https://www.petdoors.com/products/dragon-custom-double-sash?variant=44105236545771
-
Sliding Glass Door
Endura Flap
8-14
6
Small
https://www.petdoors.com/products/endura-flap-custom-vinyl
-
Sliding Glass Door
Endura Flap
8-21
8
Medium
https://www.petdoors.com/products/endura-flap-custom-vinyl?variant=44090363117803
-
Sliding Glass Door
Endura Flap
8-32
10
Large
https://www.petdoors.com/products/endura-flap-custom-vinyl?variant=44090363183339
-
Sliding Glass Door
Endura Flap
8-38
12
Extra Large
https://www.petdoors.com/products/endura-flap-custom-vinyl?variant=44090363248875
-
Window
Dragon Pet Door
9-12
5
Small
https://www.petdoors.com/products/dragon-custom-sash?variant=44105337143531
-
Window
Draagon Pet Door
12-16
7
Medium
https://www.petdoors.com/products/dragon-custom-sash?variant=44105337176299
-
Window
Dragon Pet Door
12-22
9
Large
https://www.petdoors.com/products/dragon-custom-sash?variant=44105337209067
-
Sliding Glass Door
Ideal Pet Products
5-16
7
Medium
https://www.petdoors.com/products/ideal-custom-fast-fit
-
Sliding Glass Door
Ideal Pet Products
5-22
10.5
Extra Large
https://www.petdoors.com/products/ideal-custom-fast-fit?variant=44105430401259
-
Sliding Glass Door
Ideal Pet Products
5-30
15
Super Large
https://www.petdoors.com/products/ideal-custom-fast-fit?variant=44105430696171
-
Window
Dragon Pet Door
9-12
5
Small
https://www.petdoors.com/products/dragon-custom-double-window?variant=44105212035307
-
Window
Dragon Pet Door
11-16
7
Medium
https://www.petdoors.com/products/dragon-custom-double-window?variant=44105212264683
-
Window
Dragon Pet Door
11-22
9
Large
https://www.petdoors.com/products/dragon-custom-double-window?variant=44105212494059
-
Window
PetSafe
6-12
5
Small
https://www.petdoors.com/products/petsafe-custom-sash
-
Window
Ideal Pet Product
4-8
6
Cat Flap
https://www.petdoors.com/products/ideal-custom-sash
-
Window
Ideal Pet Products
4-15
7
Large Cat Flap
https://www.petdoors.com/products/ideal-custom-sash?variant=44105245196523
-
Window
Ideal Pet Prodcuts
5-16
7
Medium
https://www.petdoors.com/products/ideal-custom-fast-sash
-
Sliding Glass Door
Ideal Pet Products
5-23
10.5
Extra Large
https://www.petdoors.com/products/ideal-custom-fast-sash?variant=44105349333227
-
Door
Gun Dog House Door
6-14
12.5
Medium
https://www.petdoors.com/products/gun-dog?variant=44682807509227
-
Door
Gun Dog House Door
6-18
14.5
Large
https://www.petdoors.com/products/gun-dog?variant=44682807574763
-
Door
Gun Dog House Door
6-25
15"
Extra Large
https://www.petdoors.com/products/gun-dog?variant=44682807673067
-
Wall
Endura Flap
8-14
9.25
Small
https://www.petdoors.com/products/endura-flap-designer?variant=44683225333995
-
Wall
Endura Flap
8-21
11.25
Medium
https://www.petdoors.com/products/endura-flap-designer?variant=44683225399531
-
Wall
Endura Flap
8-27
13
Large
https://www.petdoors.com/products/endura-flap-designer?variant=44683225465067
-
Wall
Endura Flap
8-34
12
Extra Large
https://www.petdoors.com/products/endura-flap-designer?variant=44683225530603
-
Door
PetSafe
5-12.5
7.1
Medium
https://www.petdoors.com/products/petsafe-smart-connected?variant=43828661911787
-
Door
PetSafe
12.5-24
11.9
Large
https://www.petdoors.com/products/petsafe-smart-connected?variant=43828661944555
-
Sliding Glass Door
Liberty Pet Door
9-16
6
Small
https://www.petdoors.com/products/liberty-custom-slider?variant=44745192276203
-
Sliding Glass Door
Liberty Pet Door
9-22
8
Medium
https://www.petdoors.com/products/liberty-custom-slider?variant=44745192931563
-
Sliding Glass Door
Liberty Pet Door
9-28
10
Large
https://www.petdoors.com/products/liberty-custom-slider?variant=44745193586923
-
Sliding Glass Door
Liberty Pet Door
9-35
12
Extra Large
https://www.petdoors.com/products/liberty-custom-slider?variant=44745194242283
-
Sliding Glass Door
Liberty Pet Door
9-40
13
XXL
https://www.petdoors.com/products/liberty-custom-slider?variant=44745194897643
-
Sliding Glass Door
Liberty Pet Door
9-16
6
Small
https://www.petdoors.com/products/liberty-slider?variant=44600917885163
-
Sliding Glass Door
Liberty Pet Door
9-22
8
Medium
https://www.petdoors.com/products/liberty-slider?variant=44600950391019
-
Sliding Glass Door
Liberty Pet Door
9-28
10
Large
https://www.petdoors.com/products/liberty-slider?variant=44600950653163
-
Sliding Glass Door
Liberty Pet Door
9-35
12
Extra Large
https://www.petdoors.com/products/liberty-slider?variant=44600950915307
-
Sliding Glass Door
Liberty Pet Door
9-40
13
XXL
https://www.petdoors.com/products/liberty-slider?variant=44625277911275
-
Sliding Glass Door
Liberty Pet Door
9-16
6
Small
https://www.petdoors.com/products/liberty-custom-vinyl?variant=44745412706539
-
Sliding Glass Door
Liberty Pet Door
9-22
8
Medium
https://www.petdoors.com/products/liberty-custom-vinyl?variant=44745413034219
-
Sliding Glass Door
Liberty Pet Door
9-33
10
Large
https://www.petdoors.com/products/liberty-custom-vinyl?variant=44745413361899
-
Sliding Glass Door
Liberty Pet Door
9-39
12
Extra Large
https://www.petdoors.com/products/liberty-custom-vinyl?variant=44745413689579
-
Sliding Glass Door
Liberty Pet Door
9-44
13
XXL
https://www.petdoors.com/products/liberty-custom-vinyl?variant=44745413689579
-
Sliding Glass Door
Liberty Pet Door
9-16
6
Small
https://www.petdoors.com/products/liberty-vinyl?variant=44625278566635
-
Sliding Glass Door
Liberty Pet Door
9-22
8
Medium
https://www.petdoors.com/products/liberty-vinyl?variant=44625278894315
-
Sliding Glass Door
Liberty Pet Door
9-33
10
Large
https://www.petdoors.com/products/liberty-vinyl?variant=44625279221995
-
Sliding Glass Door
Liberty Pet Door
9-39
12
Extra Large
https://www.petdoors.com/products/liberty-vinyl?variant=44625279549675
-
Sliding Glass Door
Liberty Pet Door
9-44
13
XXL
https://www.petdoors.com/products/liberty-vinyl?variant=44625279877355
-
Window
Liberty Pet Door
9-16
6
https://www.petdoors.com/products/liberty-white-window?variant=44746100179179
-
Window
Liberty Pet Door
9-22
8
Medium
https://www.petdoors.com/products/liberty-white-window?variant=44746100670699
-
Window
Liberty Pet Door
9-28
10
Large
https://www.petdoors.com/products/liberty-white-window?variant=44746101194987
-
Window
Liberty Pet Door
9-16
6
Small
https://www.petdoors.com/products/liberty-black-window?variant=44746105782507
-
Window
Liberty Pet Door
9-22
8
Medium
https://www.petdoors.com/products/liberty-black-window?variant=44746106306795
-
Window
Liberty Pet Door
9-28
10
Large
https://www.petdoors.com/products/liberty-black-window?variant=44746106831083
-
Window
Liberty Pet Door
9-15
5
Small
https://www.petdoors.com/products/liberty-custom-sash?variant=44765874618603
-
Window
Liberty Pet Door
9-21
7
Medium
https://www.petdoors.com/products/liberty-custom-sash?variant=44765875142891
-
Window
Liberty Pet Door
9-27
9
Large
https://www.petdoors.com/products/liberty-custom-sash?variant=44765875699947
-
Window
Liberty Pet Door
9-15
5
Small
https://www.petdoors.com/products/liberty-sash-white?variant=44765776019691
-
Window
Liberty Pet Door
9-21
7
Medium
https://www.petdoors.com/products/liberty-sash-white?variant=44765776085227
-
Window
Liberty Pet Door
9-27
9
Large
https://www.petdoors.com/products/liberty-sash-white?variant=44765776150763
-
Window
Liberty Pet Door
9-15
5
Small
https://www.petdoors.com/products/liberty-black-sash?variant=44765811998955
-
Window
Liberty Pet Door
9-21
7
Medium
https://www.petdoors.com/products/liberty-black-sash?variant=44765812523243
-
Window
Liberty Pet Door
9-27
9
Large
https://www.petdoors.com/products/liberty-black-sash?variant=44765813047531
-
Sliding Glass Door
Liberty Pet Door
1-13
6
Original
https://www.petdoors.com/products/liberty-cat?variant=45242223395051
-
Window
Liberty Pet Door
1-13
6
Original
https://www.petdoors.com/products/liberty-window-cat?variant=45242221101291
-
Window
Liberty Pet Door
1-13
6
Original
https://www.petdoors.com/products/liberty-cat-sash?variant=45242222280939
-
Sliding Glass Door
Liberty Pet Door
1-13
6
Original
https://www.petdoors.com/products/liberty-custom-cat-panel?variant=45245975920875
-
Window
Liberty Pet Door
1-13
6
Original
https://www.petdoors.com/products/liberty-custom-cat-sash?variant=45246006427883
-
Window
Liberty Pet Door
1-13
6
Original
https://www.petdoors.com/products/liberty-custom-cat-window?variant=45245996368107
ClearVis Portable AC Window Vent Kit
ClearVis Portable AC Window Vent Kit
- Regular price
- $320.00
- Sale price
- $320.00
- Regular price
-
$352.00 - Unit price
- /per
Adding product to your cart
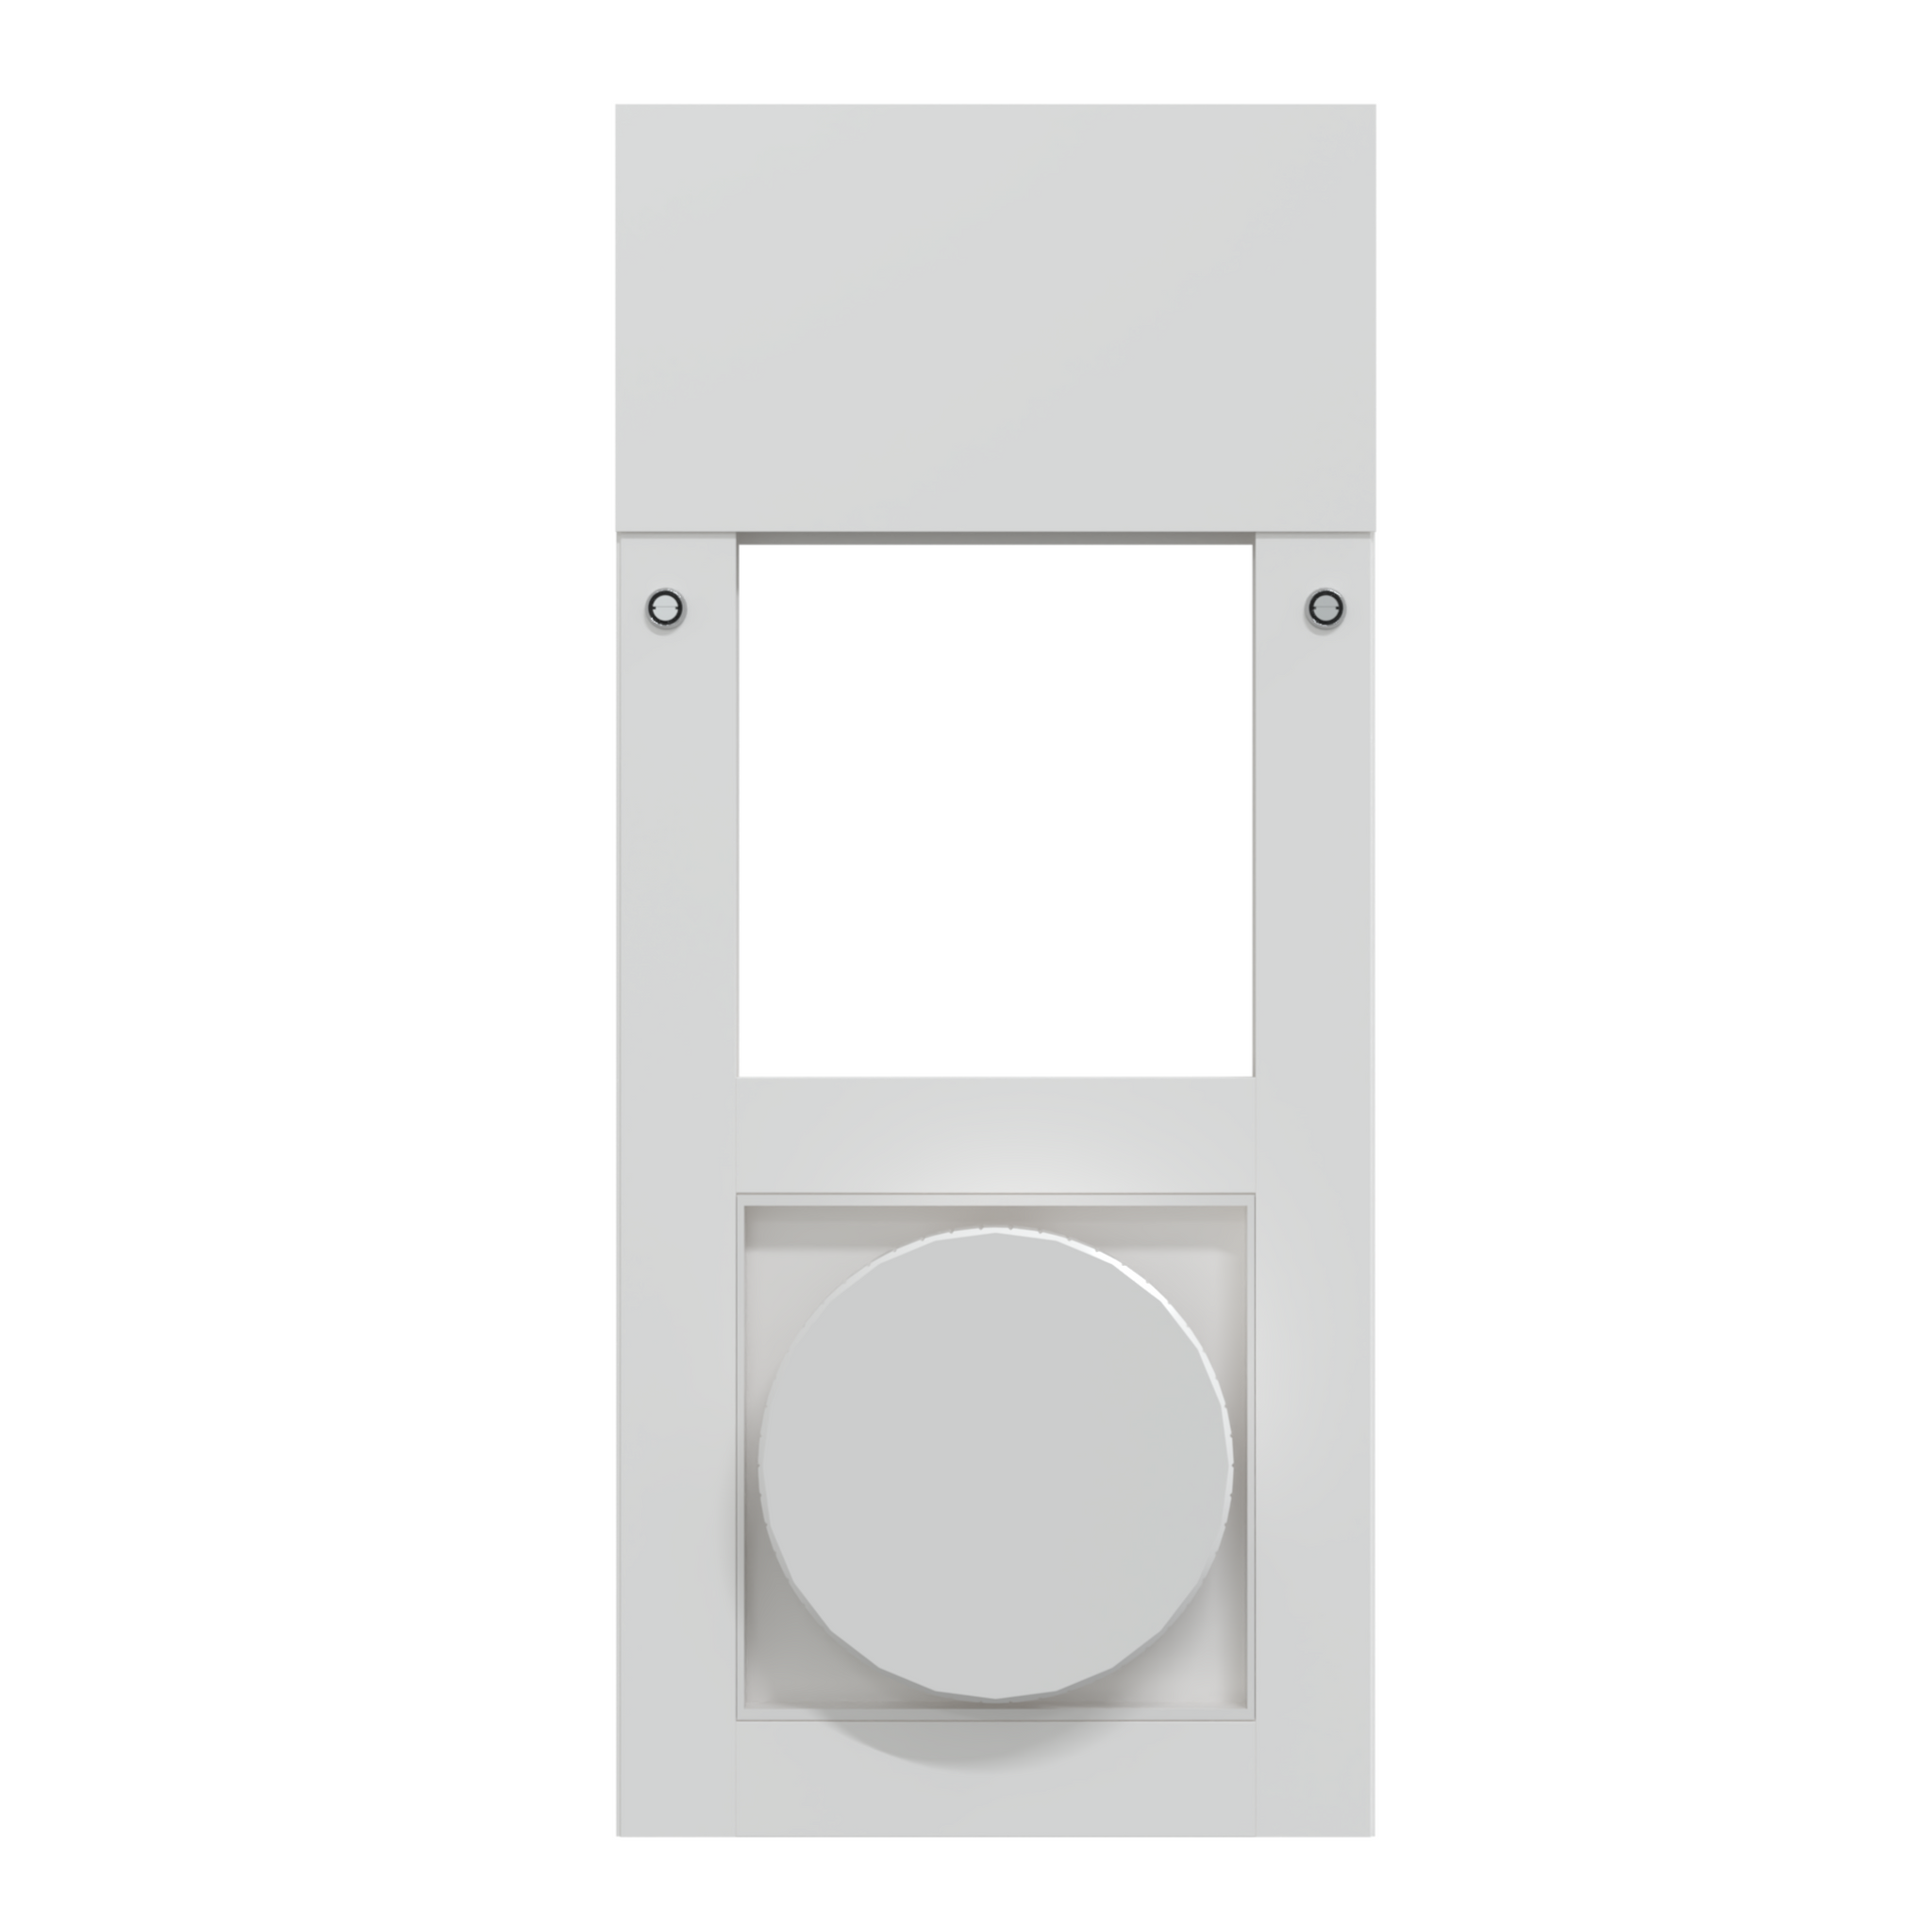
- Versatile AC mount panel that can be installed in any direction to fit your sliding glass door, horizontal-opening window, or sash window.
- Adjusts for both 5.0/5.1" and 5.9" exhaust hoses and clockwise/counterclockwise ducting for a seamless fit, tailored for aluminum or vinyl sliding doors and windows.
- One-piece, no-assembly design creates an easy installation; perfect for quick setups in both permanent and temporary living spaces.
- Superior sealing using tempered safety glass, offers enhanced efficiency, reducing costs and environmental impact.
- Maintains your window's aesthetics, preserving uninterrupted views while efficiently venting your AC unit.
- Aluminum Frame Fits tracks at least 1" thick and is 10 3/4" wide
- Vinyl Frame Fits tracks at least 1 1/4" thick and is 11 3/8" wide
Vinyl Frame Is Custom Order | Ships in 1 Month | Non-Refundable
ClearVis Portable AC Window Vent Kit
22" - 25" / Aluminum Edit
Product Details
Crafted to elevate the efficiency of your portable air conditioner, the robust ClearVis Portable AC Window Vent Kit is the perfect mount for your portable AC unit. Featuring tempered safety glass encased in an adjustable frame, this panel ensures an ideal fit for any window or sliding glass door you want to mount your AC unit into. Whether you're integrating with a 5.1 to 5.9 inch exhaust hose or seeking an airtight seal for optimal cooling, the kit delivers universal compatibility with precision.
When you're on a tight schedule, its swift installation shines through. With an easy-to-adjust frame complemented by weather stripping, this panel promises not just quick setups, but enhanced insulation as well. Its spring-loaded design makes it ideal for renters of all kinds; it can be non-permanently installed in apartments, vacation homes, and more!
Beyond its operational prowess, the ClearVis Portable AC Window Vent Kit excels in durability and design. Its robust frame is built to resist the wear of seasons, ensuring longevity through the hottest summers and harshest winters. The frame is available in durable aluminum or vinyl to match your track. Matching your vinyl frame with a vinyl slider track will minimize condensation.
Dive into a realm of cooling efficiency, energy savings, and stellar design with the ClearVis Portable AC Window Vent Kit. Enhance your ambiance, enjoy the view, and let the breezes flow.
Features:
- Universal Compatibility: Designed to fit a plethora of portable AC units, this kit is optimized for 5.1 to 5.9 inch exhaust hoses.
- Airtight Excellence: The adjustable aluminum or vinyl frame ensures a snug fit, leading to significant energy savings.
- Quick Setup: Effortlessly install the vent kit with its intuitive one-piece design, complimented by included weather stripping.
- Architectural Durability: Built to brave the elements, the aluminum frame promises enduring performance and longevity.
- Seamless Design: Enhance your space; the tempered safety glass insert preserves views while melding effortlessly with any decor.
Size & Measurement Guide x
Track Measurement Guide x
In order to choose the correct panel size, you will need to measure your sliding glass door track.
Please Note: These instructions are for channel-style sliding door tracks. If you have a monorail track, these instructions do not apply.
Step 1Find the Lowest Corner of Your Track

- With your sliding door open, insert one end of your measuring tape at the deepest point of the lower corner of your sliding glass door track.
- Make sure the tape measure is flush to the corner. There may be a part of your door track blocking the lowest point of the corner.
Step 2Find the Highest Corner of Your Track

- Line the measuring tape up the side of your doorway, stopping at the highest corner. Make sure the measuring tape is flush with the corner and is not blocked.
- The distance from the lowest corner of your track to the highest corner of your track is your sliding glass door track height.
- Select the Height Adjustment Range that includes your track height. Some brands have custom options if your track height does not fall into one of the ranges.
Step 3Measure Your Track Width

- Using your tape measure, find the width of the bottom track your sliding glass door slides along.
- Most aluminum panels require a track at least 1" wide and most vinyl panels require a track at least 1.5" wide.
- Check the product details to ensure the panel will fit in your track.
Installation Instructions
 Difficulty
Easy
 Steps
06
 Time Required
0.5 hours
 Sections
01
 Flags
00
Parts
- 1 ClearVis AC Window Panel
Tools
- Flathead Screwdriver
Please read instructions & notes thoroughly before installation.
Step 1 Loosen Width Adjustment Locks

- Release the automatic width adjustment locks by loosening the screws with a screwdriver. This allows the spring mechanism to move freely from side to side.
Step 2 Test Fit the Panel

- Before applying weatherstripping, test installing the sash into your window track.
- Insert the sash into the window track. Push against the spring mechanism and swing the opposite end into the opposite window track.
- Gently release then tighten the width adjustment locks.
- It is important to test that the sash fits properly before applying the weatherstripping. If it sits properly, you can remove it to put on the foam weatherstripping in step 3.
Step 3 Apply Weatherstripping

- Apply the foam weatherstripping by peeling back the paper and exposing the adhesive.
- Unroll it along the edge of the sash, pressing to ensure it adheres.
- Install on both the top and the bottom. Trim to fit with scissors.
Step 4 Insert Into Track

- Place the sash back into the window, then tighten the width adjustment lock to lock it in place.
Step 5 Prep Panel for AC Unit

- Remove any existing attachments on the end of the air conditioner tube.
Step 6 Attach AC Tube

- Rotate the tube on the outside or inside of the threads to make a seal, you may need to spin clockwise or counterclockwise.
Customer Reviews
Size & Measurement Guide x
Track Measurement Guide x
In order to choose the correct panel size, you will need to measure your sliding glass door track.
Please Note: These instructions are for channel-style sliding door tracks. If you have a monorail track, these instructions do not apply.
Step 1Find the Lowest Corner of Your Track

- With your sliding door open, insert one end of your measuring tape at the deepest point of the lower corner of your sliding glass door track.
- Make sure the tape measure is flush to the corner. There may be a part of your door track blocking the lowest point of the corner.
Step 2Find the Highest Corner of Your Track

- Line the measuring tape up the side of your doorway, stopping at the highest corner. Make sure the measuring tape is flush with the corner and is not blocked.
- The distance from the lowest corner of your track to the highest corner of your track is your sliding glass door track height.
- Select the Height Adjustment Range that includes your track height. Some brands have custom options if your track height does not fall into one of the ranges.
Step 3Measure Your Track Width

- Using your tape measure, find the width of the bottom track your sliding glass door slides along.
- Most aluminum panels require a track at least 1" wide and most vinyl panels require a track at least 1.5" wide.
- Check the product details to ensure the panel will fit in your track.
x
Installation Instructions

 Difficulty
Easy
 Steps
06
 Time Required
0.5 hours
 Sections
01
 Flags
00
Parts
- 1 ClearVis AC Window Panel
Tools
- Flathead Screwdriver
Please read instructions & notes thoroughly before installation.
Step 1 Loosen Width Adjustment Locks

- Release the automatic width adjustment locks by loosening the screws with a screwdriver. This allows the spring mechanism to move freely from side to side.
Step 2 Test Fit the Panel

- Before applying weatherstripping, test installing the sash into your window track.
- Insert the sash into the window track. Push against the spring mechanism and swing the opposite end into the opposite window track.
- Gently release then tighten the width adjustment locks.
- It is important to test that the sash fits properly before applying the weatherstripping. If it sits properly, you can remove it to put on the foam weatherstripping in step 3.
Step 3 Apply Weatherstripping

- Apply the foam weatherstripping by peeling back the paper and exposing the adhesive.
- Unroll it along the edge of the sash, pressing to ensure it adheres.
- Install on both the top and the bottom. Trim to fit with scissors.
Step 4 Insert Into Track

- Place the sash back into the window, then tighten the width adjustment lock to lock it in place.
Step 5 Prep Panel for AC Unit

- Remove any existing attachments on the end of the air conditioner tube.
Step 6 Attach AC Tube

- Rotate the tube on the outside or inside of the threads to make a seal, you may need to spin clockwise or counterclockwise.
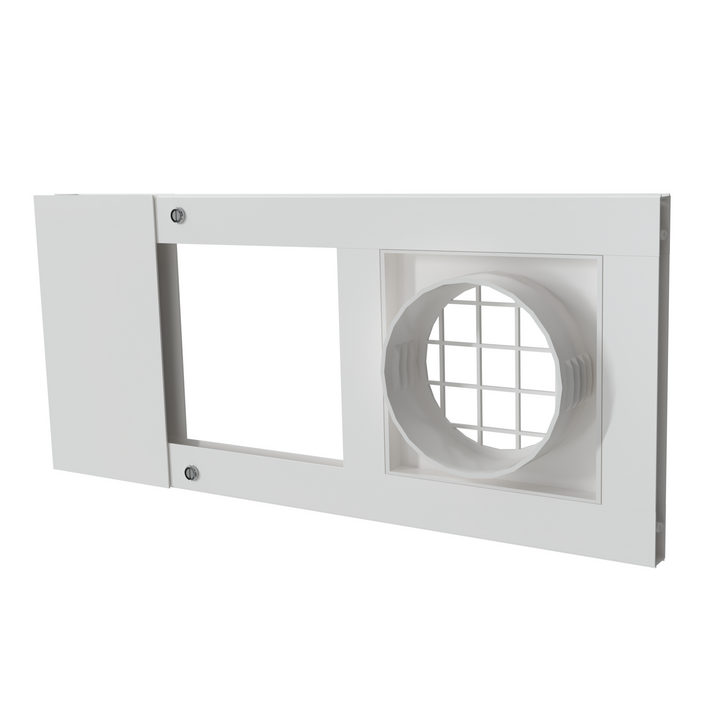
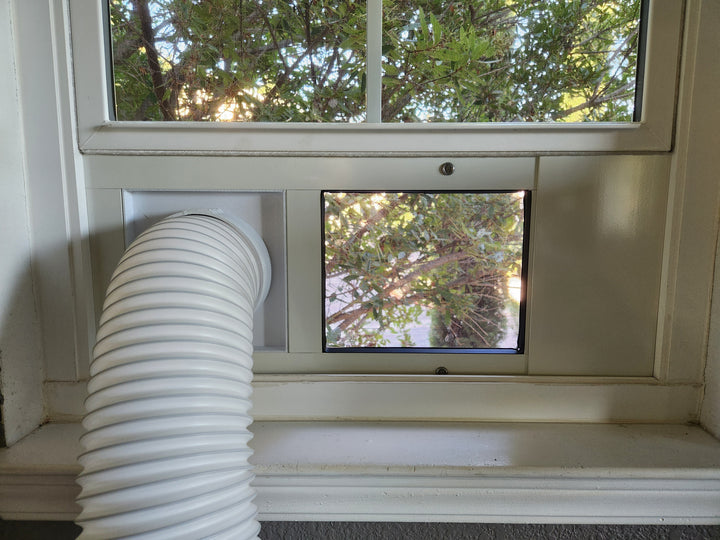


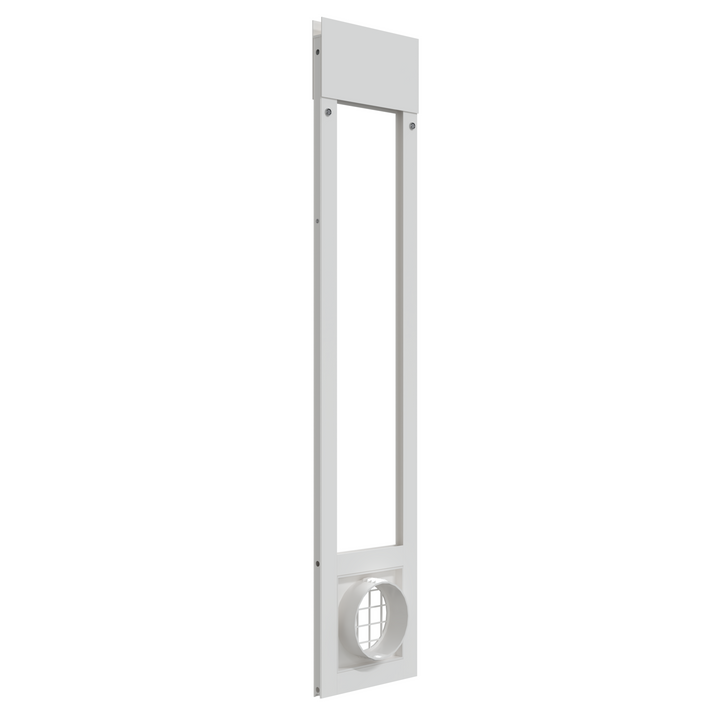
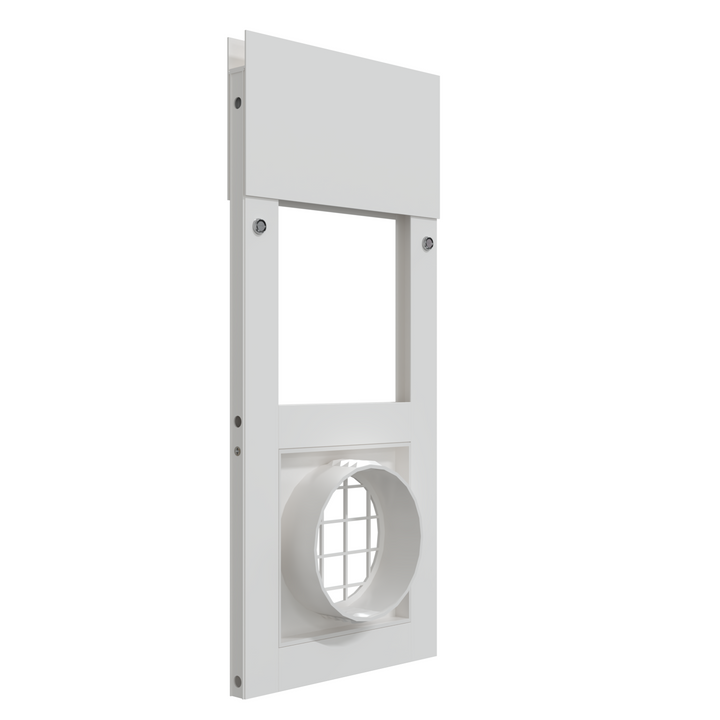
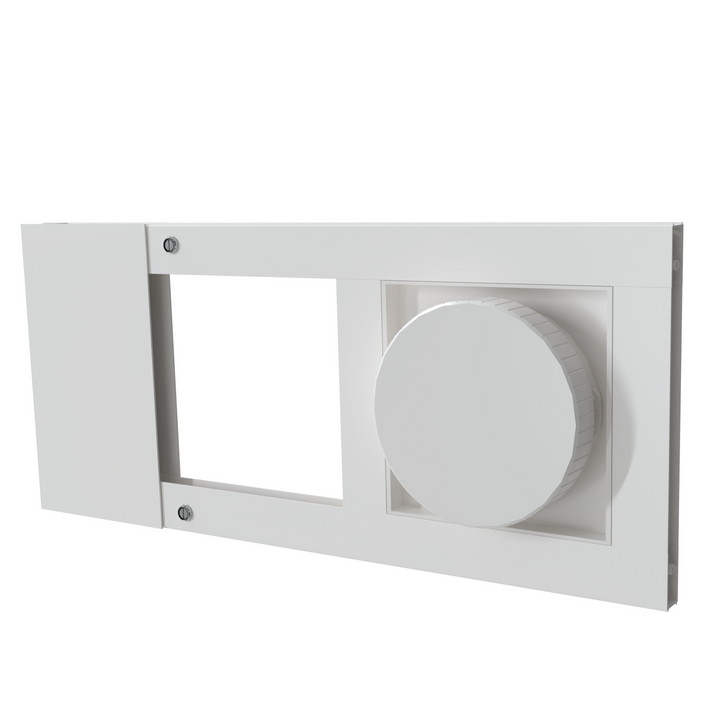
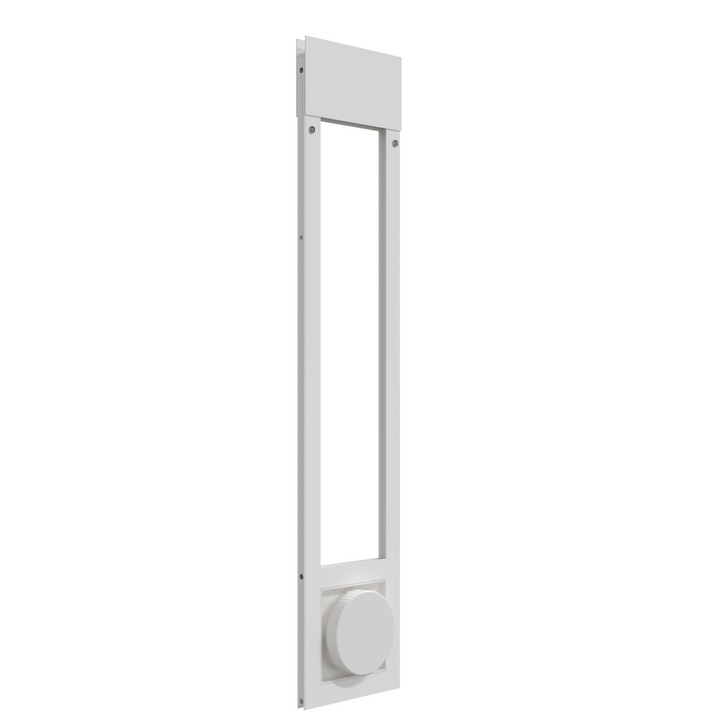
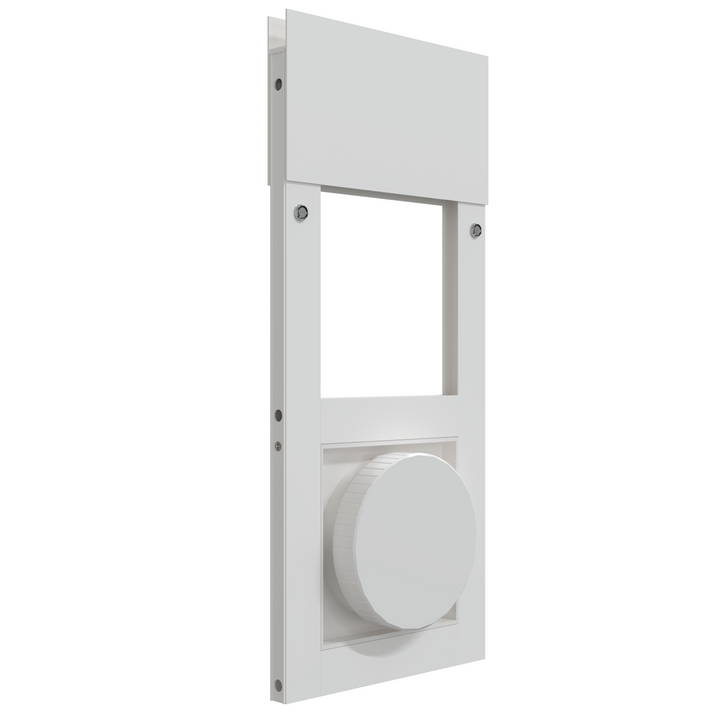
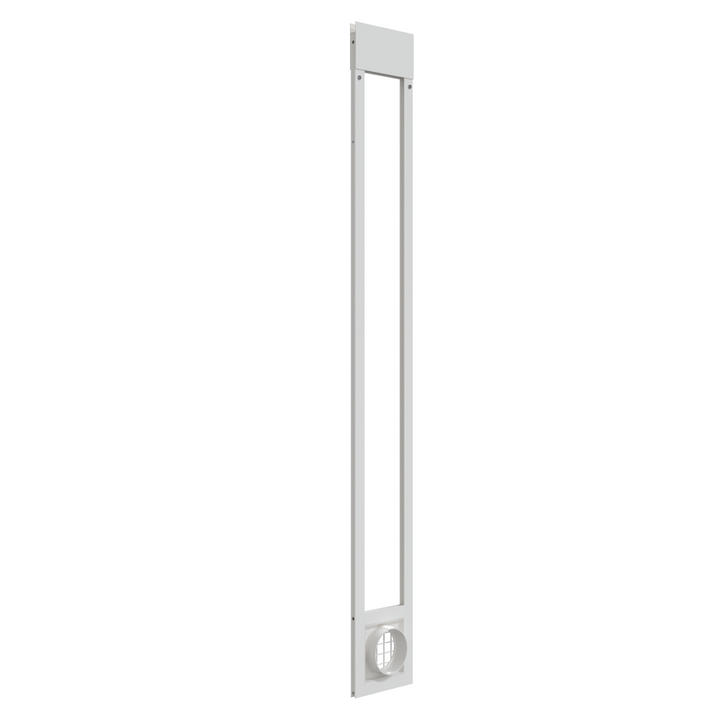
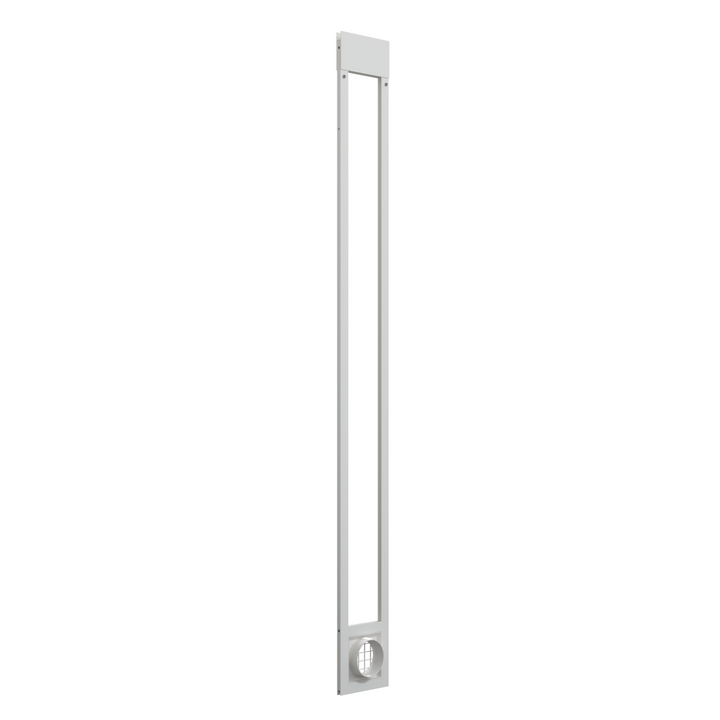
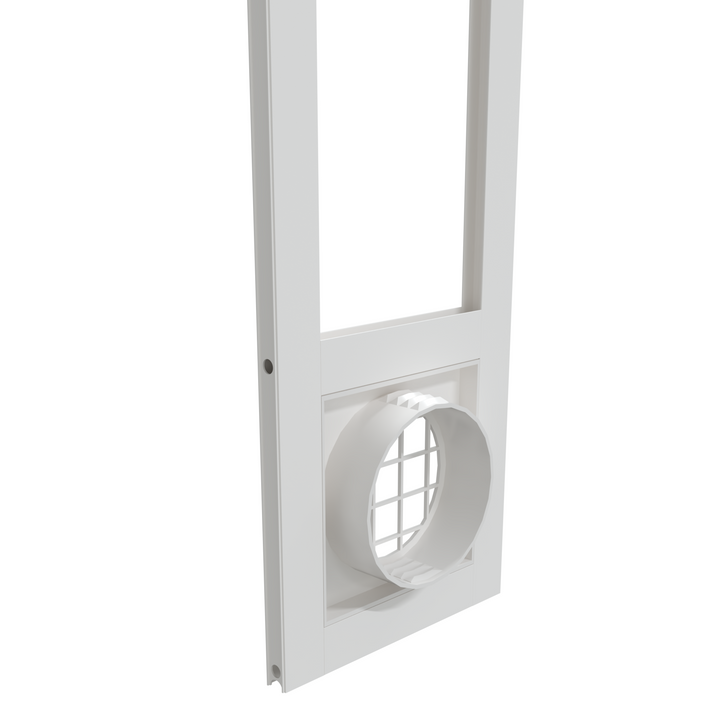
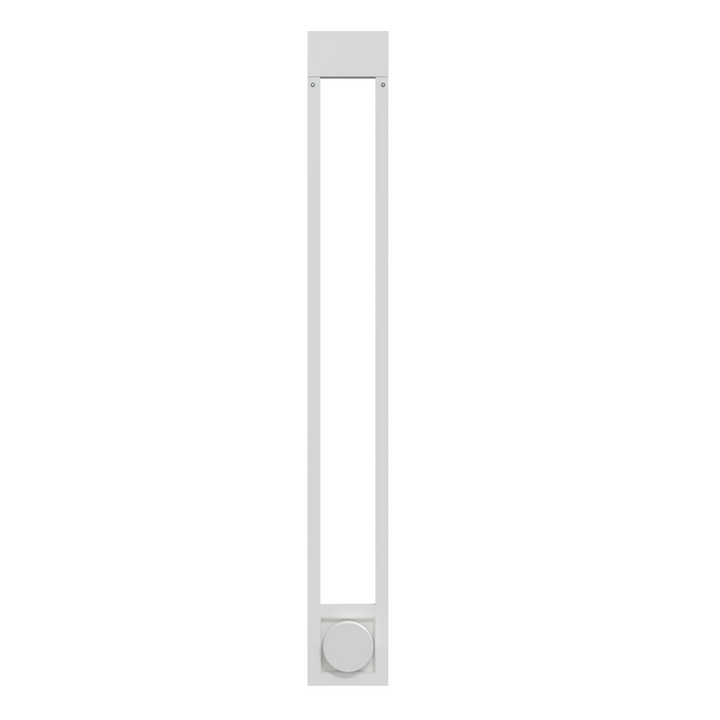
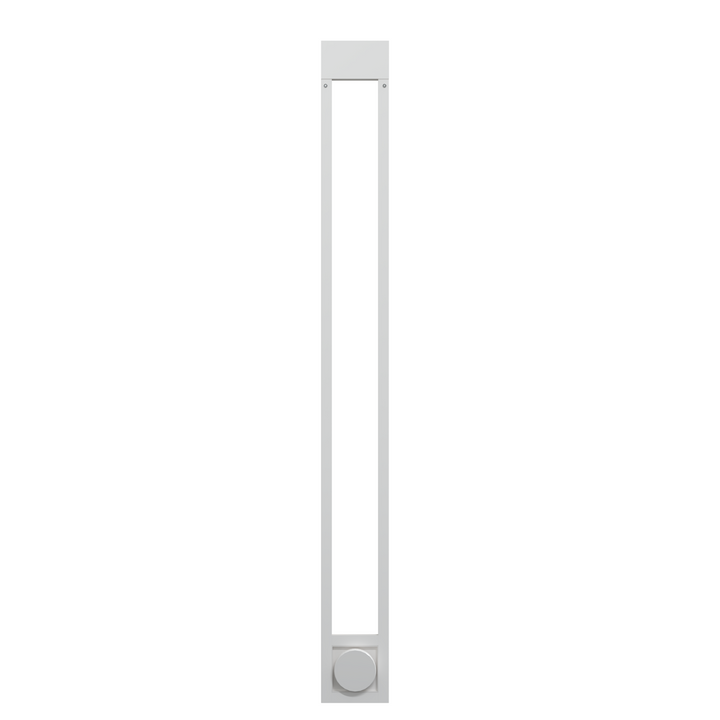
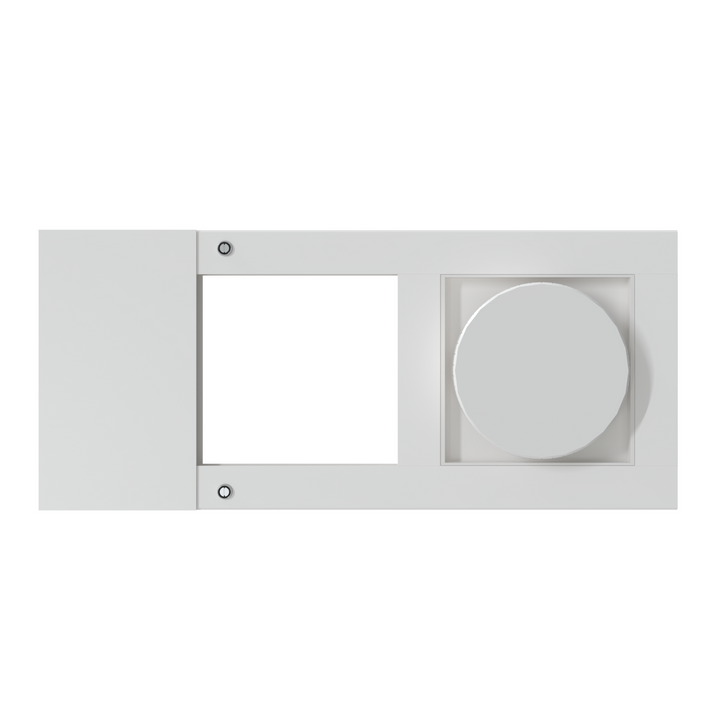
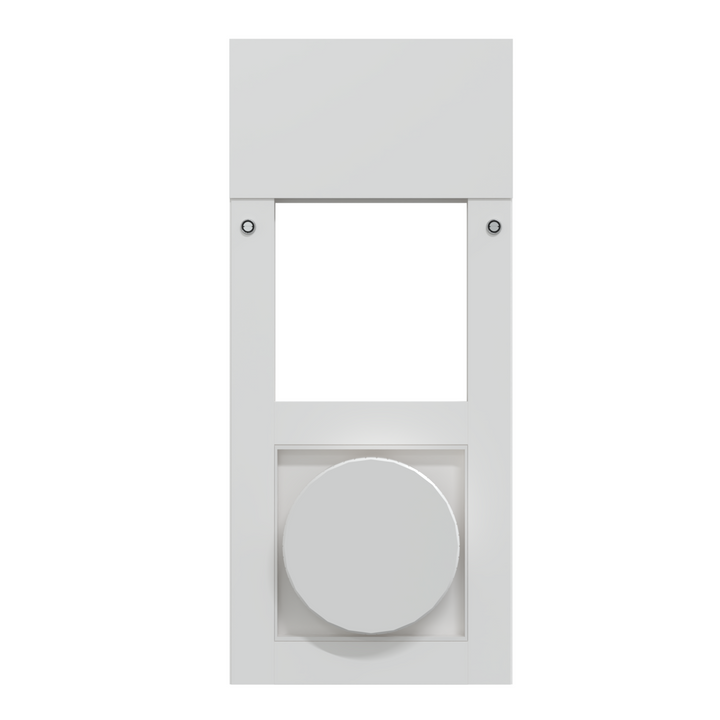
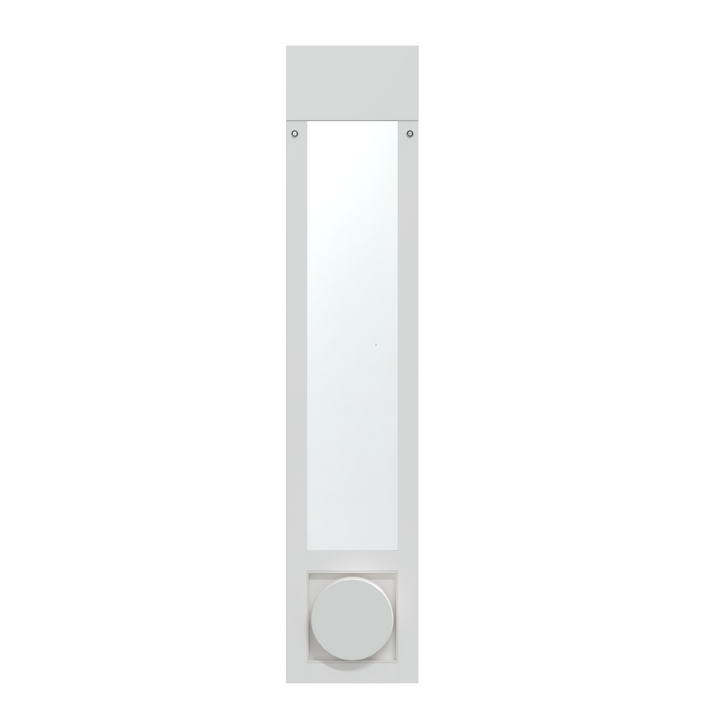
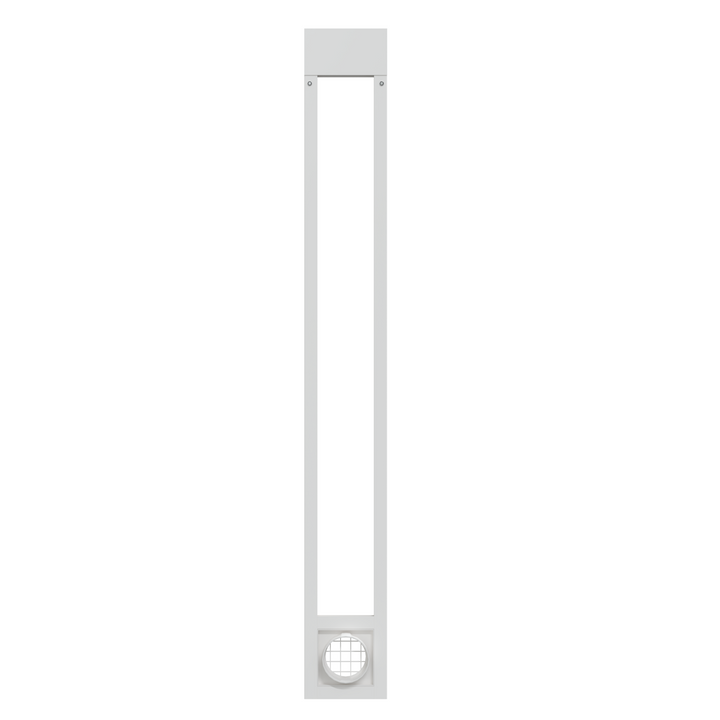
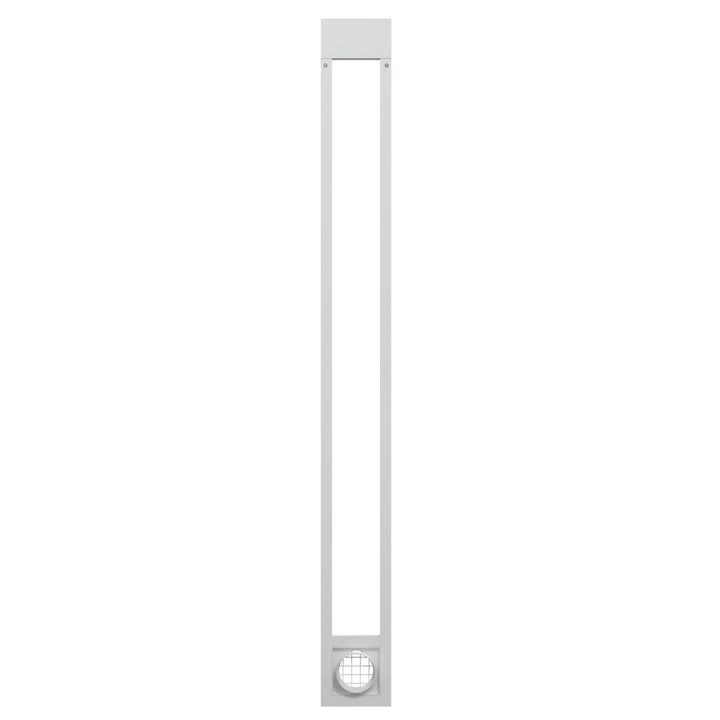
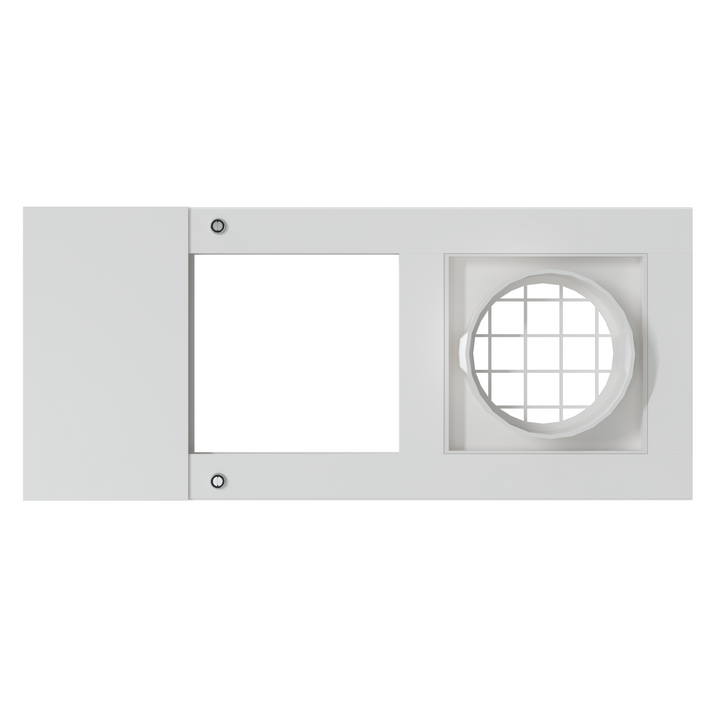
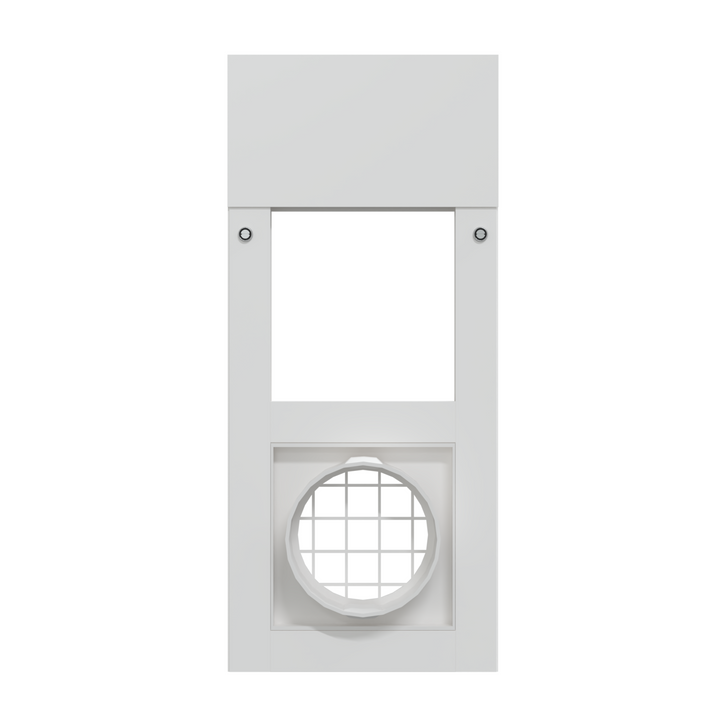
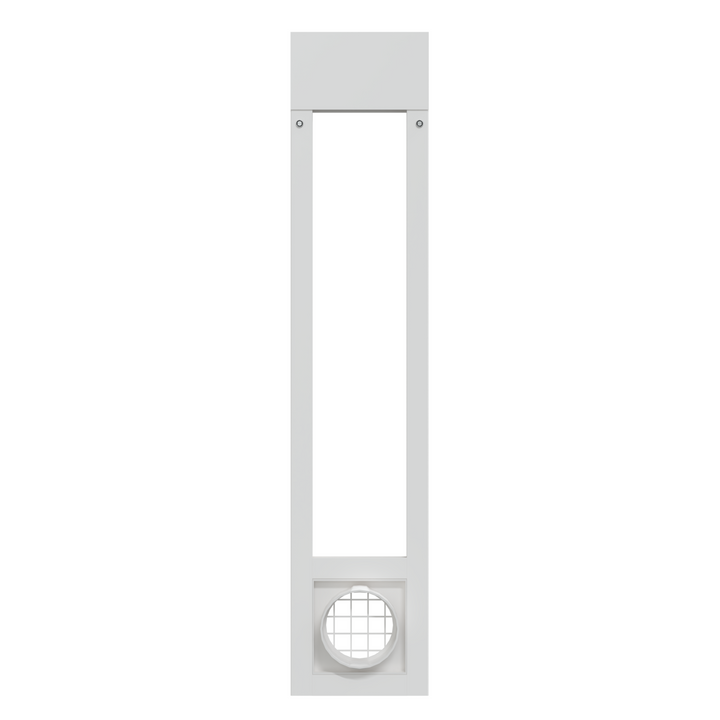
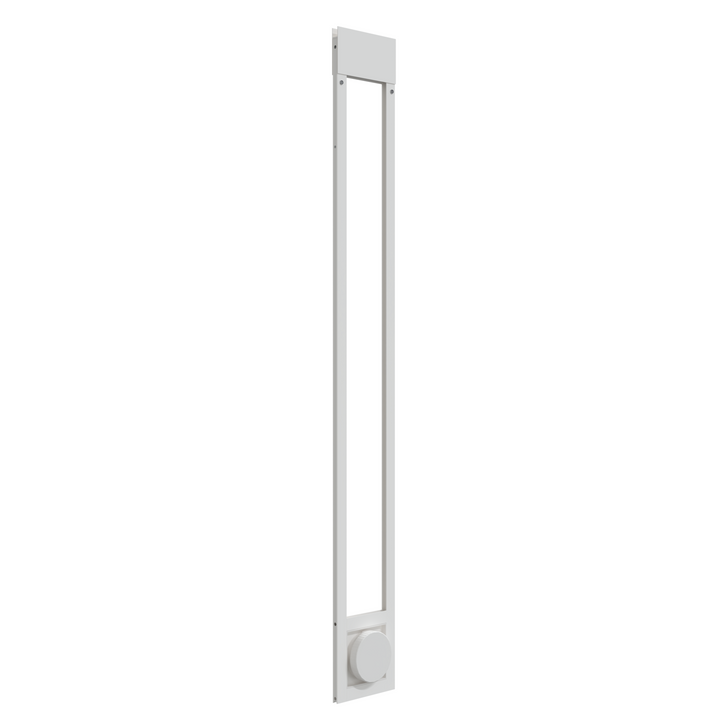
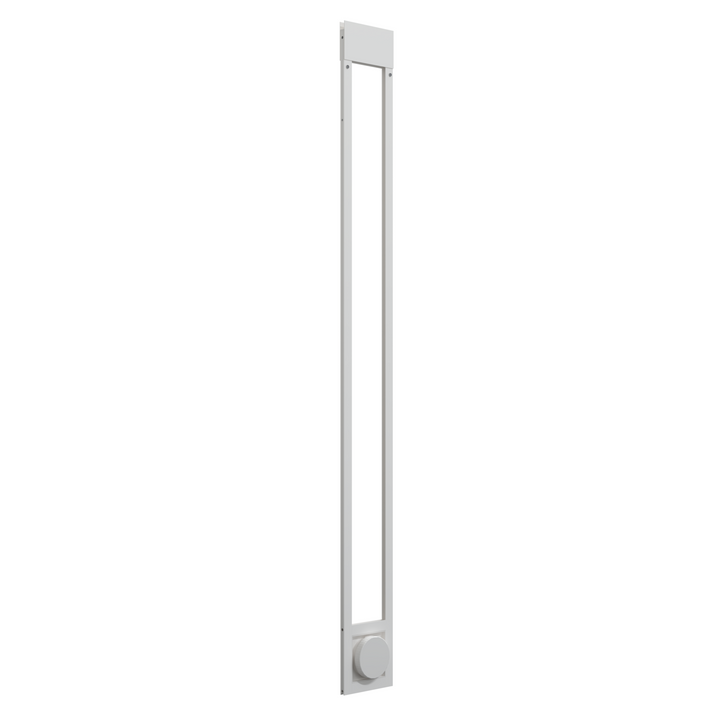
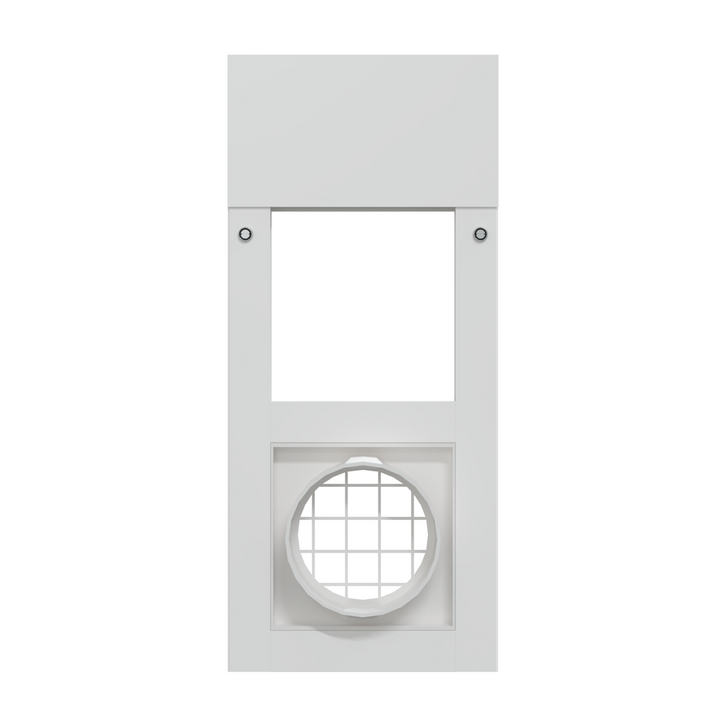
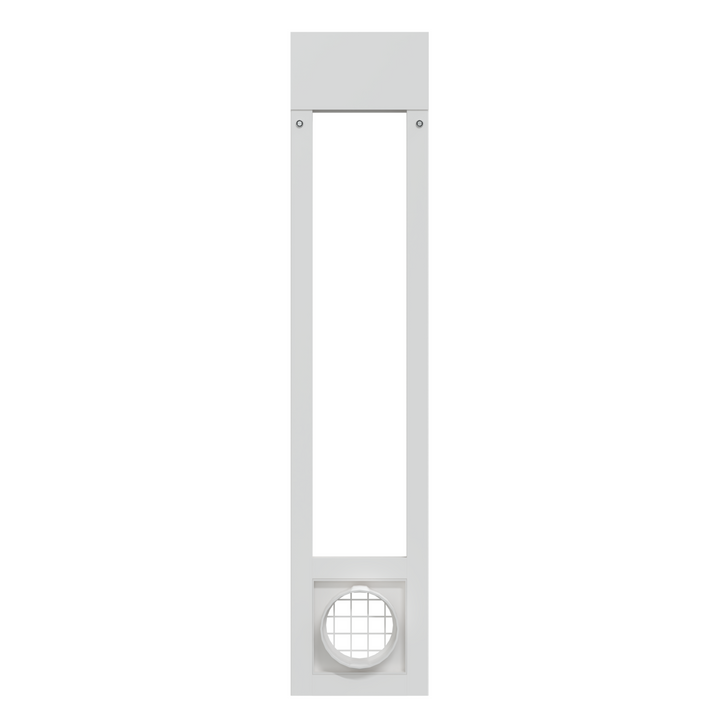
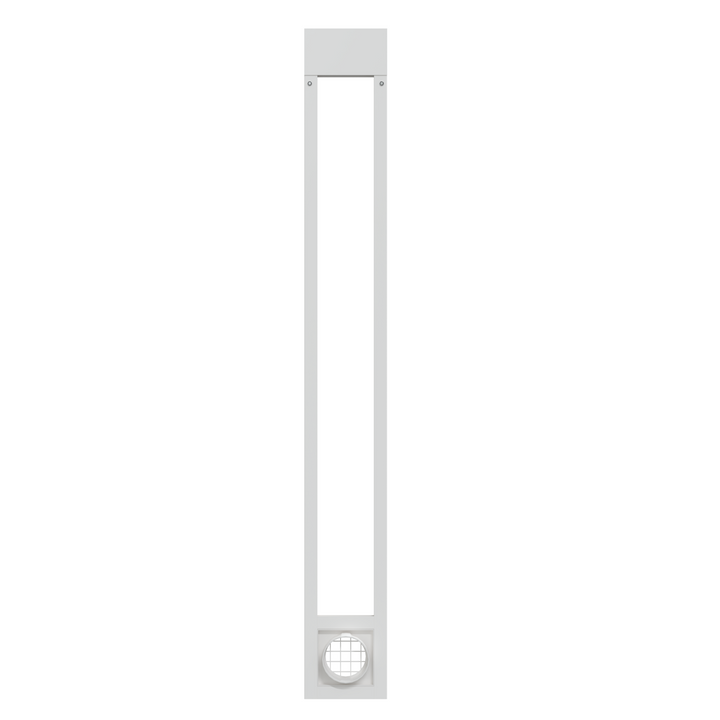


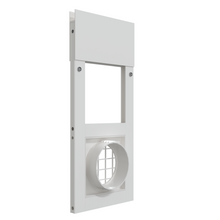

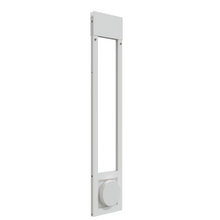
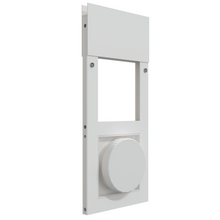

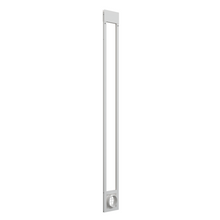

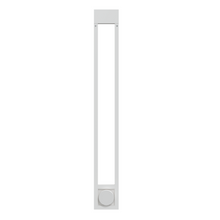
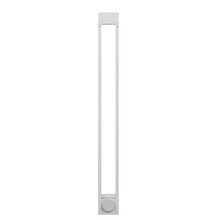

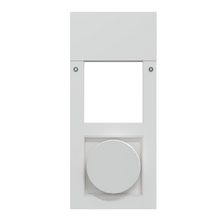

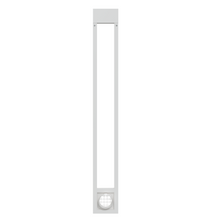

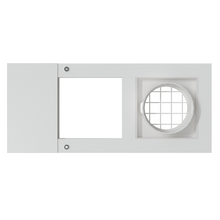

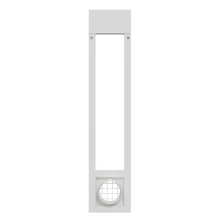

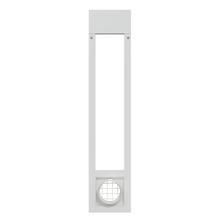
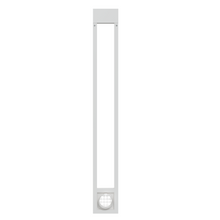
 Product Details