


Monorail Adapters
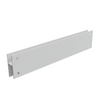
Creates a secure, custom-fit channel for monorail sliding doors.

Fast & Free Shipping in the USA.
Satisfaction Guarantee -
Couldn't load pickup availability
By placing your order you agree to our Terms and Privacy and our Refund Policy
Monorail sliding glass doors often leave standard patio inserts with too much room to shift, tilt, or feel unsupported. This adapter solves that problem by creating a defined channel that holds your Thermo Panel firmly in place. The result is a more stable installation that feels intentional, not improvised.
Once installed, the adapter improves how the panel sits within the track, reducing side-to-side movement and helping maintain consistent alignment over time. This added stability can make everyday use smoother, especially in homes with active pets or frequent door traffic.
The design is straightforward and purpose-built for Endura aluminum panels, ensuring compatibility without the need for workarounds. Pre-punched guide holes help position the adapter correctly, while final drilling allows it to be securely fastened for long-term use.
While the Thermo Panel itself is typically tool-free, the adapter adds a more anchored solution for monorail systems that benefit from additional support. It remains removable if needed, making it a practical option for both permanent and transitional living situations.
In colder climates, some airflow or condensation may still occur due to the nature of monorail systems, but the adapter helps reduce excess gaps and improves overall fit compared to unsupported installations.
Installation & Fit
Installation & Fit
Best Suited For
Best Suited For
Questions
Questions
What's in the box?
- Monorail Adapter
- 2 10-24 Stainless Steel Acorn nuts
- 2 10-24 x 1-1/8" Stainless Steel Screws
How do I measure my old flap to order the right replacement size?
Can I add additional magnets to my Endura Flap door?
Can I buy just one flap for a double flap pet door?
Explore all questionsSize & Measurement Guide
Refund policy
Refund and Returns Policy
PetDoors.com, a store operated by Patio Pacific, Inc.
This policy covers orders placed at petdoors.com. Orders placed on Amazon, at EnduraFlap.com, at a Liberty Pet Doors storefront, or through a dealer are returned under that seller's policy, not this one.
Buying a pet door means planning to cut a permanent hole in your house, and wanting to be certain before you commit to that is reasonable. This policy is built around it. Holding the door up in the opening to check the fit does not cost you the return.
How long you get depends on who built the item, and we explain why below rather than making you guess.
Jump to: Short version · Return window · Lines that cannot come back · Condition we accept · What you cannot return · Damaged, defective, or wrong item · A defect inside your return window · Who pays return shipping · How to start a return · Refunds · Exchanges · International orders · Cancellations and delays · Pricing errors · Contact
The short version
- 90 days on products we make. 30 days on products we resell. You have that long from delivery to request an RMA, our return authorization number, and you get the item price back. It is the request that has to happen inside the window, not the package arriving back here.
- A few resold lines cannot be returned at all, because the manufacturer does not take them back. They are listed below by name.
- We pay return shipping if the item is defective, damaged in transit, or not what you ordered.
- You pay return shipping if you changed your mind or ordered the wrong item. If that order shipped free, we may also deduct what the outbound shipping cost us.
- Items have to come back complete and in resellable condition. We can decline one that does not.
- Installed doors and custom-built items cannot be returned.
- We do not do exchanges. Return the item, then place a new order.
- Nothing comes back without an RMA number.
Return window
The clock starts the day the carrier records your order as delivered.
90 days on products we make. Endura Flap, Liberty Pet Doors, the Patio Pacific screen conversion kit, Draft Stopper weatherstrip, PetDoors.com weatherstrip, and the loose Endura components and replacement parts sold here are built by Patio Pacific in San Luis Obispo. They come back to us, we decide, and nobody else is in the way. So you get 90 days.
30 days on products we resell. Hale Pet Door, PetSafe, Ideal Pet Products, High Tech Pet Products, Pride Pet Doors, Watchdog Security Covers, and the other brands built by other companies get 30 days.
The shorter window is not us being stingy, it is us being accurate. A resold item goes back to the manufacturer, most of them ship it to you direct from their own warehouse in the first place, and each one sets its own return window. Ours has to fit inside theirs. If we published 90 days on an item a supplier stops accepting at 30, we would be writing a promise somebody else has to keep, and they have not agreed to keep it. We would rather tell you 30 and mean it.
It is the request that has to reach us inside your window. The item does not have to be back at the warehouse by the last day, and it does not even have to be in the mail by then.
Your window is set on the day you request the RMA, as long as you ship within 14 days of receiving it. If you miss that 14-day window, the date we receive the item is what counts instead. See How to start a return.
This policy is also linked at checkout, before you pay.
There is no restocking fee for changing your mind, at any point in either window. What we require instead is that the item come back complete and in resellable condition, and we can decline a return that does not. That is covered in The condition we accept. What a change-of-mind return can cost you is shipping, and that is covered in Who pays return shipping. On an item that is defective, damaged in transit, or not what you ordered, you pay nothing at all, and that is covered in Damaged, defective, or wrong item.
Lines that cannot come back
Three of the brands we resell are not returnable. Their manufacturers do not accept returns, and we are not able to take back an item we cannot send anywhere:
- Pet Door Guys
- Pet Door Products
- Utah Pet Access
All three are built to your measurements after you order, which puts them in the custom category below as well.
This is marked on the product page before you buy. If it is not marked on the page you are looking at, tell us, because that is a bug on our end and we will fix it.
A defect is different. If one of these arrives damaged, arrives wrong, or fails, you are covered by the warranty on it and by Damaged, defective, or wrong item below. Not returnable means you cannot send it back because you changed your mind. It does not mean you are on your own with a broken door.
The condition we accept
Returned items must come back in resellable condition. Concretely, that means:
- Complete. Every part that shipped with the door is in the box: frame or frames, flap, locking cover, hardware pack, screw covers, cutting template, and instructions.
- Unmodified. Nothing cut, trimmed, drilled, sanded, painted, or re-finished.
- No installation residue. No caulk, sealant, adhesive, paint, or foam on the frame, and no added screw holes.
- Undamaged. No dents, bends, cracks, or scratches beyond what a new unit has.
- No pet damage. No chew marks or claw punctures on the flap or frame.
- Repackable. Original box, or a box that protects the item as well as the original did.
Two things that do not cost you anything:
- A fit check is fine. You can hold the door in the opening, mark it, and take it back out. Temporarily setting it in place to test fit does not void your return as long as the item comes back meeting the six points above.
- Dust and pet hair are fine. We clean returned items. We do not charge a fee for a dirty item.
We can decline a return that comes back incomplete or modified. If that happens, we tell you what we found and what your options are before we do anything with your refund. You will not find out from the refund amount.
On a resold item, the manufacturer inspects it, not us. Their standard is what it has to meet, and we do not get to overrule them. Pack it well and send everything back.
What you cannot return
Installed doors. Once a door has been mounted, sealed, screwed in, or framed into a wall, door, or panel, it cannot come back. A fit check is not an installation. See The condition we accept.
Custom-built items. An item is custom when it is built to a measurement or specification you give us. That means:
- any panel or insert cut to your track height, door height, or glass opening
- any in-the-glass unit
- any item built to a dimension that is not one of our published stock sizes
- any item we or the manufacturer modify at your request
Made to order is not the same as custom. Many items here are built after you order them. If your item is a published stock size in a published color and flap option, it is returnable under this policy even though it was made for your order. Door mount and wall mount doors in standard sizes are returnable. Cut-to-size panel inserts and in-the-glass units are not.
Custom items are marked final sale on the product page, and that marking appears as soon as you select a custom option.
Options and upgrades added to a made-to-order item. Some products let you add an option or an upgrade that is not one of our published stock choices. When you do, that addition goes onto the order we send to the factory or the supplier who builds the item, and we are charged for it there. Those additions are final sale, and an item built with one cannot come back.
The three lines listed under Lines that cannot come back.
Items damaged by a pet or by misuse. Chewed, clawed, or forced parts cannot be returned for a refund, and no warranty on this site covers them either. Saying that here is better than sending you to a page that turns you down. What we can do is sell you the part. Replacement flaps and parts are available at any time, including for doors and brands we no longer stock. Email or call us with your door model and we can point you to the right one.
Damaged, defective, or wrong item
Visible damage or the wrong item. Contact us within 7 business days of delivery. Send photos of the item, the damage, and the shipping box including the label. We will replace it, repair it, or refund it. You pay nothing.
Concealed damage found at installation. Pet doors often sit in a box for weeks before anyone opens them. If you find shipping damage when you unbox the item to install it, contact us within 30 calendar days of delivery. Keep the box and all packing material. We may need photos of both to file a carrier claim, and on an item that shipped direct from the manufacturer they may need them too.
We pay all shipping on these returns, and no fee is deducted from your refund. That is true whether we shipped the item or the manufacturer did.
Come to us first, not to the manufacturer. On damage, a wrong item, or a shortage, we are the seller and it is ours to sort out, even when the box came from somebody else's dock. We will bring the supplier in where we need to.
Past 30 days we can no longer document shipping damage well enough to file a carrier claim, so damage reported after that is handled as a defect rather than as a shipping problem. Which remedy you get then is the next section, and inside your return window it is your choice.
A defect inside your return window: you choose
If your door fails inside your return window, 90 days on what we make and 30 days on what we resell, you decide which remedy you want. Return it for a refund under this policy, or keep it and take the warranty repair, which means the parts come to you at no cost. It is your call, not ours, and asking about one does not give up the other.
After the return window closes, the warranty is the route, for as long as that particular warranty runs. Terms on this site range from 30 days to the life of the product, and the Warranty page tells you which one you have.
Who pays return shipping
This is the part most people ask about, so here it is plainly.
We pay when the problem is ours:
- the item is defective
- the item arrived damaged
- we shipped the wrong item, size, or color against your order
We email you a prepaid label and you owe nothing.
You pay when you changed your mind:
- you ordered the wrong size
- you no longer need it
- it does not fit your door or your pet
- any other return that is not a defect, a shipping damage, or our error
We will email you a prepaid label and deduct its cost from your refund, or you can ship it back with your own carrier. If you ship it yourself, use tracking, and use the address on the RMA, not the address on the box. You are responsible for the item until it reaches the right warehouse.
Free U.S. shipping is the shipping that brings the door to you. It covers the outbound leg of your order and it has never covered return shipping.
Original shipping charges. If you paid an outbound shipping or freight charge, that charge is not refunded on a change-of-mind return.
If your order shipped free. On a change-of-mind return of an order that shipped under free U.S. shipping, we may deduct what that outbound shipment actually cost us from your refund. It is not an automatic deduction. When we do apply it, we tell you the amount before the refund goes through, so it is never a surprise on your statement.
How to start a return
- Request an RMA. Email customerservice@petdoors.com or call (800) 826-2871. Have your order number ready.
- We issue an RMA number and a return address. Do not use the address printed on the box you received, and do not send it to 254 Granada Drive by default. Many items go back to the manufacturer who shipped them, and that address is different for every brand. This is the single most common way a return goes wrong on this site.
- Ship within 14 calendar days of the date on your RMA. Include everything listed in The condition we accept. Write the RMA number on the outside of the box.
- Pack it properly. An item damaged in return transit because it was packed loose or in an undersized box may not come back resellable. If that happens, we tell you before we process your refund.
Items sent back without an RMA number are refused at the dock. We cannot refund an item we cannot identify, and a manufacturer will not accept an unannounced box from a customer at all.
If you miss the 14-day ship-by window: your RMA expires. Contact us and we will issue a new one at no charge. Your return is then measured by the date we actually receive the item, not by your original request date.
Refunds
Inspection. We inspect returns when they arrive and we email you the result, approved or not, with the reason and any deduction. We process returns during the business week, so a box that lands on a Friday is looked at the following week.
On an item that goes back to the manufacturer, they inspect it and we refund you once they confirm receipt and condition. That adds time we do not control, and we will tell you where it stands rather than leaving you to wonder.
Payment. Approved refunds go back to your original payment method within 10 business days of approval. That is the commitment, and we would rather hold a number we can hit in a busy week than publish a faster one and miss it.
We refund to the original payment method only. We cannot send a refund to a different card, account, or person.
What you get back:
- the item price
- sales tax charged on that item
What is deducted, when it applies:
- the cost of the return label, if we provided one on a change-of-mind return
- our outbound shipping cost on a change-of-mind return of an order that shipped free, if we apply it (see Who pays return shipping)
- original outbound shipping you paid is not refunded
Bank posting time. Once we send the refund, your bank or card issuer controls when it appears, usually 3 to 10 days. That gap is on their side, not ours. If more than 15 business days have passed since we told you the refund was approved and you still do not see it, email customerservice@petdoors.com.
Exchanges
We do not offer exchanges. Return the item you have, and place a separate order for the one you want. That is faster than an exchange, because your new order goes into production or out to the supplier immediately instead of waiting on the return to arrive.
International orders
We do not sell or ship to the European Union, the European Economic Area, the United Kingdom, or Switzerland.
For international orders we do accept:
- We pay the freight when the fault is ours. If the item is defective, arrived damaged, or is not what you ordered, we pay to get it back and to get the right one to you, wherever we shipped the original order. Outside the continental United States is no exception.
- You pay return shipping on any return that is not a defect, damage, or our error.
- Duties, taxes, and customs fees are not refundable by us. Some countries refund them on export. That claim is between you and your customs authority. The same is true of duties on a warranty part.
- We have to receive an international return within 100 days of your order date. An international refund has to be matched back to the original charge, and banking rules limit how long that stays possible. Request your RMA inside your return window and ship it promptly and this will not come up.
- Some resold products cannot ship outside the United States at all, because their manufacturer does not permit it. That is decided before you order, not after. If you are ordering from outside the U.S., check the product page or ask us first.
Order cancellations and shipping delays
Cancelling an order, revised ship dates, and what happens if we cannot ship in the time we stated are covered by the Shipping Policy. Refund timing on a cancelled order is the same as on any other refund, and it is under Refunds above.
Pricing and typographical errors
Prices, specifications, and product descriptions on this site are occasionally wrong. What we do when that happens, including your right to a full refund and to buy the item at the correct price, is set out under Prices and errors in our Terms & Privacy. We keep the full statement in one place so there is only one version of it.
Contact
Patio Pacific, Inc.
254 Granada Drive
San Luis Obispo, CA 93401
(800) 826-2871
customerservice@petdoors.com
Monday to Friday, 7:00 AM to 4:30 PM Pacific, excluding major holidays.
Do not ship a return to this address without an RMA number and a return address from us. On this site, many returns do not come here at all.
v2026.1, effective August 21, 2026

Monorail Adapters
 Product Details
 Sizing & Fit
 Installation Guide
 Videos
 FAQs
FAQs
 Reviews
 Product Details
Product Details
Monorail sliding glass doors often leave standard patio inserts with too much room to shift, tilt, or feel unsupported. This adapter solves that problem by creating a defined channel that holds your Thermo Panel firmly in place. The result is a more stable installation that feels intentional, not improvised.
Once installed, the adapter improves how the panel sits within the track, reducing side-to-side movement and helping maintain consistent alignment over time. This added stability can make everyday use smoother, especially in homes with active pets or frequent door traffic.
The design is straightforward and purpose-built for Endura aluminum panels, ensuring compatibility without the need for workarounds. Pre-punched guide holes help position the adapter correctly, while final drilling allows it to be securely fastened for long-term use.
While the Thermo Panel itself is typically tool-free, the adapter adds a more anchored solution for monorail systems that benefit from additional support. It remains removable if needed, making it a practical option for both permanent and transitional living situations.
In colder climates, some airflow or condensation may still occur due to the nature of monorail systems, but the adapter helps reduce excess gaps and improves overall fit compared to unsupported installations.
 Sizing & Fit
Size Chart
| PET DOOR SIZE | FLAP DIMENSION |
|---|---|
|
Endura Flap Pet Doors |
|
| Small | 6" w x 11" h |
| Medium | 8" w x 15" h |
| Large | 10" w x 19" h |
| Extra Large | 12" w x 23" h |
| XXL | 14" w x 27" h |
|
Liberty Pet Doors |
|
| Cat Door | 7"w x 8"h |
| Small | 5"w x 12"h |
| Medium | 7"w x 16"h |
| Large | 9"w x 20"h |
| Extra Large | 11"w x 24"h |
| XXL | 13"w x 28"h |
Do not know which size to get? Here is a measurement guide to help you out
 Installation Guide
Installation Information
Monorail Adapter
 Difficulty
Moderate
Difficulty
Moderate
 Steps
6
Steps
6
 Time Required
.5 hours
Time Required
.5 hours
Parts
- Monorail Adapter
- 2 10-24 Stainless Steel Acorn nuts
- 2 10-24 x 1-1/8" Stainless Steel Screws
Tools
- Drill with a 3/8“ bit for drilling metal
- Clamps (Optional, but helpful)
Before drilling into your panel, test fit which side of the monorail adapter (1” or 1-1/2") depth will fit over your track the best without any gaps.
Step 1 Test Fit the Adapter

Step 2 Lay the Panel Flat & Drill the Holes

Step 3 Apply Weatherstripping

Step 4 Position In Slider Track


Step 5 Bolt on monorail

Step 6 Release Height Adjustment Mechanism

 Videos
Videos
Monorail adapapter
 FAQs
FAQs
FAQ
 Reviews
Customer Reviews


Request Freight Quote
Track heights exceeding 106 inches (107" or higher) may require additional shipping charges. Please provide your contact information for a custom freight quote, and our team will follow up during normal business hours.
