


Ideal Screen-Fit Pet Door


- Fits window and door screens for small dogs and cats
- Clear flap dimensions: 8 3/4" width x 10 1/4" height
- Durable plastic, neutral grey frame with a 2-way lock
- Quick and easy installation
- Magnetic closure prevents bugs from entering
- 2-way lock allows you to secure the flap when needed
 Product Details
Product Details
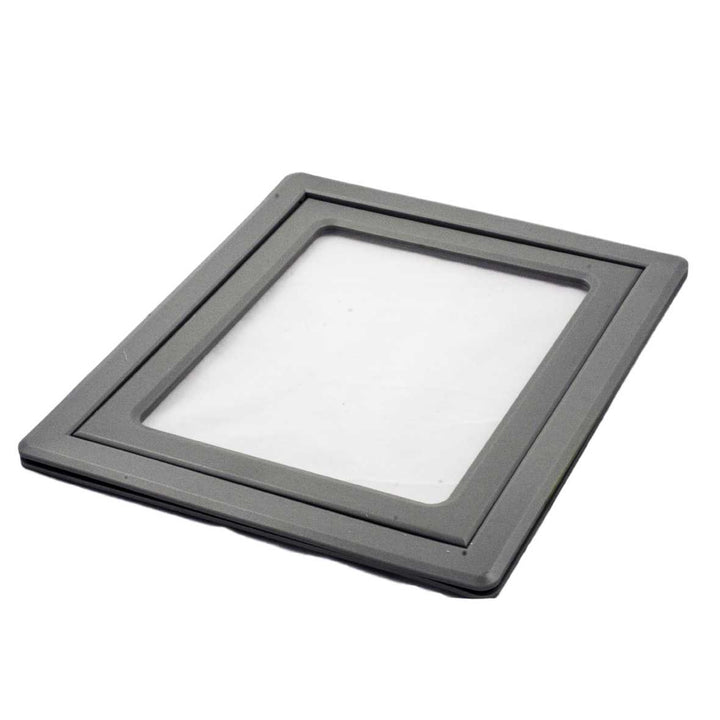
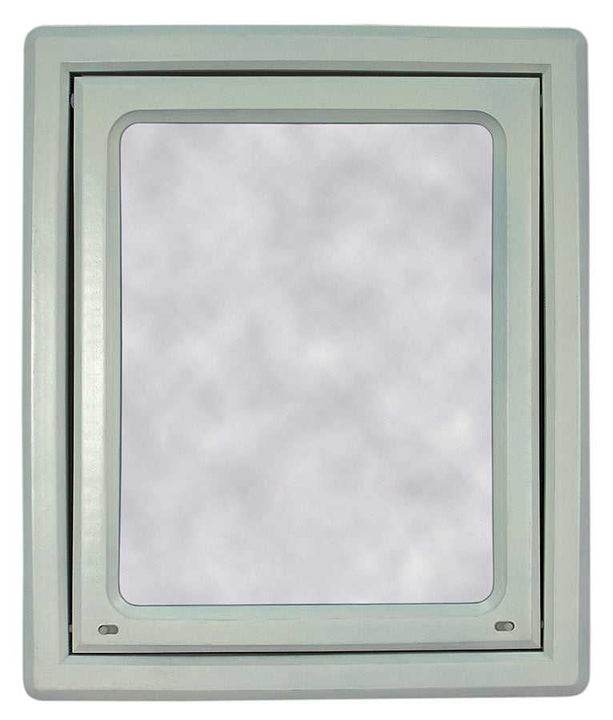
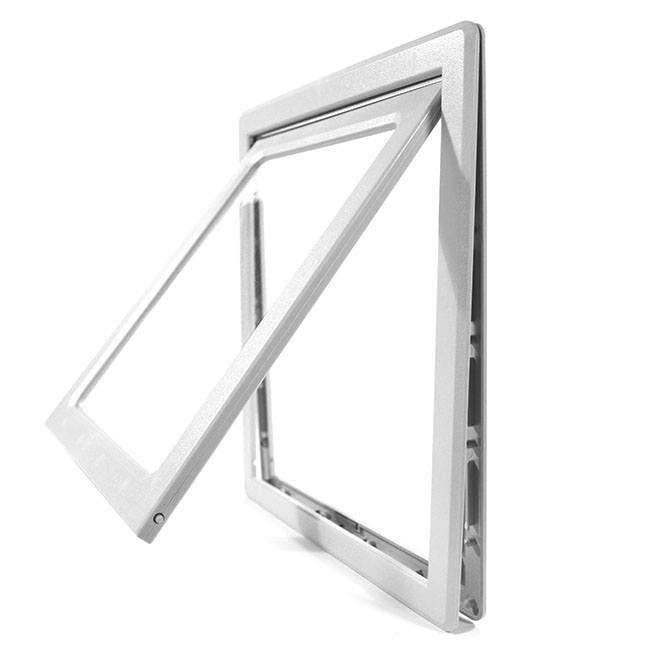
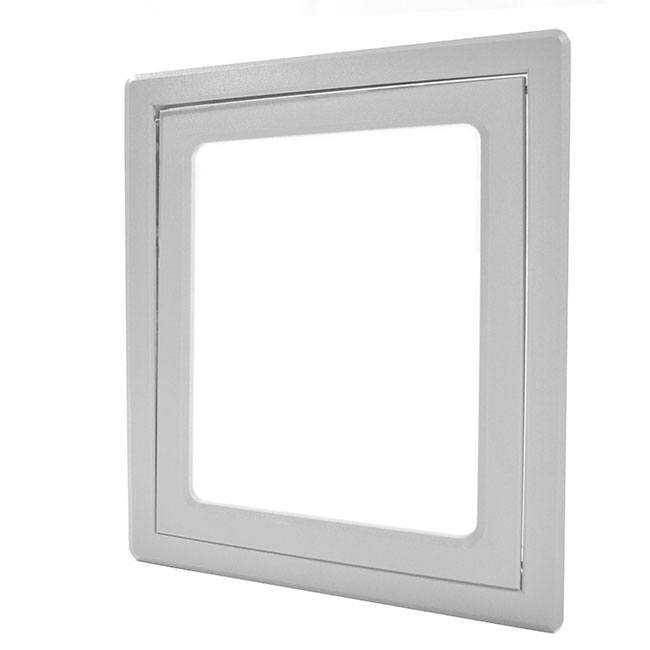
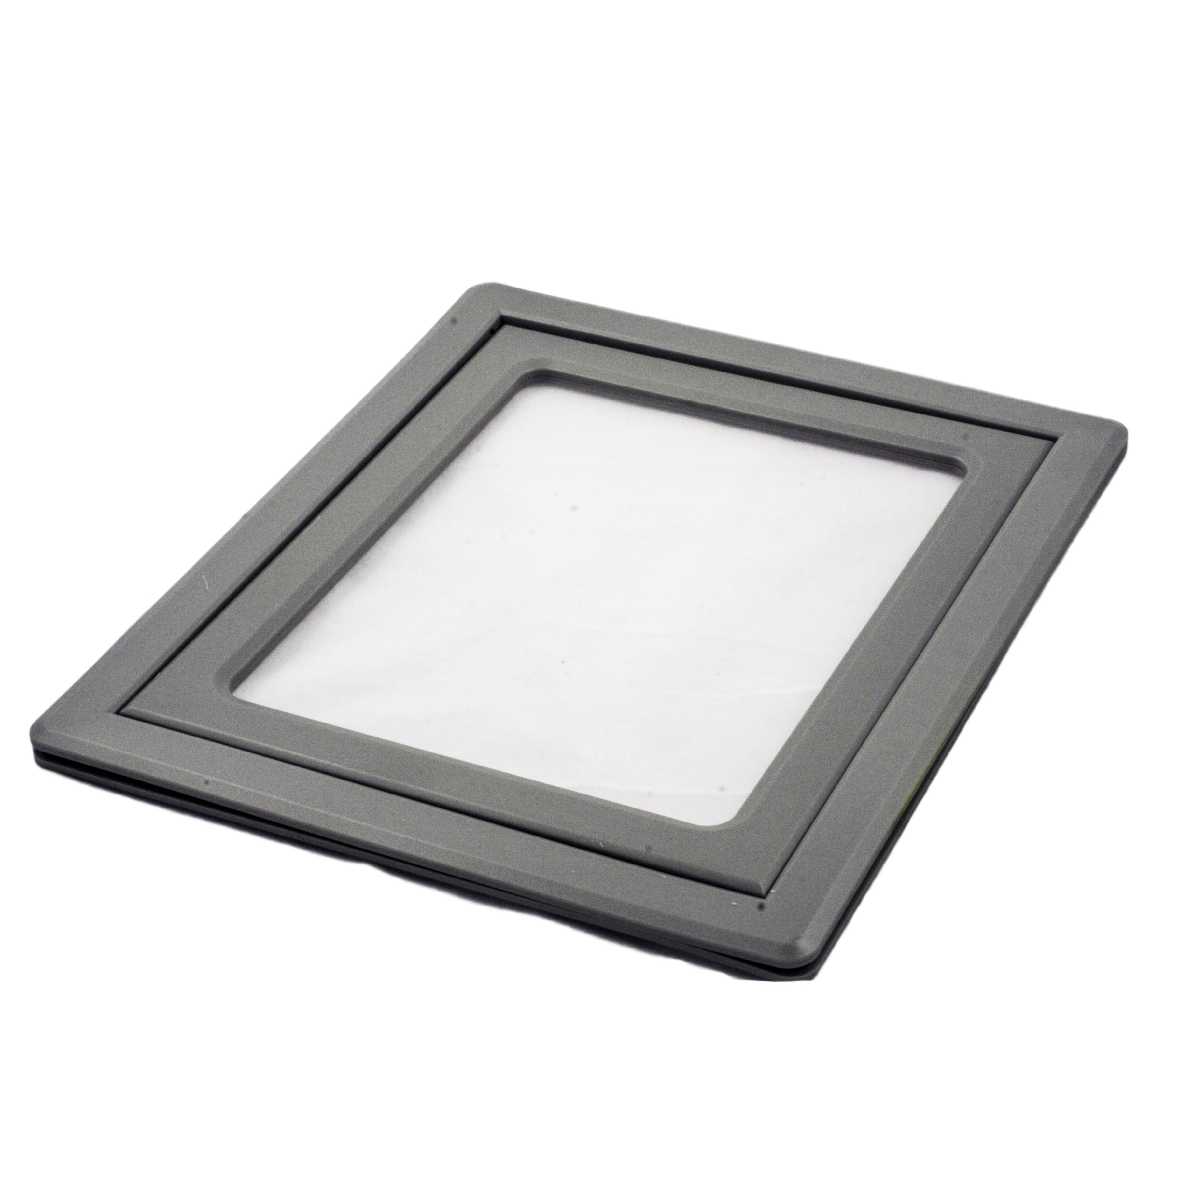
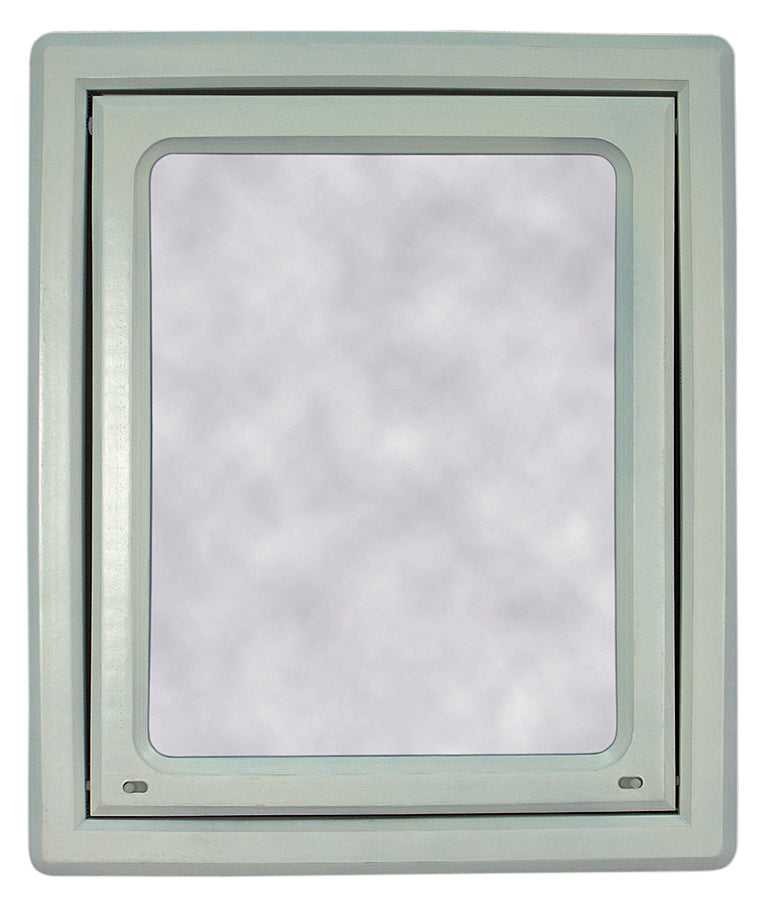
The Ideal Screen-Fit Pet Door is designed to grant your furry friend the freedom they deserve while keeping your home comfortable and bug-free. This pet door is perfect for small dogs and cats, seamlessly fitting into your existing window, sliding door, or storm door screen. The clear, ABS plastic flap is sturdy and easy for your pet to use, providing them with the independence they crave.
The durable plastic frame comes in a neutral grey color, blending effortlessly with any home decor. The magnetic closure on the flap ensures a tight seal, keeping pesky bugs from entering your home. For added security, the 2-way lock allows you to secure the flap when needed, giving you peace of mind.
Installation is quick and easy, allowing you to enjoy the benefits of this pet door in no time. The Ideal Screen-Fit Pet Door has proven to be a great solution for pet owners looking to grant their pets freedom without sacrificing their home's comfort. The pet door is suitable for small dogs up to 20 lbs and cats, making it versatile and accommodating to your needs.
With dimensions of 8 3/4" width x 10 1/4" height, this pet door is an excellent addition to any home. Enjoy the benefits of allowing your pet to come and go as they please while keeping your home secure and bug-free. The Ideal Screen-Fit Pet Door is the perfect solution for giving your pet the freedom they deserve.
Features:
- Accommodates both small dogs and cats for versatile use
- Clear, ABS plastic flap is sturdy and easy to use
- Installs in window, sliding door, and storm door screens
- Two-way lock for added security when not in use
- Prevents bugs from entering with magnetic closure
Benefits:
- Simple installation
- Works for small dogs and cats
- Pets no longer claw the screen to be let out
- Pets can come in and out as they please
- Allows you to have the screen door open but the sliding door closed
- Much easier than cutting holes in a door or wall


Size Chart
- Ideal Screen Fit Cat Door8 3/4"w x 10 1/4"h
Flap Dimensions:
8 3/4"w x 10 1/4"h
The entry way your dog goes through.

Outside Frame Dimensions:
10 5/8"w x 12 5/8"h
The outer edge of the pet door.| Flap Size | Flap Dimension | Outside Frame Dimension | Recommended Pet Height |
|---|---|---|---|
| Ideal Screen Fit Pet Door | 8 3⁄4" w x 10 1⁄4" h | 10 5⁄8" w x 12 5⁄8" h | 8" - 16" |
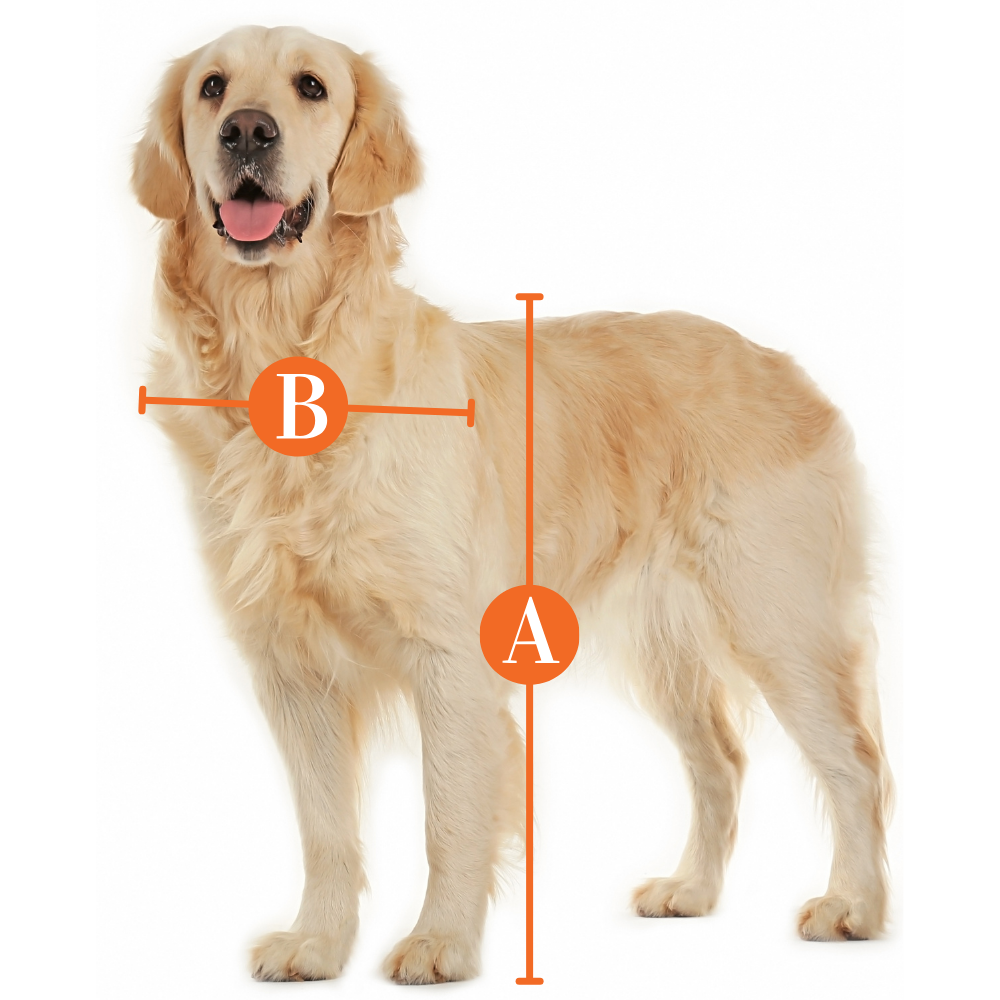
Do not know which flap size to get? Here is a measurement guide to help you out.
Find The Best Pet Door Size For My Pet

A
Pet Height: inches
B
Pet Width: inches
Installation Instructions
 Difficulty
Easy
Difficulty
Easy
 Steps
07
Steps
07
 Time Required
1-2 hours
Time Required
1-2 hours
 Sections
01
Sections
01
 Flags
01
Flags
01
Parts
- Outside Frame
- Flap Assembly
- Inside Frame
Tools
- Utility Knife
- Mallet
Please read instructions & notes thoroughly before installation.
Step 1 Select Installation Location

- Select a screen for installation and remove the window or door screen from its frame.
Step 2 Prepare the Screen

- Lay the exterior side of the screen down on a flat, hard surface.
Step 3 Measure Your Pet

- Measure your pet from the floor to the top of their shoulder.
- The top of the frame should be installed 2” above your pet's shoulders. It is also recommended you install the door at least 2” away from the frame to protect the door.
Step 4 Position the Outside Frame

- Put the outside of the frame, with the magnet facing the bottom of the door, under the screen.
- Align the bottom and side edges with the outside of the frame.
- Use a sharp utility knife to cut horizontal slits in the screen at both top hinge groove locations (Fig. 1).
Step 5 Position the Inside Frame

- Place the flap assembly in the outside frame with the slide locks facing you. Do this by aligning both hinge posts at the top of the flap assembly with both hinge groove locations at the top of the frame.
- After, place the inside frame on top of the outside frame and align the cavities and posts (Fig. 2).
- Once aligned, use a mallet to carefully tap the frame together all around, sealing all gaps between the frames. This secures the flap assembly in place and holds the frames to the screen.
Step 6 Cut the Screen

- Hold the flap up and cut the screen around the inner portion of the door with a sharp utility knife (Fig. 3).
- Trim away any excess screen from the inside, as it prevents the flap assembly from swinging freely (Fig. 4).
Step 7 Re-install the Screen

- Reinstall the screen panel into window or door frame.
Videos
Ideal Screen-Fit Pet Door
FAQ
|
What is the frame made of? This dog door is made of durable plastic. |
|
What is the flap made of? The pet door flap is made of a thin sheet of clear plastic. |
|
Do I have to attach this to the frame? No, this cat door installs directly through the screen material, making it an easy installation. |
|
Would this door be good for active pets? Since it is only held in place by the screen it is not as durable as the type that installs by screwing onto the frame. That is why we recommend that this be used as a smaller dog or cat flap for less active pets. |
|
What colors does it come in? These door models only come in a light grey, but as a great DIY project, you could easily paint the frame to your liking. |
|
Could this be installed through a thin metal plate? Since this is meant to be installed only through screen door or patio door, it wouldn't work if you tried to install it through other materials. |
|
Do I need to have a special screen? It is pretty lightweight, so it would be fine installing on virtually any type of screen. However, if you have the thicker pet screen or screen guard, you would need to make sure that you were able to get the pins all the way through so that is remains attached. |
|
What tools do I need to install it? You will need a sharp knife to be able to cut the screen and a rubber mallet to tap the frames together. |
|
How do I lock it? For your convenient use, at the bottom of the flap in each corner of the screen guard pet door, there are small pins that you can easily slide back and forth to close it off. |
|
Can bugs get in? For better quality to prevent this, the gap around the frame and the flap of the screen pet door is purposely very small, making it tough for bugs to get through. |
|
How much does shipping cost? Shipping is calculated at checkout. |
Warranty
Superseding Warranty: The provided warranty supersedes any previous warranties, and any existing warranties will now follow the terms of this new warranty.
Duration: There is a One Year Warranty from the purchase date.
Coverage:
The product is warranted to be free from manufacturer’s defects in workmanship and materials.
Only the original purchaser can claim this warranty, and it's non-transferable.
In case of valid claims, defective parts will be replaced at no charge. No refunds are given.
Exclusions:
The product is not waterproof against inclement weather or excessive water exposure.
Warranty is voided by improper installation, intentional misuse, unauthorized repairs, non-compliance with manufacturer's instructions, or commercial use.
The product should be used for domesticated animals only. Damage or defects caused by acts of God, criminal activity, dog abuse, unauthorized entry by non-domestic animals, children's use, or any unintended misuse are not covered.
Customer Reviews

Size Chart
- Ideal Screen Fit Cat Door8 3/4"w x 10 1/4"h
Flap Dimensions:
8 3/4"w x 10 1/4"h
The entry way your dog goes through. Outside Frame Dimensions:
10 5/8"w x 12 5/8"h
The outer edge of the pet door.| Flap Size | Flap Dimension | Outside Frame Dimension | Recommended Pet Height |
|---|---|---|---|
| Ideal Screen Fit Pet Door | 8 3⁄4" w x 10 1⁄4" h | 10 5⁄8" w x 12 5⁄8" h | 8" - 16" |
Do not know which flap size to get? Here is a measurement guide to help you out.
Find The Best Pet Door Size For My Pet
A
Pet Height: inches
B
Pet Width: inches
Installation Instructions
Difficulty
Easy
Steps
07
Time Required
1-2 hours
Sections
01
Flags
01
Parts
- Outside Frame
- Flap Assembly
- Inside Frame
Tools
- Utility Knife
- Mallet
Please read instructions & notes thoroughly before installation.
Step 1 Select Installation Location
- Select a screen for installation and remove the window or door screen from its frame.
Step 2 Prepare the Screen
- Lay the exterior side of the screen down on a flat, hard surface.
Step 3 Measure Your Pet
- Measure your pet from the floor to the top of their shoulder.
- The top of the frame should be installed 2” above your pet's shoulders. It is also recommended you install the door at least 2” away from the frame to protect the door.
Step 4 Position the Outside Frame
- Put the outside of the frame, with the magnet facing the bottom of the door, under the screen.
- Align the bottom and side edges with the outside of the frame.
- Use a sharp utility knife to cut horizontal slits in the screen at both top hinge groove locations (Fig. 1).
Step 5 Position the Inside Frame
- Place the flap assembly in the outside frame with the slide locks facing you. Do this by aligning both hinge posts at the top of the flap assembly with both hinge groove locations at the top of the frame.
- After, place the inside frame on top of the outside frame and align the cavities and posts (Fig. 2).
- Once aligned, use a mallet to carefully tap the frame together all around, sealing all gaps between the frames. This secures the flap assembly in place and holds the frames to the screen.
Step 6 Cut the Screen
- Hold the flap up and cut the screen around the inner portion of the door with a sharp utility knife (Fig. 3).
- Trim away any excess screen from the inside, as it prevents the flap assembly from swinging freely (Fig. 4).
Step 7 Re-install the Screen
- Reinstall the screen panel into window or door frame.
Videos
Ideal Screen-Fit Pet Door
FAQ
|
What is the frame made of? This dog door is made of durable plastic. |
|
What is the flap made of? The pet door flap is made of a thin sheet of clear plastic. |
|
Do I have to attach this to the frame? No, this cat door installs directly through the screen material, making it an easy installation. |
|
Would this door be good for active pets? Since it is only held in place by the screen it is not as durable as the type that installs by screwing onto the frame. That is why we recommend that this be used as a smaller dog or cat flap for less active pets. |
|
What colors does it come in? These door models only come in a light grey, but as a great DIY project, you could easily paint the frame to your liking. |
|
Could this be installed through a thin metal plate? Since this is meant to be installed only through screen door or patio door, it wouldn't work if you tried to install it through other materials. |
|
Do I need to have a special screen? It is pretty lightweight, so it would be fine installing on virtually any type of screen. However, if you have the thicker pet screen or screen guard, you would need to make sure that you were able to get the pins all the way through so that is remains attached. |
|
What tools do I need to install it? You will need a sharp knife to be able to cut the screen and a rubber mallet to tap the frames together. |
|
How do I lock it? For your convenient use, at the bottom of the flap in each corner of the screen guard pet door, there are small pins that you can easily slide back and forth to close it off. |
|
Can bugs get in? For better quality to prevent this, the gap around the frame and the flap of the screen pet door is purposely very small, making it tough for bugs to get through. |
|
How much does shipping cost? Shipping is calculated at checkout. |
Warranty
Superseding Warranty: The provided warranty supersedes any previous warranties, and any existing warranties will now follow the terms of this new warranty.
Duration: There is a One Year Warranty from the purchase date.
Coverage:
The product is warranted to be free from manufacturer’s defects in workmanship and materials.
Only the original purchaser can claim this warranty, and it's non-transferable.
In case of valid claims, defective parts will be replaced at no charge. No refunds are given.
Exclusions:
The product is not waterproof against inclement weather or excessive water exposure.
Warranty is voided by improper installation, intentional misuse, unauthorized repairs, non-compliance with manufacturer's instructions, or commercial use.
The product should be used for domesticated animals only. Damage or defects caused by acts of God, criminal activity, dog abuse, unauthorized entry by non-domestic animals, children's use, or any unintended misuse are not covered.