How Can I Install A Patio Pet Door If My Sliders Meet In The Middle?
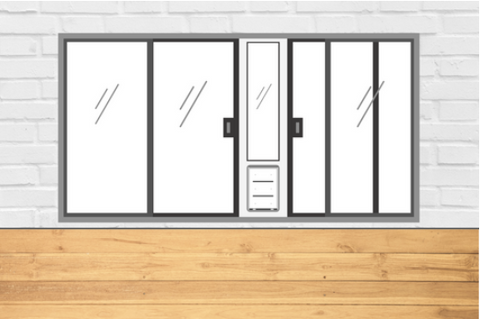
Installation can work the same way as with standard sliding doors. In order for the panel insert to remain secure and stable, you will need to make one of your sliders stationary. In essence, you will only be allowed to slide and walk through one of your two sliders.
Related Questions
-
DIY Dog & Cat Door Installation Guide
Time required: 30 m - 2 hr | Skill level: Intermediate
Installing a pet door on your own is a cost-effective alternative to hiring a professional to do the job for you. Although installation will vary by style and brand, you’ll generally need the following tools: pen, tape, hammer, jigsaw, drill & drill bits, screwdriver, tape measure, and level. We'll discuss the most common type of installation: a pet door for doors.
For trickier installations, such as wall pet doors, we recommend hiring a professional unless you are completely very with the installation process. If you need help finding an installer in your area, please visit our Professional Pet Door Installation page for recommendations.
If you are a DIY master, you can find specific pet door installation guides at the end of this page.
How to Install a Dog Door in a Door
The following steps outline the general process of choosing and installing a dog door in your door. Installing a cat door in a door follows almost the exact same process, with only a few minor differences that we’ll discuss later. The basic steps required to install a dog door in a door are:
1. Preparation
The first step is to choose a pet door that meets your needs. It’s important to consider which style, size, and flap material will work best for your home and pet.
If you have a very active dog, a high-quality door will withstand heavy use, whereas an average-quality door might start to break down over time. However, if you are looking for a temporary, quick-fix for letting your pet come and go an average-quality door might be the perfect solution. You’ll also want to consider the type of door that you have to ensure it will work with the pet door you choose.
2. Measurement (Width, Height & Step-Over)
Once you've decided what kind of pet door you want to buy, you need to ensure you pick the correct size. Measuring your pet is crucial when buying a pet door. Choosing the correct flap size determines how comfortably your pet can move through the door, so it’s important not to guess here. You’ll need to consider the following information when measuring your pet:
Width:
The width of the pet door should be about 2” wider than the widest part of your pet for comfortable use. A simple way to do this is to open your door just wide enough for your pet to come through (you can motivate them with their favorite toy or treat). This amount of space is all you need, but sizing up 2” is a good idea to account for any future growth.
Height:
The top of the pet door flap should be at least 1” above the tallest point on your pet’s back. Have your pet stand and measure from the floor to the top of their withers. Add 2” to that height, as your pet will naturally duck their head to move through the door, raising their back slightly.
Step-Over:
The “Step-Over” is the distance from the ground to the bottom of the pet door flap—the area that your pet needs to step up or down from to use the door. For maximum ease of use, the step-over height should never exceed ⅓ of your pet’s height.
Follow this equation to determine where you need to make the cutout in your door:
Flap Height + Step-Over = Top of Pet Door Flap
Once you’ve measured for width, height, and step-over, you can select the perfect flap size for your dog. Remember to leave at least 3” below the cutout to maintain the integrity of your door.
For homes with multiple pets, you’ll want to make sure that your largest dog can fit through the pet door. Keep in mind this might require a heavier flap that is hard for a very small dog to push through.
Check out this video on How to Measure Your Pet or our Measurement Guide Page for more details.
3. Choose the Installation Location
Before installing a pet door, it’s important to consider the optimal location for your home. Here are a few key things to keep in mind when installing a dog door in a door:
Accessibility:
The dog door should be installed in a door that is accessible by your pet—ideally, in a door near their main living area. You also have the option of installing the dog door in an interior or exterior door as discussed below:
- Exterior Doors: The most common installation location, an exterior door allows your pet outdoor access. Make sure your yard is completely fenced off before installing the door.
- Interior Doors: A less common but handy installation location, an interior dog door allows your pet access to different areas of the home. For instance, they can leave the bedroom at night without waking you up to open the door for them.
Ease of Installation:
Every door is different, so it’s important to consider ease of installation when selecting which door you want to install the doggie door in. A regular hollow core door is the easiest to install a pet door in, and the complexity increases with different designs and materials such as metal, solid, and panel doors. This is because a door with a very solid or uneven surface will require a little more handiwork than a flat-surface, hollow door. Keep in mind your skill-level when considering which door to install the doggie door in.
Aesthetics:
Installing a pet door impacts the dynamic of your home. You should expect your pet to spend plenty of time around the area where the door is installed. You might want to rearrange the furniture accordingly to account for higher traffic through this space.
Pet doors come in a variety of colors and materials, so you can select whichever you think will best match your door.
4. Install the Dog Door
Now that you’ve chosen the perfect pet door and decided where to install it, you’re ready to get to work. The manufacturer of the pet door you purchase will likely provide more detailed instructions specific to your pet door, so make sure to read them.
Once your new pet door arrives and you have decided where to install it, you'll need a few tools. In most cases, you will need the following:
- Pencil
- Painters Tape
- Hammer
- Jigsaw
- Tape Measure
- Drill & Drill Bits
- Screwdriver
- Level
- Safety Equipment (gloves & eye protection)
These are the general steps for installing a dog door in your door:
Step 1: Tape the Provided Template on the Door
Tape the template that came with your pet door kit where you want to make the rough cutout (remember to leave at least 3” at the bottom of the door).
Step 2: Mark the Drilling Points
To make drilling easy and accurate, consider making four X marks on the inner corners of the outline if not already drawn on.
Step 3: Drill the Holes
Take a 1/2-inch drill bit and drill holes in the center of the “X” marks at each corner. While doing so, make sure that the holes do not go past the outline.
If the pet door requires screws to fasten it to the house door, drill the screw holes you marked initially using a 3/8-inch drill bit or whatever bit size the manufacturer has recommended.
Step 4: Mark the Rough Cutout
Remove the pet door template from the door. Apply tape to connect the four holes you drilled. Use a pen to draw lines connecting the outsides of each hole.
Step 5: Cut the Opening
To cut the opening, consider using a jigsaw. Begin in one corner and insert the blade into the ½-inch drill hole. Carefully continue along the pencil line to cut the outline of the pet door
Step 6: Insert the Frames into the Rough Cutout
Place the interior and exterior frames on either side of the door. Make sure the frames are flushed with the surface of the door. Use a level to make sure the frames are even on both sides. Optional: You can use caulking to seal up any gaps on uneven doors. Use a level to make sure the frames are straight and aligned properly.
Step 7: Screw the Frame into the Door
Hold the pet door in place and tighten the screws. Make sure you tighten them until they are just fixed and not overly tightened.
You might also want to add caulk to the inner side of the outer frame to make sure no air leaks. This is especially important for installation in panel doors.
After you have successfully installed and sealed the pet door, it is time to introduce your furry friend to their new entrance. Check out our tips on Training Your Pet to Use a Pet Door for more info.
DIY Pet Door Installation FAQs
How much does it cost to install a doggy door?
Installing a doggy door yourself is free if you have the right tools. Although installation varies by brand, this process will generally require a drill, level, jigsaw, screwdriver, and some measuring tape. If you have the required tools on hand, a DIY installation will be the most cost-effective option (if you do it right).
How far up should I install the pet door?
Pet doors must be installed at least 1" above the tallest part of the dog's back and at least 3" from the floor. We recommend measuring your pets to find a comfortable step-over range so you can install it in the perfect place for them.
It’s important to also keep in mind that the step-over should be no more than a third of your pet’s height. This allows them to move easily through the door and accounts for decreased mobility with age.
See how to measure your pet for a pet door. Each manufacturer will also have specific recommendations included in the installation instructions.
How long does it take to Install a Dog Door?
That depends on your level of comfort with the installation process, as well as the type of dog door you’re installing. A sliding pet door panel takes a few minutes, whereas a door or wall mount takes 1-2 hours. If you are a more handy person, the installation process will likely be easier and take less time. You can contact our customer service team for installation tips to help with this process.
How do you Install a Dog Door in a Panel Door?
The process of installing a dog door in a panel door is largely the same as any other type of door. You will, however, need to caulk around the edges of the pet door frame to fill any gaps between the frame and the door. Installing the pet door towards the center of the door (rather than in one of the panels) is still the most effective method for maintaining the integrity of the door.