Hale Pet Door for Screens
- Regular price
- $239.99
- Sale price
- $239.99
- Regular price
-
- Unit price
- per
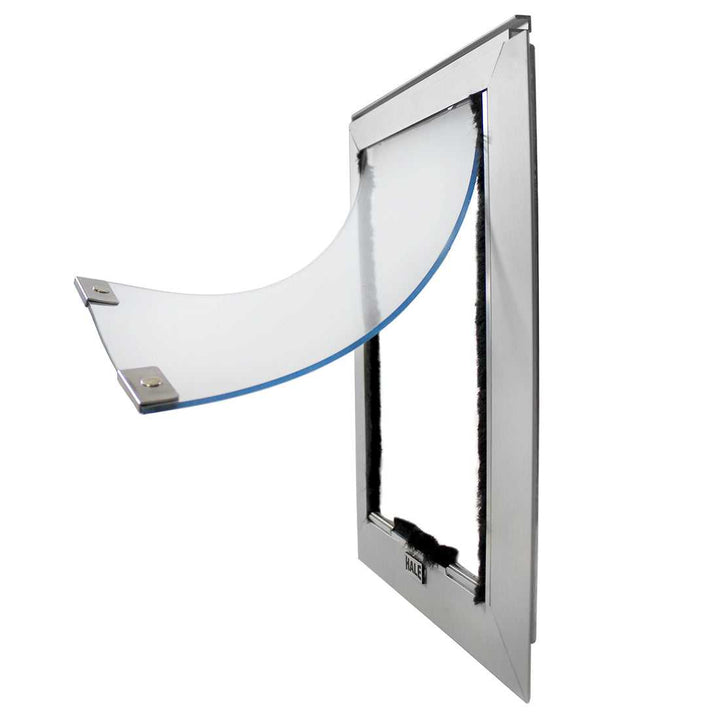
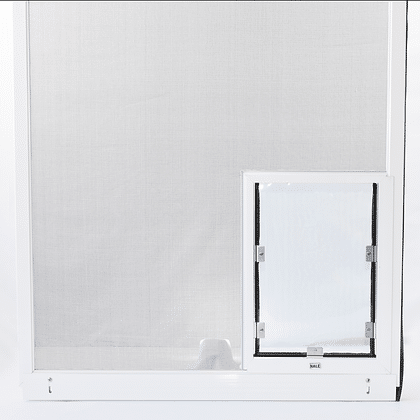
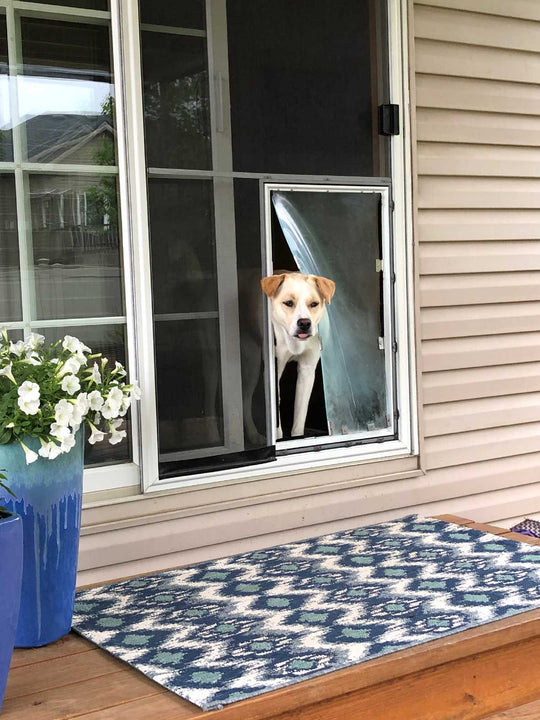
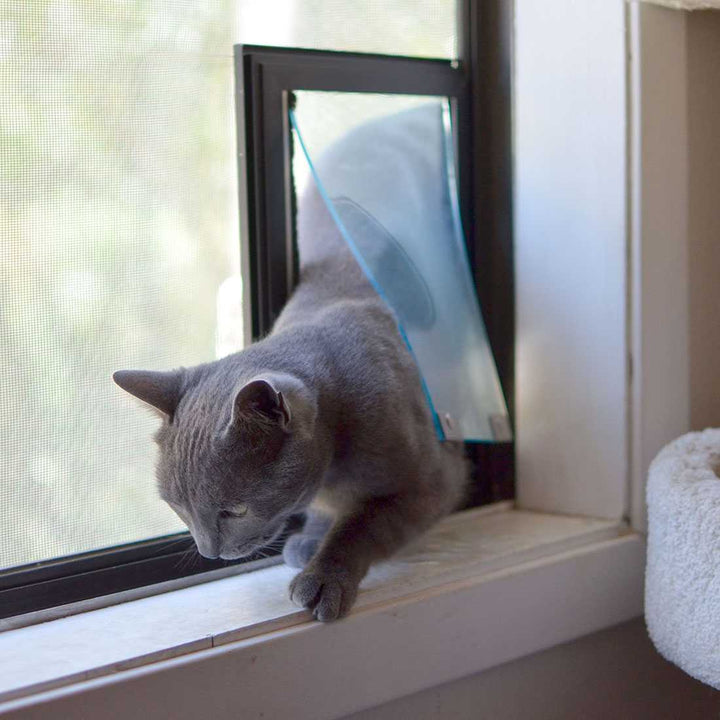
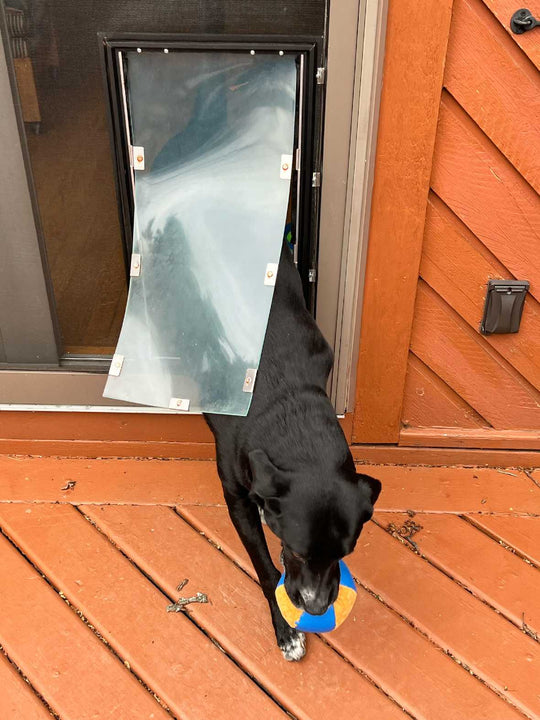
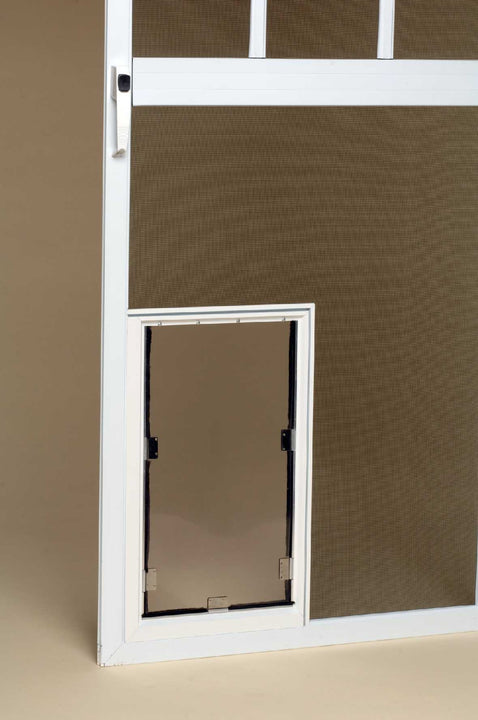
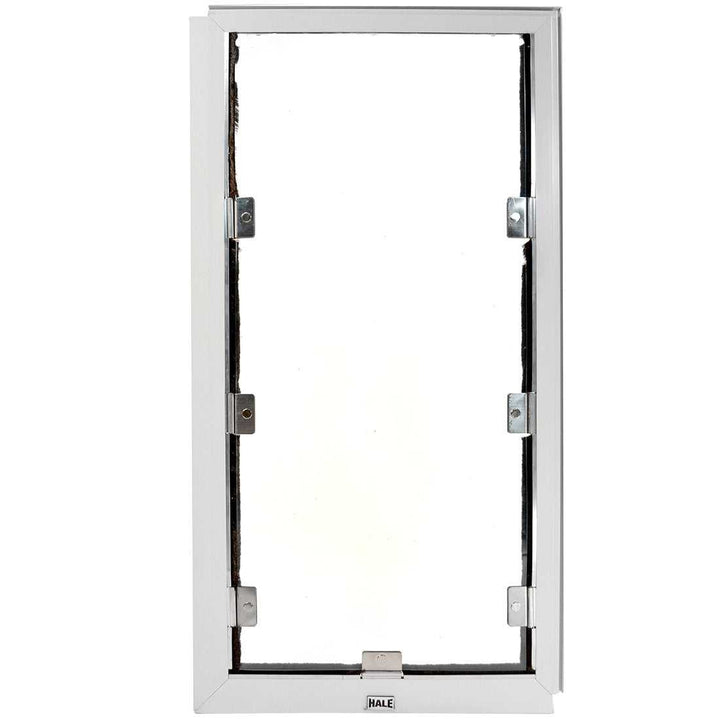
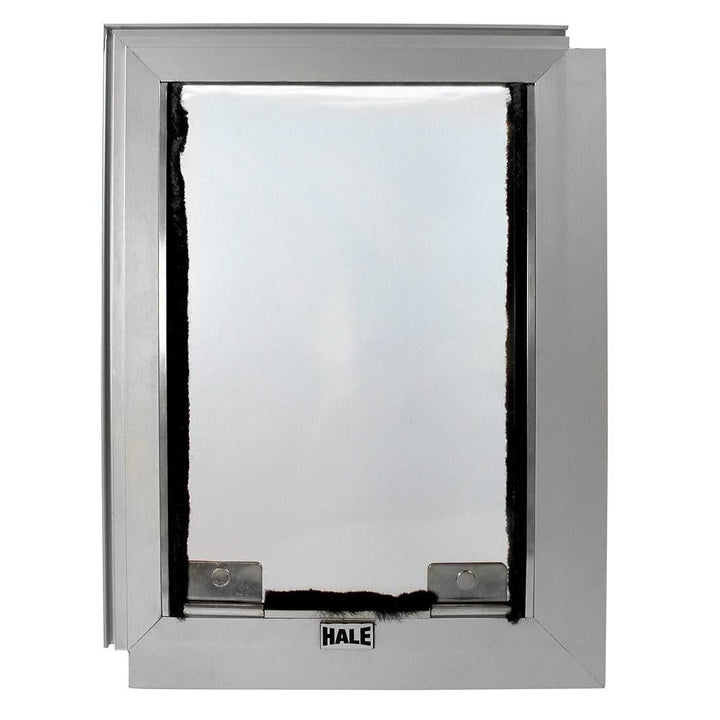
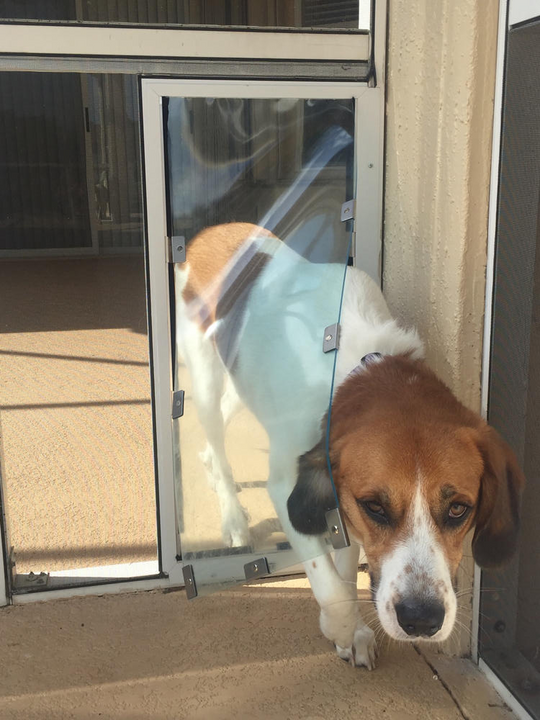
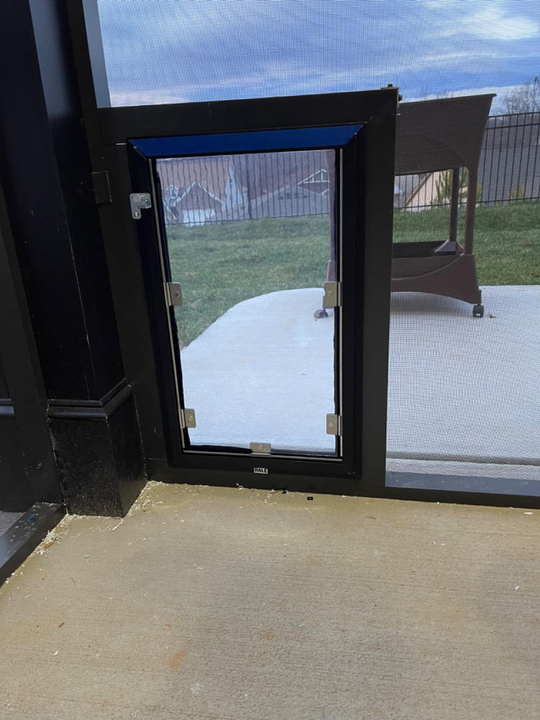
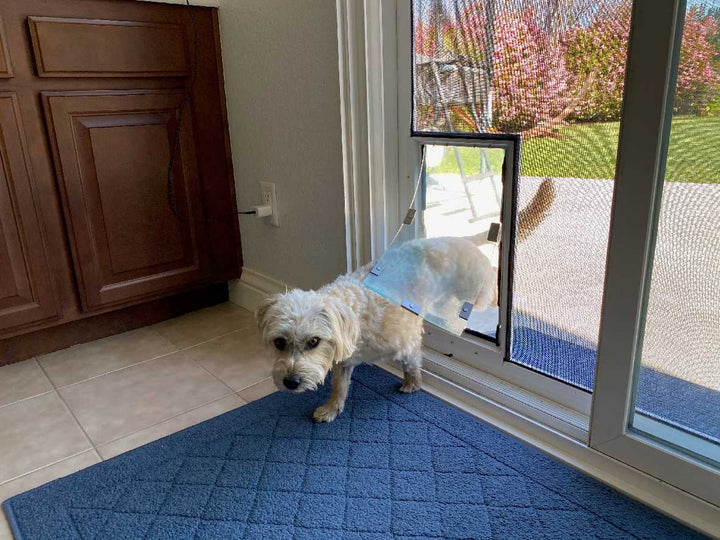
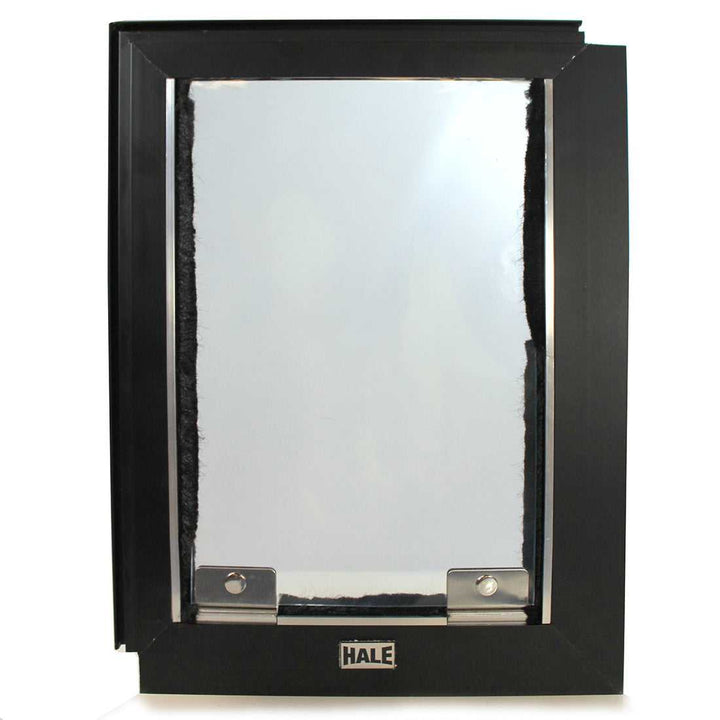
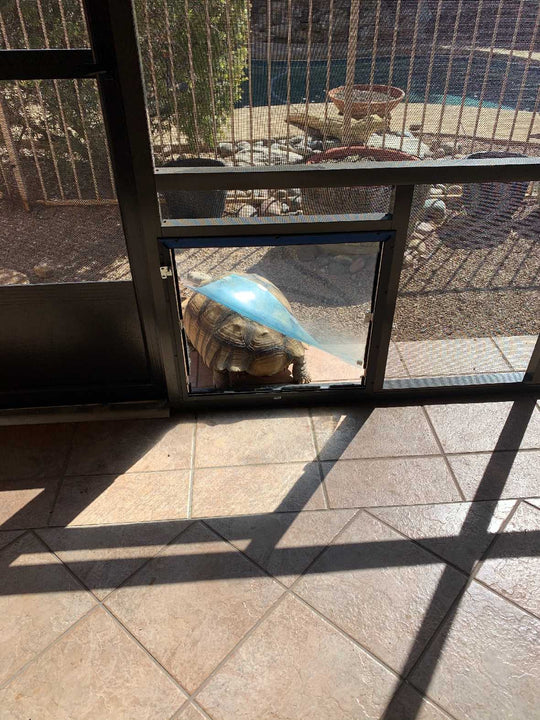
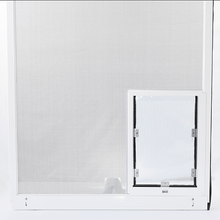
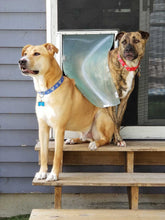
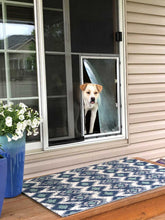
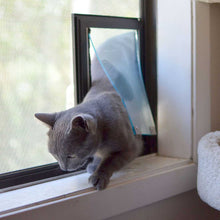
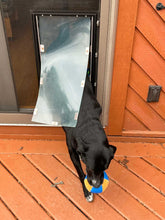
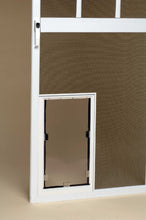
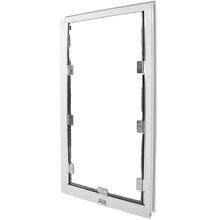
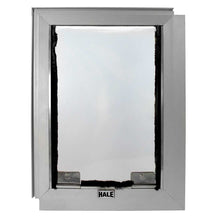
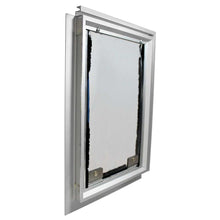
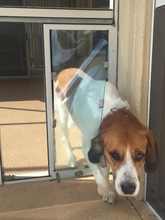
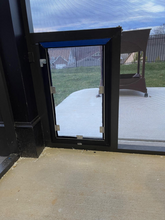
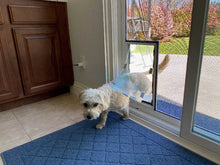
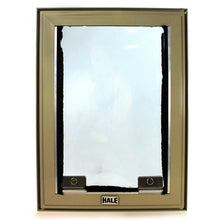
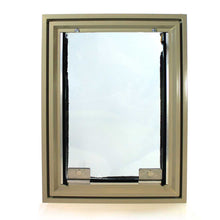
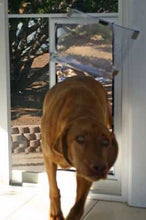
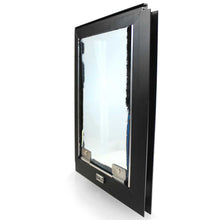
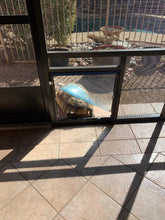
- Designed for screen enclosures, doors, and porches, offering pets the freedom to come and go without compromising airflow or visibility.
- Available in 11 sizes to accommodate small cats to giant dogs, with a lightweight vinyl flap that remains flexible for easy use.
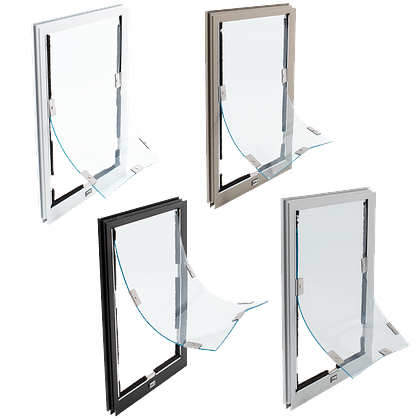
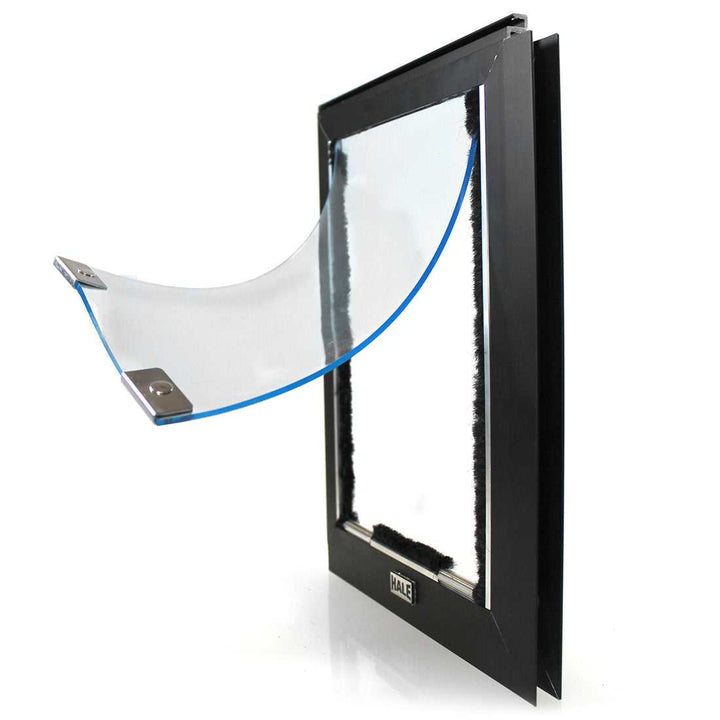
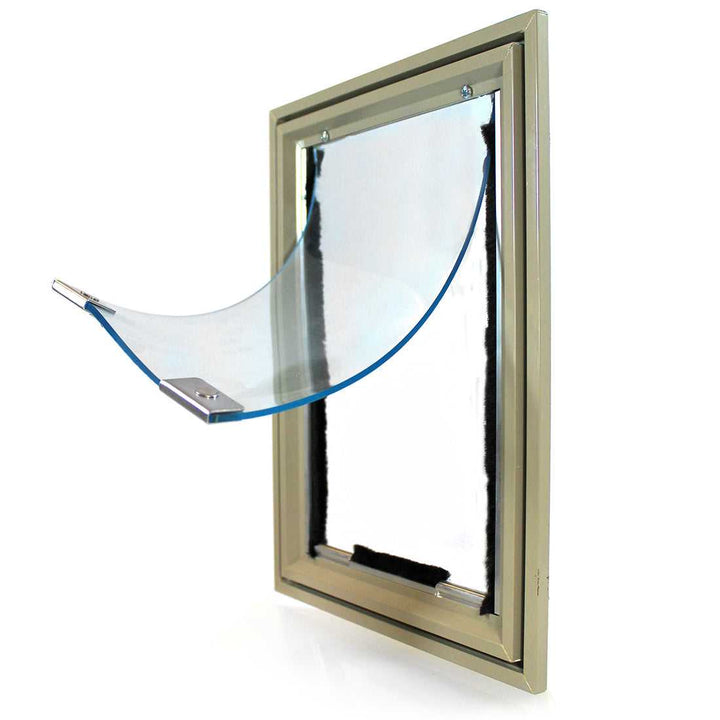
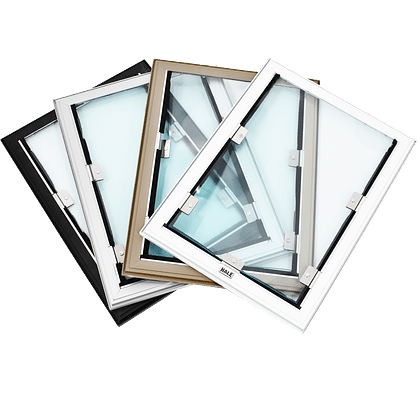
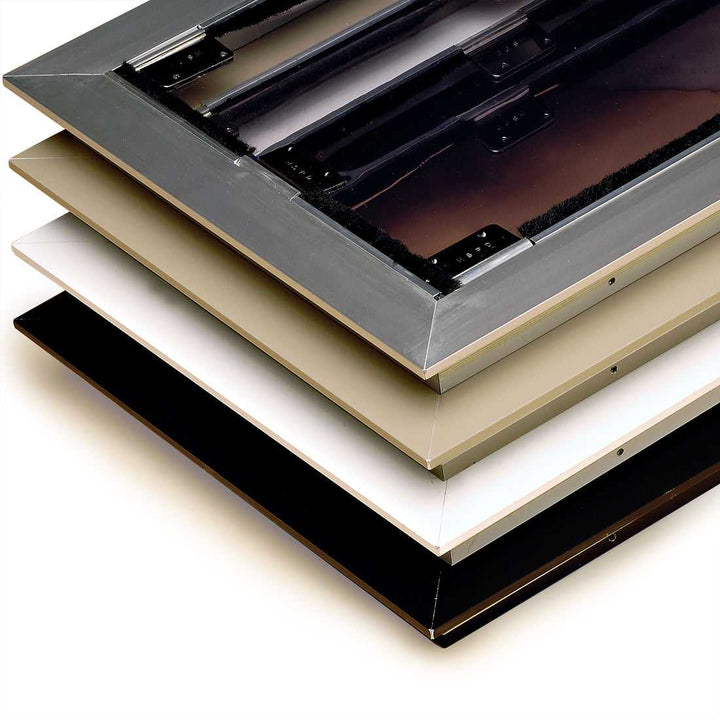
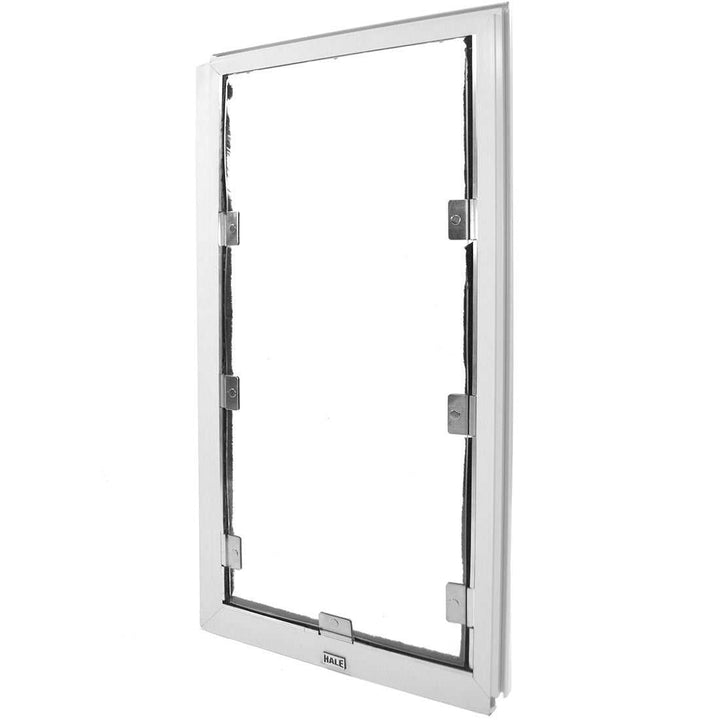
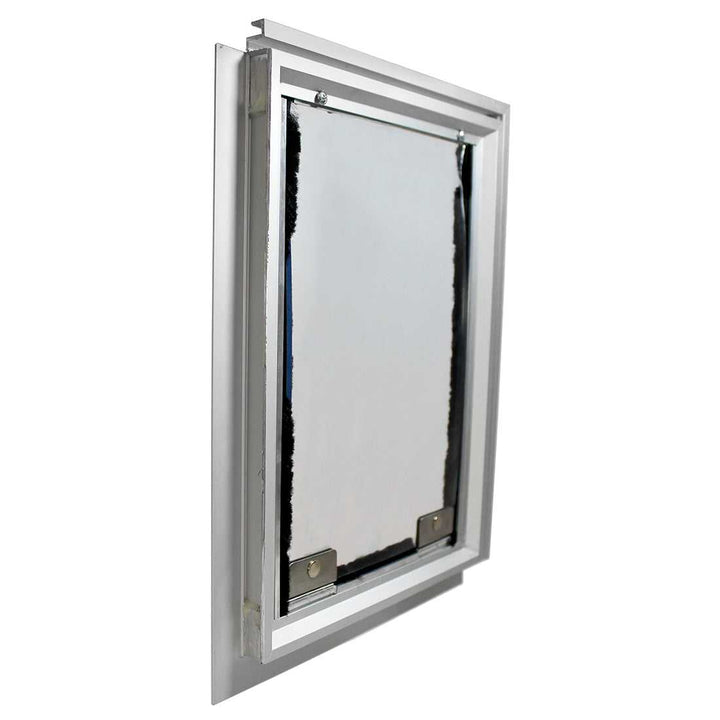
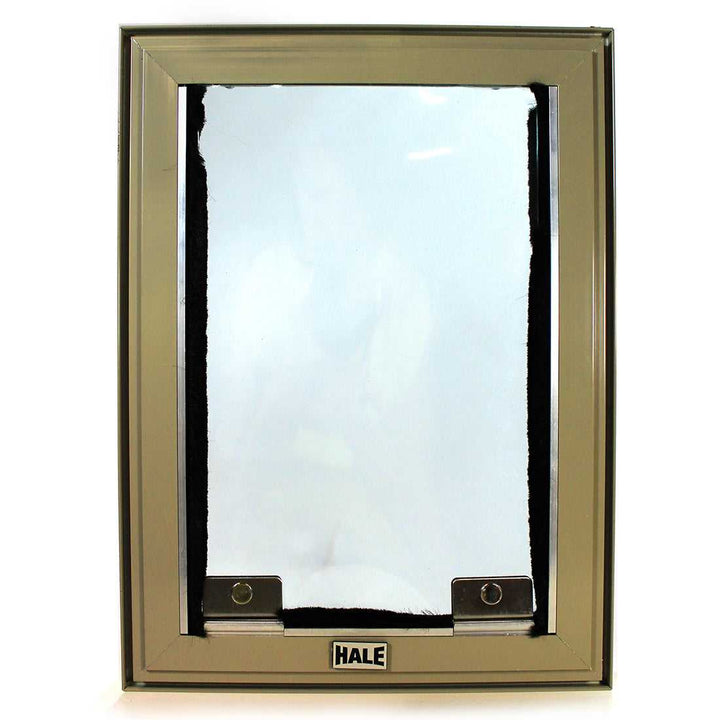
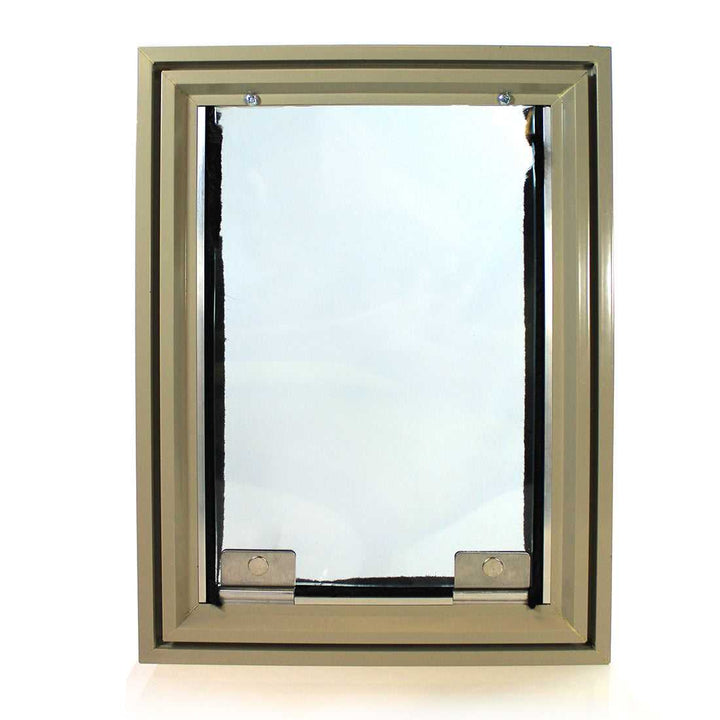
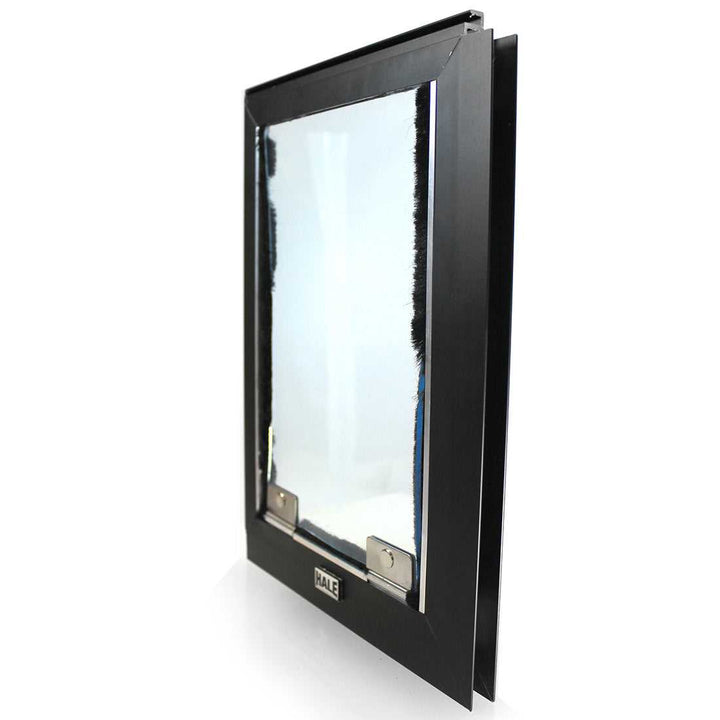
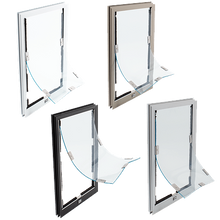
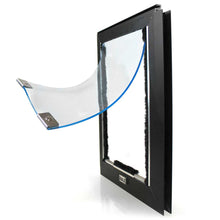
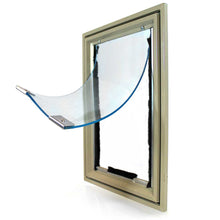
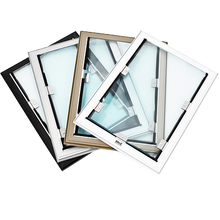
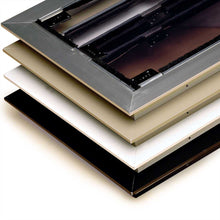
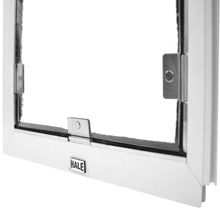
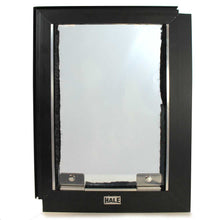
- Heavy-duty aluminum frame provides superior durability and support for active pets, with four color options to match your decor.
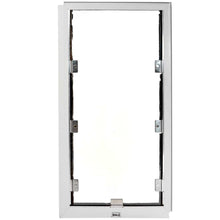
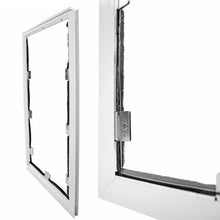
- Secure corner-fit installation reinforces the screen frame, ensuring longevity and preventing sagging over time.
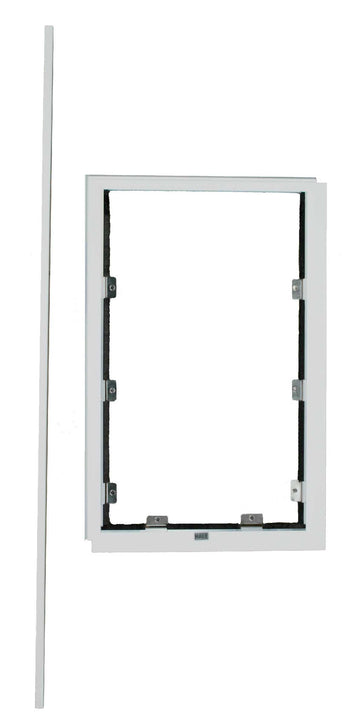
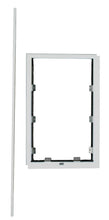
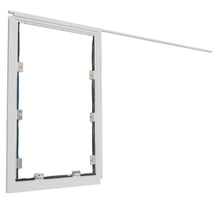
- Stabilizer bar included for sizes Tall Large to Giant (48" wide, trim to fit) to maintain structural integrity in larger installations.
- This is a screen mounted pet door and does not have a locking cover. For the Custom-Cut, Four-Sided-Flange version you can add a locking cover for an additional cost. All other versions will not accommodate a locking cover.
- We'll need more information to complete your order. In your Order Confirmation email there is an Orange button with "Finish Your Order". Click on it to enter to answer questions to finish your order. Thank you!

Product Details
The Hale Pet Door for Screens is an elegant, functional solution for integrating a pet door into screen enclosures, sliding doors, or porches without compromising the integrity of the screen. Designed for a secure fit, this pet door is reinforced by a durable aluminum frame that withstands frequent use, making it the sturdiest screen pet door option available for large dogs.
A stabilizer bar is included in sizes Tall Large to Giant to provide additional structural support and ensure long-term reliability. You can add a stabilizer bar kit to a smaller sizes by adding to your order. Custom ordered Stabilizer Bar Kits can be ordered up to 72" wide by contacting Customer Service at (805) 781-7700 or customerservice@petdoors.com .
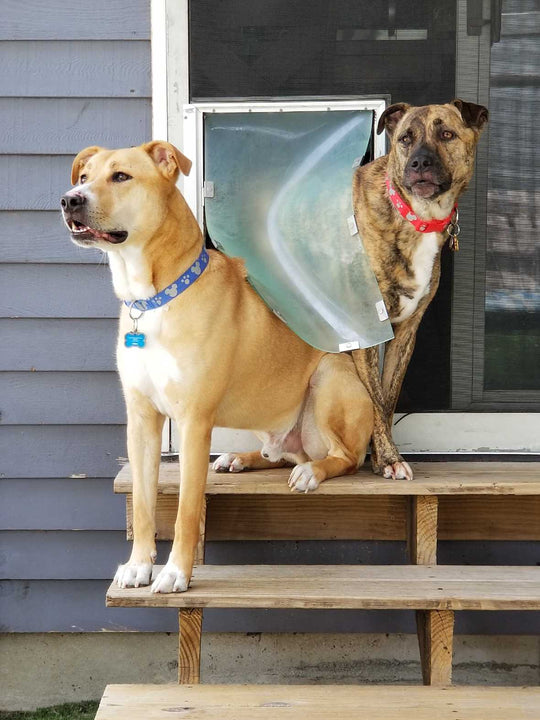
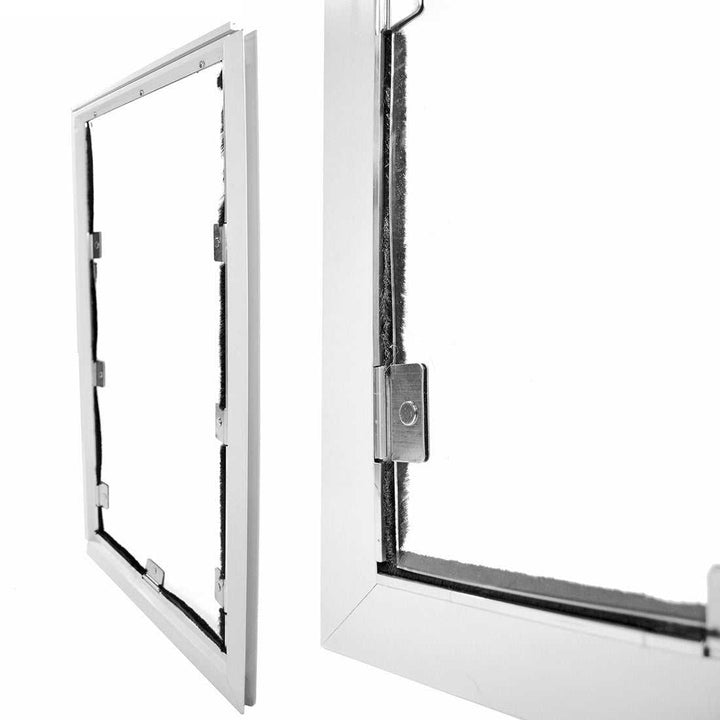
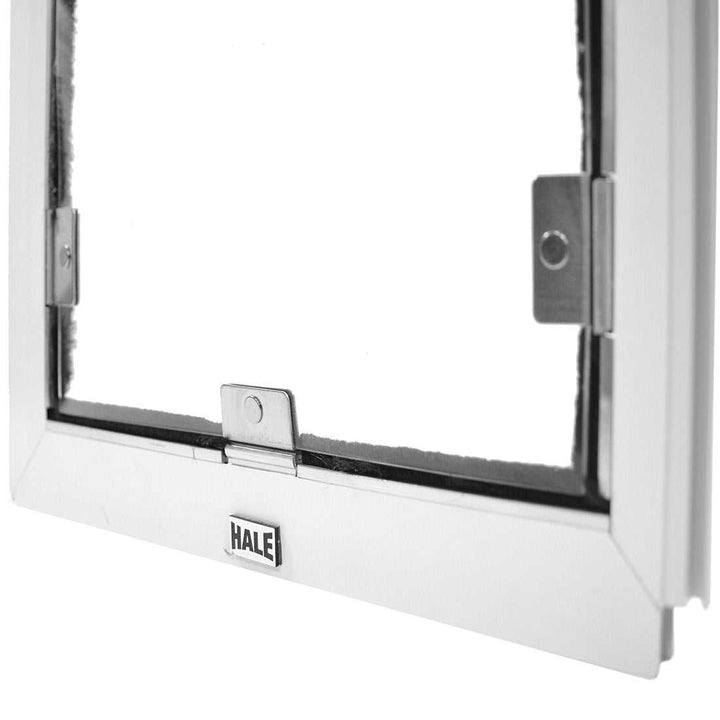
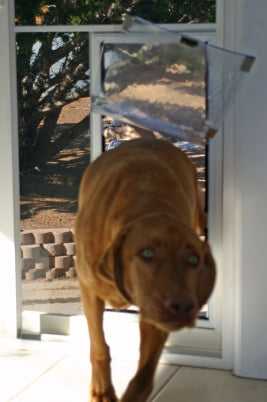
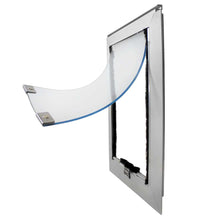
The clear vinyl flap is designed for effortless entry, making it accessible for pets of all sizes while maintaining visibility. It features magnetic closures along the edges, supported by fuzzy nylon weather stripping, to create a strong seal that prevents bugs and debris from entering while still allowing smooth operation. Unlike rigid flaps, the flexible design makes it ideal for multi-pet households where different-sized pets need to share the same door.
Designed for versatility, the Hale Pet Door for Screens is available in 11 sizes and four frame colors, allowing it to blend seamlessly into any home. The corner-fit installation adds structural support, preventing premature wear and ensuring a snug fit. Customizable mounting options accommodate a variety of screen frame thicknesses, providing a secure and professional-grade installation.
For those who need additional reinforcement, optional stabilizer bars are available in sizes up to 72" wide for customized installations. Whether you need a pet door for a screened-in porch or a sliding door screen, this model offers durability, convenience, and a seamless aesthetic. With a focus on quality and ease of use, the Hale Pet Door for Screens provides pets with unrestricted access while maintaining a strong, insect-proof barrier for your home.
Ordering Instructions
To ensure you get the right Hale Pet Screen Door, follow these steps carefully. After placing your order, we will contact you for more details.
Screen Frame Thickness Options
Measure the thickest part of your screen frame to determine which pet door model will work best:
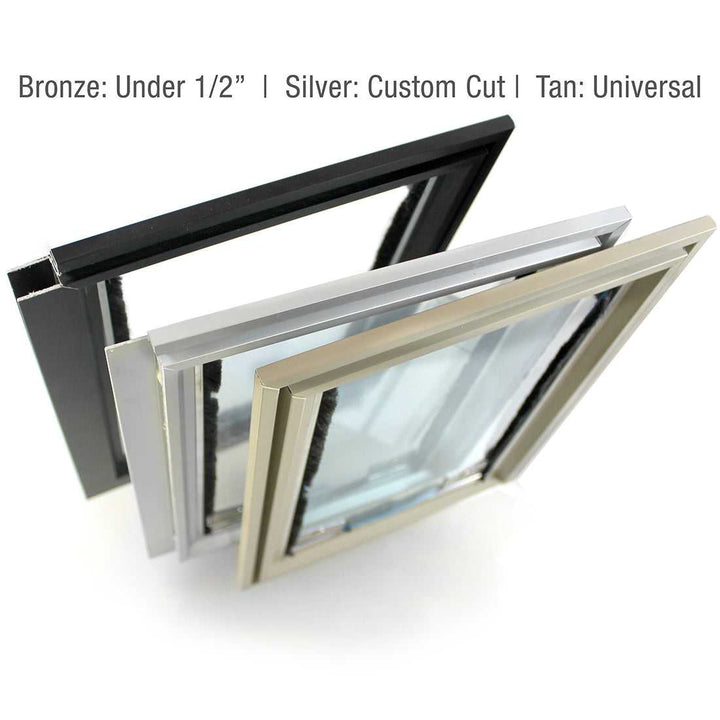
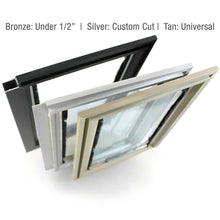
A. For frames between 3/8" and 1/2" thick
- You will receive the Up to 1/2" model, which has a 3/4" deep U-shaped flange that fits along the bottom and one side of your screen door frame.
- Note: If your frame is thinner than 3/8", it may not be sturdy enough to support the pet door, so this model is not recommended.
B. For frames thicker than 1/2", you have two options:
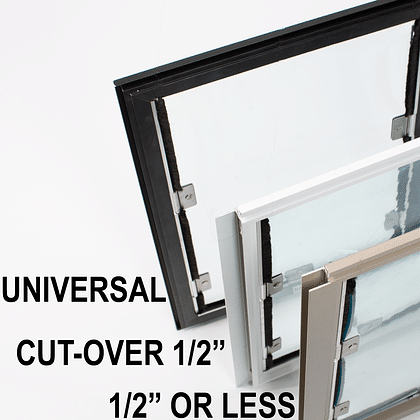
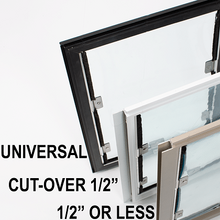
Option 1: Universal Model (Fits up to 1" thick frames)
Option 2: Custom Cut Model (For frames thicker than 1" or special cases like screen porches and sidelights)
- In this option, Hale trims off one flange to fit extra-thick frames. The remaining flange is 3/4" long and 3/4" deep.
- If you need a four-sided flange for a framed hole, this is the only option that allows a locking cover (sold separately).
C. If choosing the Custom Cut model, you’ll need to provide two additional details (submitted via a link in your order confirmation email):
Option 1: Spline Location (Interior or Exterior)
- Determine whether your screen’s spline is on the inside or outside of the frame.
- To check, stand inside your home looking out.
- Your pet door must be installed on the same side as the screen mesh and spline.
- The manufacturer will ensure the framing accommodates your setup
Option 2: Installation Corner (Left or Right)
- Specify whether the pet door will be installed in the lower left or lower right corner of the screen frame.
- Again, determine this while looking at the frame from inside your home.
Installation Instructions
Installation steps vary depending on your pet door model:
- Up to 1/2" Model & Custom Cut Model – See steps 8 & 9 in the installation guide.
- Universal Model (Over 1/2" up to 1") – Follow the separate installation guide.
Hale Pet Door Screen Mount Stabilizer Bar Kit
- Hale pet screen doors are normally supported by the screen frame along the bottom and one side.
- For larger flap sizes and active dogs, extra support is needed.
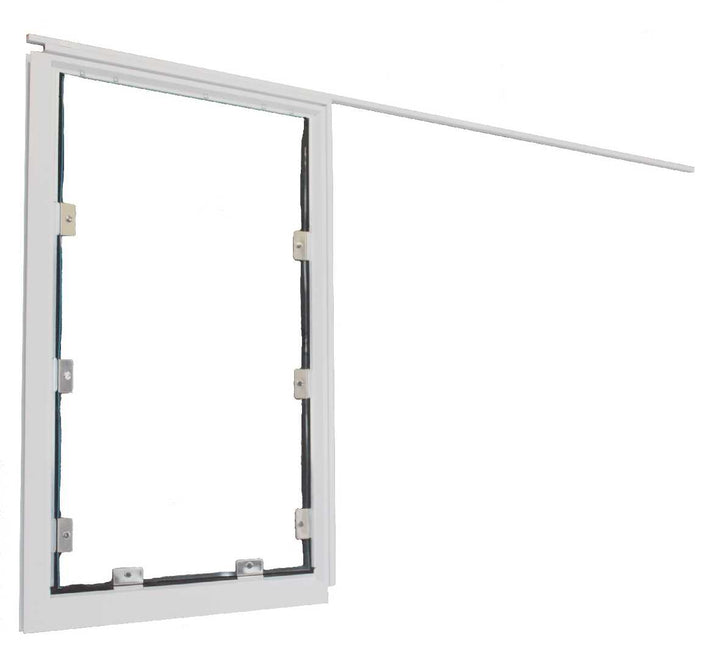
- The Stabilizer Bar Kit provides extra reinforcement across the top of the pet door.
- This 48" stabilizer bar must be trimmed with a hacksaw to fit your screen.
- The kit includes all necessary fittings.
- Sizes Tall Large through Giant automatically include this stabilizer in your selected frame color.
- For smaller sizes, you can add the stabilizer bar kit from the drop-down menu when ordering.
- If you only need the stabilizer bar kit, visit the Stabilizer Bar Kit page to purchase separately.
Need Help Deciding Between Universal vs. Custom Cut for Frames Over 1/2”?
If you're unsure which model to choose, send photos of your screen door to customerservice@petdoors.com. We’ll review them and recommend the best option for your setup.
Size Chart
- Small Medium 6 1/2"w x 9 1/2"h
- Medium 8 1/2"w x 11 1/2"h
- Tall Medium 8 1/2"w x 16"h
- Large 11"w x 16"h
- Tall Large 11"w x 19"h
- Tall Large Plus 11"w x 23 1/2"h
- Extra Tall Large 11"w x 27 1/2"h
- Extra Large 14"w x 19 1/2"h
- Extra Large Plus 14"w x 23 1/2"h
- Giant 15 1/2"w x 27 1/2"h
Flap Dimensions:
6 1/2"w x 9 1/2"h
The entry way your dog goes through.Outside Frame Dimensions
9 9/16"w x 12 9/16"h
The outer edge of the pet door.


Rough Cut Out:
8 1/2"w x 11 1/2"h
The size of the hole needed to fit your pet door into your door.Flap Dimensions:
8 1/2"w x 11 1/2"h
The entry way your dog goes through.Outside Frame Dimensions
11 9/16"w x 15 3/8"h
The outer edge of the pet door.


Rough Cut Out:
10 1/2"w x 14 1/2"h
The size of the hole needed to fit your pet door into your door.Flap Dimensions:
8 1/2"w x 16"h
The entry way your dog goes through.Outside Frame Dimensions
11 9/16"w x 19 1/16"h
The outer edge of the pet door.


Rough Cut Out:
10 1/2"w x 18"h
The size of the hole needed to fit your pet door into your door.Flap Dimensions:
11"w x 16"h
The entry way your dog goes through.Outside Frame Dimensions
14 1/16"w x 19 1/16"h
The outer edge of the pet door.


Rough Cut Out:
13"w x 18"h
The size of the hole needed to fit your pet door into your door.Flap Dimensions:
11"w x 19 1/2"h
The entry way your dog goes through.Outside Frame Dimensions
14 1/16"w x 22 9/16"h
The outer edge of the pet door.


Rough Cut Out:
13"w x 21 5/8"h
The size of the hole needed to fit your pet door into your door.Flap Dimensions:
11"w x 23 1/2"h
The entry way your dog goes through.Outside Frame Dimensions
14 1/16"w x 26 9/16"h
The outer edge of the pet door.


Rough Cut Out:
13"w x 25 5/8"h
The size of the hole needed to fit your pet door into your door.Flap Dimensions:
11"w x 27 1/2"h
The entry way your dog goes through.Outside Frame Dimensions
14 1/16"w x 30 9/16"h
The outer edge of the pet door.


Rough Cut Out:
13"w x 29 5/8"h
The size of the hole needed to fit your pet door into your door.Flap Dimensions:
14"w x 19 1/2"h
The entry way your dog goes through.Outside Frame Dimensions
17 1/16"w x 22 9/16"h
The outer edge of the pet door.


Rough Cut Out:
16"w x 21 5/8"h
The size of the hole needed to fit your pet door into your door.Flap Dimensions:
14"w x 19 1/2"h
The entry way your dog goes through.Outside Frame Dimensions
17 1/16"w x 22 9/16"h
The outer edge of the pet door.


Rough Cut Out:
16"w x 21 5/8"h
The size of the hole needed to fit your pet door into your door.Flap Dimensions:
14"w x 23 1/2"h
The entry way your dog goes through.Outside Frame Dimensions
17 1/16"w x 26 9/16"h
The outer edge of the pet door.


Rough Cut Out:
16"w x 25 5/8"h
The size of the hole needed to fit your pet door into your door.Flap Dimensions:
15 1/2"w x 27 1/2"h
The entry way your dog goes through.Outside Frame Dimensions
18 9/16"w x 30 9/16"h
The outer edge of the pet door.


Rough Cut Out:
17 5/8"w x 29 5/8"h
The size of the hole needed to fit your pet door into your door.| Size | Flap Dimension | Rough Cut Out | Outside Frame Dimensions | Recommended Pet Height | Small Medium | 6 1⁄2" w x 9 1⁄2" h | 8 1⁄2" w x 11 1⁄2" h | 9 9⁄16" w x 12 9⁄16" h | 5" - 14" |
|---|---|---|---|---|
| Medium | 8 1⁄2" w x 12 1⁄2" h | 10 1⁄2" w x 14 1⁄2" h | 11 9⁄16" w x 15 3⁄8" h | 5" - 19" |
| Tall Medium | 8 1⁄2" w x 16" h | 10 1⁄2" w x 18" h | 11 9⁄16" w x 19 1⁄16" h | 5" - 23" |
| Large | 11" w x 16" h | 13" w x 18" h | 14 1⁄16" w x 19 1⁄16" h | 5" - 24" |
| Tall Large | 11" w x 19 1⁄2" h | 13" w x 21 5⁄8" h | 14 1⁄16" w x 22 9⁄16" h | 5" - 29" |
| Tall Large Plus | 11" w x 23 1⁄2" h | 13" w x 25 5⁄8" h | 14 1⁄16" w x 26 9⁄16" h | 5" - 34" |
| Extra Tall Large | 11" w x 27 1⁄2" h | 13" w x 29 5⁄8" h | 14 1⁄16" w x 30 9⁄16" h | 5" - 42" |
| Extra Large | 14" w x 19 1⁄2" h | 16" w x 21 5⁄8" h | 17 1⁄16" w x 22 9⁄16" h | 5" - 31" |
| Extra Large Plus | 14" w x 23 1⁄2" h | 16" w x 25 5⁄8" h | 17 1⁄16" w x 26 9⁄16" h | 5" - 36" |
| Giant | 15 1⁄2" w x 27 1⁄2" h | 17 5⁄8" w x 29 5⁄8" h | 18 9⁄16" w x 30 9⁄16" h | 5" - 44" |
Notes
Do not know which flap size to get? Here is a measurement guide to help you out
There are three models for different installation methods. We will email you an order form for you to choose one of the following options:
1. If your screen frame thickness is up to 1/2", but no less than 3/8", you will receive the Universal under 1/2" model.
2. If your screen frame is over 1/2" up to 1" you can choose Universal over 1/2" model or Custom Cut.
3. If your screen frame over 1" you must choose the Custom Cut version (used mainly for situations such as screen porches or sidelights). Hale will trim off one of the flanges on the channel in order to accommodate very thick framing. The pet door will be screwed into your framing.
Please read the detailed ORDERING INSTRUCTIONS for additional information.
Find The Best Pet Door Size For My Pet

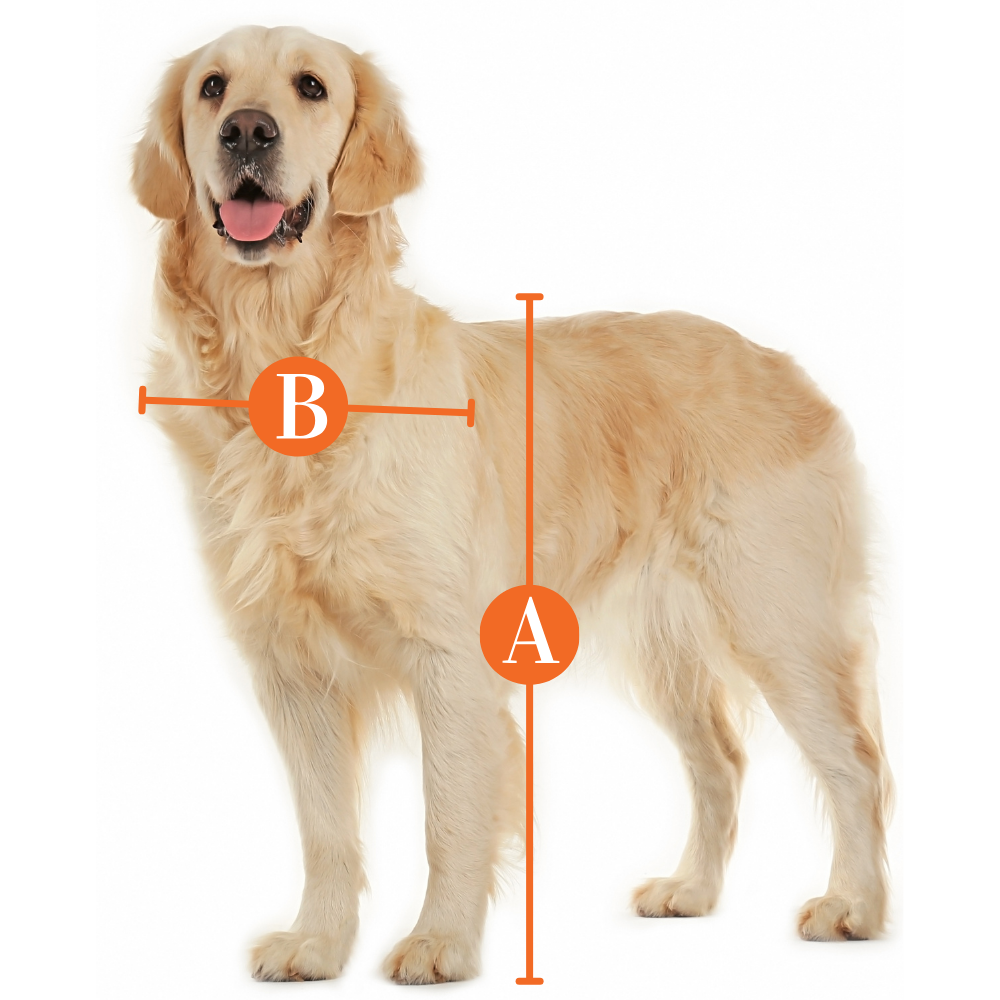
A
Pet Height: inches
B
Pet Width: inches
Installation Instructions
Universal Model

 Difficulty
Moderate
 Steps
14
 Time Required
1 hour
 Sections
01
 Flags
04
Parts
- Installation Booklet (includes warranty, policies, training, etc)
- Hale Pet Door screen model
- Screen spline 3/16”
- Phillips head screws 1⁄4”
- 7/64" drill bit
- Metal screen retainer clips
- Screen Stabilizer Bar Kit included with pet door sizes TL and larger (optional purchase with smaller pet doors)
Tools
- Drill
- Razor blade
- Flat headed screwdriver or putty knife
- Phillips headed screwdriver
- Screen spline roller (handy but not necessary)
- Needle-nosed pliers (optional)
- Silicone caulk
A SAFETY REMINDER!
Always wear eye protection and gloves when appropriate.
Before installing: The Hale Pet Door Universal Screen Model is designed to fit into one of the lower corners of a screen door frame or screen window frame that over 1/2" thick. In screen frames that are 1/2" thick or less the standard screen model should be used although the universal model will work in those situations as well. The doors are very similar but the installation process differs between the two models. The universal screen pet door is completely reversible and will fit into either corner of the screen frame.
Note: The Hale Pet Door™ screen model is not designed to work on security doors. A “door” model is a much better choice for a security screen application.
Step 1 Pre-Installation Check


- Before installation, be sure that you have the proper size pet door for your pet.
- Take a brief look at the large diagrams of the screen model at the end of the instructions and become familiar with various components of the screen model. This will not only help in understanding the terms used in these instructions but can be very useful should you need to call for technical support.
Step 2 Prep Screen Door for Installation


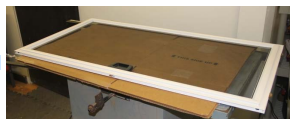
- Determine which corner of the screen door is to be used for installing the pet door.
- Remove the screen window or door from its track. The screen door can generally be removed by lifting it upward and swinging the bottom outward. Occasionally the wheels will interfere with removal. In this case, the wheels will need to be lifted upward to clear the track.
- Lay the screen window or screen door on a flat surface with the screen spline facing upward.
Step 3 Remove Screen Spline


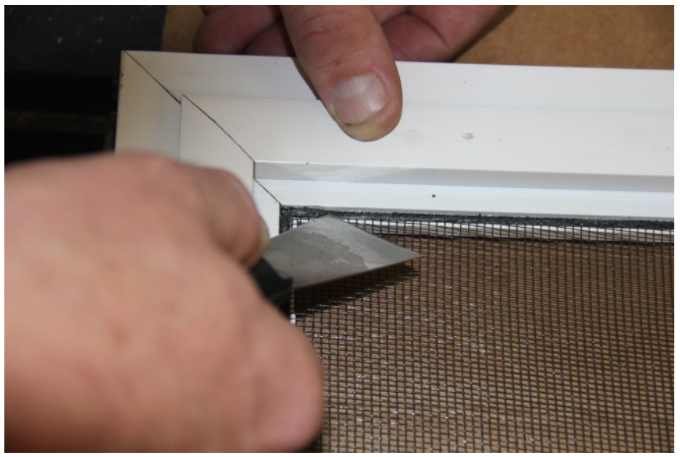


- Remove the screen spline (the ribbed rubber around the screen) from the installation corner. Needle-nosed pliers work very well for removing the screen spline or you can also carefully use a flat head screwdriver or a putty knife at the corner to get started. If using a screwdriver or putty knife, be careful not to cut into the spline or slice into the finish of the door frame.
- Leave the spline attached for the moment and just push or fold it out of the way.
Step 4 POSITION PET DOOR FRAME


- Place the pet door snugly against the frame at the chosen corner. Make sure the pet door is adjusted properly and operates smoothly while in position. It should be flush against both the bottom and side edges.
Step 5 Position Clips


- Place the metal screen retainer clips in the spline track of the people door evenly spaced around the pet door as shown. Depending on the size of the pet door ordered there should be between one and four clips in the bottom track and another one to four clips in the side track of the people door.
Step 6 Drill Hole


- Holding the pet door snugly against the people door frame, drill through the holes in the metal retainers into the frame of the pet door using the 7/64" drill bit provided.
Step 7 Add Screws


- Insert the #6 screws with a Phillips screwdriver or drill as shown.
Step 8 Apply Silicone


- Run a thin bead of silicone in the spline track on the people door along the side and bottom of the pet door running the silicone over the metal retainers as shown.
Step 9 Add Screen Mesh


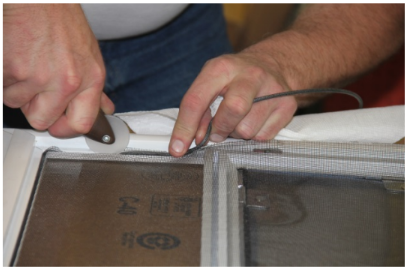
- Lay the screen material back over the pet door. Pull the screen material taut. To hold the screen fabric around the pet door, insert the screen spline that you previously pulled out of the people door with a flat headed screwdriver or screen spline roller.
Step 10 Clean Excess Silicone


- Clean any excess silicone off the people door and the pet door with a paper towel, if needed.
Step 11 Remove Excess Mesh


- Using a razor blade, carefully cut the screen fabric inside the perimeter of the pet door near the weather stripping. Be sure to leave enough screen fabric to be pulled down into the track by the screen spline that came with your pet door. You can trim off any excess fabric after the installation is complete. Remove the square of screen fabric and discard.
Step 12 Insert Into Door Frame


- Insert the screen spline included with your pet door into the spline frame track around all four sides of the pet door being sure to pull the screen fabric taut to make the pet door more secure.
- This means that on the bottom and one side of your pet door you will have two pieces of screen spline: One in the people door track (black spline at top of picture below) and one in the pet door track (light gray spline at bottom of picture below) with a narrow strip of screen fabric between them.
Step 13 Remove Excess Spline


- Cut away any excess screen spline with a razor blade or scissors. Cut away the excess screen material with a razor blade being careful not to cut into the screen spline or the finish of the pet door. If you are installing a stabilizer bar (see next section), leave some excess screen material at this time. You can trim it later after installing the stabilizer bar kit.
- Re-install the screen door or screen window.
Step 14 Adjust Magnets

- After re-installing the screen into a vertical position, adjust the magnets in the pet door upward or downward if needed. The magnets are pressure fitted and can be adjusted downward by tapping lightly with the handle of your screwdriver. They can be adjusted upward by twisting a flat headed screwdriver below the magnet between the magnet and frame.
Optional Stabilizer Bar Kit for Screen Model Installation: Information and Installation Instructions
For our screen model pet doors, size Large and above, or if you have more than one pet, we recommend adding the optional Stabilizer Bar Kit for additional stability for your pet door and people door alike. The Stabilizer Bar Kit contains a spreader bar, 2 aluminum clips to attach the bar to the frame of your screen door, 2 metal screen retainers to attach the bar to the top edge of the pet door and a drill bit to drill the holes into the spreader bar for the retainers.

The spreader bar is designed to be installed as a brace across the screen door directly above the pet door to add rigidity and strength both to the screen door itself and to the unsupported edge of the pet door. This can be especially important for very large or very active dogs.

Videos
How to Measure
Hale Screen Mount Pet Door
Make sure it fits!
FAQ
|
Which side of the door do I stand on to determine which the installation corner? You should be standing inside and facing the screen door when determining which corner of your screen your pet door will be installed into. This is an important distinction as a pet door that looks like it's on the right hand corner of your screen door inside a kitchen will look like it's on the left hand corner when you're on the patio. Think of it as when you're trying to follow an workout instructor: your right is their left! |
|
Is this the entire thing? This is only the pet door, not a full patio screen door with a pet door pre-installed. Hale offers multiple installation options to fit all different types of screen doors. |
|
What is the flap made of on the Hale? The Hale Screen Mount Flap is made of vinyl. |
|
Why is this one more expensive than other pet door for screen doors? This is the best doggie door in screen door models because of how durable and sturdy it is. Also, larger dog doors for screen doors will cost more than smaller sizes. |
|
Why would I need the stabilizer bar for the Hale screen pet door? The Screen Mount Stabilizer Bar Kit adds an additional support across the top of the pet door. This is necessary for larger, active dogs, as it will help the screen and dog door stay in good shape for as long as possible by providing extra support. This is recommended for all large dog screen door installations, so it is included for Tall/Large size and above. |
|
What does it mean by "exterior" and "interior" for Hale screen pet doors? For the Hale Door "Exterior" and "Interior" are referring to where the screening material is located in relation to the frame. If the screen material is installed closer to the inside of the frame, then it is considered "Interior". If the screen material is installed closer to the outer part of the frame, then it is considered "exterior". If your framing is thicker than ½” then this is very important because it will determine how the manufacturer will need to modify it so that it will install correctly. |
|
Why does Hale ask about so many options on the screen mounts? There are many options for Hale Screen Doors because they are highly customizable, and they are very thorough about making sure they give you the right product. If the frame of the screen is over 1/2" in thickness, then it has to be modified.Options that are brought up when selecting a Hale pet door screen mount:1. 'Pet Door Installs in Which Lower Corner' - Specify whether you'll be installing the pet door in the lower left corner or the lower right corner of the screen when looking from the inside of the house to the outside. The terminology used by Hale is 'handing'. 'Handing Left' simply means that you'll be installing the pet door in the lower left-hand corner of the screen when looking from the inside of the house.2. 'Customer Screen Frame Thickness Options' - The Hale pet screen door will be modified at the factory to fit varying thicknesses of your screen framing if necessary. Here are the various situations:a. Your screen frame is thinner than 3/8". If you are considering a larger size or have a particularly vigorous dog, then your framing may not be sturdy enough and you might want to reconsider making this purchase. This option is not offered for that reason.b. If your screen frame thickness is up to 1/2" choose option 1. No further information is needed.c. If your screen frame thickness is over 1/2", choose the second option if your screen mesh and spline are located on the outside side of the screen frame-- 'exterior'--and the third option if they are located on the inside, or 'interior', side. Your pet door must be installed on the same side as the screen mesh and spline and the factory will ensure that the framing provided will accommodate that.3. Hale Pet Door Screen Mount Stabilizer Bar Kit - A normal Hale pet screen door is supported down one side and across the bottom by your screen framing. The Screen Mount Stabilizer Bar Kit adds an additional support across the top of the pet door. We think this is a very good idea for larger sizes and more vigorous dogs. Available bar widths are 36" and 48". Choose the size at least as wide as your screen and then cut the bar with a hacksaw to fit. All fittings needed are included with the kit. To order this kit, please go to the Stabilizer Bar Kit page. |
|
What is a spline and how do I know if mine is exterior or interior? The spline is what attaches the screen material to the frame, it is a tube of rubber like material. If the screen material attaches to the side that is closer to the inside of your home, it is referred to as an interior spline. If the screen attaches to the side of the frame that is closest to the outside of your home, it is referred to as an exterior spline. |
|
Can I lock the Hale Screen Pet Door? There are no closing covers offered for the Hale Screen Mount. |
|
Can it be installed on either side of the screen door? It can be installed on the bottom left or right corner of your door as long as the screen frame is 1/2" or less in thickness. |
|
Do I need to get anything else to install this through my screen, or is everything included? All hardware is included with the pet door. |
|
Can I install this myself, or do I need to hire someone? Screen door doggy doors tend to be easier to install than other pet door models. Tools that you will want include: Screen spline roller (handy but not necessary), Drill, Phillips headed screwdriver, Razor blade, Flat headed screwdriver and Needle-nosed pliers. Make sure that the framing is screwed in correctly so that it is firmly attached to the screen door. |
|
Does it matter what kind of material my screen is made of? Since the Hale Pet Door for screens attach directly to the frame of the screen, the strength of the screen material is not as critical as some other screen pet doors. Keep in mind that putting a pet door through your screen may encourage your pet to interact with the screen more, so sturdier material is still recommended. |
|
How do I know which size I need for my pet? You will want to measure your pets and determine how high off the ground the pet door will be installed. You want the top of the flap to be at least 1 inch above the tallest point of the dog or cat's back, and the flap needs to be wide enough that they can comfortably walk through. The bottom of the flap should also be low enough to the ground that your pet doesn't have difficulty stepping over it. |
|
Will this pet door keep out bugs? The fuzzy weather stripping around the Hale flap is great for keeping out bugs! It helps to fill any gaps around the edges of the flap between the magnets. |
|
Can I use this as a pet door for screen enclosure installation? Yes, this is one of the best, and the one that we highly recommend for screen enclosure dog door installations. For screen enclosures, you need to make sure to choose the custom cut over 1/2" option. |
|
Do they make a Hale screen door or screen doors with doggie door flaps pre-installed? No this is only the pet door. You need to purchase the screen door separately. |
|
What screen mount door is good for extra large dogs? The Hale Pet Doors for Screens come in a variety of sizes up to 15 1/2" wide by 27 1/2" tall. |
|
How much does shipping cost? Shipping is calculated at checkout. |
Warranty
Warranty: Lifetime Frame Warranty / 10-Year Parts Warranty Including Flaps
Duration: Lifetime for frame and 10 years for parts including flaps.
Coverage:
Hale Pet Door products and components are guaranteed to be free from defects in materials and workmanship from the date of purchase.
Flaps are made from the best vinyl imported from France using Hale's custom chemical recipe.
Coverage percentages for parts (excluding frame) decreases by 20% every two years over a ten year period.
Returns within 30 days due to dissatisfaction results in a full refund, but if the product is damaged upon return, only 50% credit is provided.
Exclusions:
Warranty does not include shipping to Hale Pet Door or field service labor.
Glass Breakage: 50% replacement cost in the first year if the glass breaks. No warranty on glass after the first year. Excludes in-glass models' glass.
Only 50% credit is provided towards the cost of a replacement Hale Pet Door if damaged due to no fault of Hale Pet Door (e.g., miscutting, mismeasuring) within 30 days of purchase.
Customer Reviews

Size Chart
- Small Medium 6 1/2"w x 9 1/2"h
- Medium 8 1/2"w x 11 1/2"h
- Tall Medium 8 1/2"w x 16"h
- Large 11"w x 16"h
- Tall Large 11"w x 19"h
- Tall Large Plus 11"w x 23 1/2"h
- Extra Tall Large 11"w x 27 1/2"h
- Extra Large 14"w x 19 1/2"h
- Extra Large Plus 14"w x 23 1/2"h
- Giant 15 1/2"w x 27 1/2"h
Flap Dimensions:
6 1/2"w x 9 1/2"h
The entry way your dog goes through.Outside Frame Dimensions
9 9/16"w x 12 9/16"h
The outer edge of the pet door.


Rough Cut Out:
8 1/2"w x 11 1/2"h
The size of the hole needed to fit your pet door into your door.Flap Dimensions:
8 1/2"w x 11 1/2"h
The entry way your dog goes through.Outside Frame Dimensions
11 9/16"w x 15 3/8"h
The outer edge of the pet door.


Rough Cut Out:
10 1/2"w x 14 1/2"h
The size of the hole needed to fit your pet door into your door.Flap Dimensions:
8 1/2"w x 16"h
The entry way your dog goes through.Outside Frame Dimensions
11 9/16"w x 19 1/16"h
The outer edge of the pet door.


Rough Cut Out:
10 1/2"w x 18"h
The size of the hole needed to fit your pet door into your door.Flap Dimensions:
11"w x 16"h
The entry way your dog goes through.Outside Frame Dimensions
14 1/16"w x 19 1/16"h
The outer edge of the pet door.


Rough Cut Out:
13"w x 18"h
The size of the hole needed to fit your pet door into your door.Flap Dimensions:
11"w x 19 1/2"h
The entry way your dog goes through.Outside Frame Dimensions
14 1/16"w x 22 9/16"h
The outer edge of the pet door.


Rough Cut Out:
13"w x 21 5/8"h
The size of the hole needed to fit your pet door into your door.Flap Dimensions:
11"w x 23 1/2"h
The entry way your dog goes through.Outside Frame Dimensions
14 1/16"w x 26 9/16"h
The outer edge of the pet door.


Rough Cut Out:
13"w x 25 5/8"h
The size of the hole needed to fit your pet door into your door.Flap Dimensions:
11"w x 27 1/2"h
The entry way your dog goes through.Outside Frame Dimensions
14 1/16"w x 30 9/16"h
The outer edge of the pet door.


Rough Cut Out:
13"w x 29 5/8"h
The size of the hole needed to fit your pet door into your door.Flap Dimensions:
14"w x 19 1/2"h
The entry way your dog goes through.Outside Frame Dimensions
17 1/16"w x 22 9/16"h
The outer edge of the pet door.


Rough Cut Out:
16"w x 21 5/8"h
The size of the hole needed to fit your pet door into your door.Flap Dimensions:
14"w x 19 1/2"h
The entry way your dog goes through.Outside Frame Dimensions
17 1/16"w x 22 9/16"h
The outer edge of the pet door.


Rough Cut Out:
16"w x 21 5/8"h
The size of the hole needed to fit your pet door into your door.Flap Dimensions:
14"w x 23 1/2"h
The entry way your dog goes through.Outside Frame Dimensions
17 1/16"w x 26 9/16"h
The outer edge of the pet door.


Rough Cut Out:
16"w x 25 5/8"h
The size of the hole needed to fit your pet door into your door.Flap Dimensions:
15 1/2"w x 27 1/2"h
The entry way your dog goes through.Outside Frame Dimensions
18 9/16"w x 30 9/16"h
The outer edge of the pet door.


Rough Cut Out:
17 5/8"w x 29 5/8"h
The size of the hole needed to fit your pet door into your door.| Size | Flap Dimension | Rough Cut Out | Outside Frame Dimensions | Recommended Pet Height | Small Medium | 6 1⁄2" w x 9 1⁄2" h | 8 1⁄2" w x 11 1⁄2" h | 9 9⁄16" w x 12 9⁄16" h | 5" - 14" |
|---|---|---|---|---|
| Medium | 8 1⁄2" w x 12 1⁄2" h | 10 1⁄2" w x 14 1⁄2" h | 11 9⁄16" w x 15 3⁄8" h | 5" - 19" |
| Tall Medium | 8 1⁄2" w x 16" h | 10 1⁄2" w x 18" h | 11 9⁄16" w x 19 1⁄16" h | 5" - 23" |
| Large | 11" w x 16" h | 13" w x 18" h | 14 1⁄16" w x 19 1⁄16" h | 5" - 24" |
| Tall Large | 11" w x 19 1⁄2" h | 13" w x 21 5⁄8" h | 14 1⁄16" w x 22 9⁄16" h | 5" - 29" |
| Tall Large Plus | 11" w x 23 1⁄2" h | 13" w x 25 5⁄8" h | 14 1⁄16" w x 26 9⁄16" h | 5" - 34" |
| Extra Tall Large | 11" w x 27 1⁄2" h | 13" w x 29 5⁄8" h | 14 1⁄16" w x 30 9⁄16" h | 5" - 42" |
| Extra Large | 14" w x 19 1⁄2" h | 16" w x 21 5⁄8" h | 17 1⁄16" w x 22 9⁄16" h | 5" - 31" |
| Extra Large Plus | 14" w x 23 1⁄2" h | 16" w x 25 5⁄8" h | 17 1⁄16" w x 26 9⁄16" h | 5" - 36" |
| Giant | 15 1⁄2" w x 27 1⁄2" h | 17 5⁄8" w x 29 5⁄8" h | 18 9⁄16" w x 30 9⁄16" h | 5" - 44" |
Notes
Do not know which flap size to get? Here is a measurement guide to help you out
There are three models for different installation methods. We will email you an order form for you to choose one of the following options:
1. If your screen frame thickness is up to 1/2", but no less than 3/8", you will receive the Universal under 1/2" model.
2. If your screen frame is over 1/2" up to 1" you can choose Universal over 1/2" model or Custom Cut.
3. If your screen frame over 1" you must choose the Custom Cut version (used mainly for situations such as screen porches or sidelights). Hale will trim off one of the flanges on the channel in order to accommodate very thick framing. The pet door will be screwed into your framing.
Please read the detailed ORDERING INSTRUCTIONS for additional information.
Find The Best Pet Door Size For My Pet

A
Pet Height: inches
B
Pet Width: inches
Installation Instructions
Universal Model

 Difficulty
Moderate
 Steps
14
 Time Required
1 hour
 Sections
01
 Flags
04
Parts
- Installation Booklet (includes warranty, policies, training, etc)
- Hale Pet Door screen model
- Screen spline 3/16”
- Phillips head screws 1⁄4”
- 7/64" drill bit
- Metal screen retainer clips
- Screen Stabilizer Bar Kit included with pet door sizes TL and larger (optional purchase with smaller pet doors)
Tools
- Drill
- Razor blade
- Flat headed screwdriver or putty knife
- Phillips headed screwdriver
- Screen spline roller (handy but not necessary)
- Needle-nosed pliers (optional)
- Silicone caulk
A SAFETY REMINDER!
Always wear eye protection and gloves when appropriate.
Before installing: The Hale Pet Door Universal Screen Model is designed to fit into one of the lower corners of a screen door frame or screen window frame that over 1/2" thick. In screen frames that are 1/2" thick or less the standard screen model should be used although the universal model will work in those situations as well. The doors are very similar but the installation process differs between the two models. The universal screen pet door is completely reversible and will fit into either corner of the screen frame.
Note: The Hale Pet Door™ screen model is not designed to work on security doors. A “door” model is a much better choice for a security screen application.
Step 1 Pre-Installation Check


- Before installation, be sure that you have the proper size pet door for your pet.
- Take a brief look at the large diagrams of the screen model at the end of the instructions and become familiar with various components of the screen model. This will not only help in understanding the terms used in these instructions but can be very useful should you need to call for technical support.
Step 2 Prep Screen Door for Installation


- Determine which corner of the screen door is to be used for installing the pet door.
- Remove the screen window or door from its track. The screen door can generally be removed by lifting it upward and swinging the bottom outward. Occasionally the wheels will interfere with removal. In this case, the wheels will need to be lifted upward to clear the track.
- Lay the screen window or screen door on a flat surface with the screen spline facing upward.
Step 3 Remove Screen Spline


- Remove the screen spline (the ribbed rubber around the screen) from the installation corner. Needle-nosed pliers work very well for removing the screen spline or you can also carefully use a flat head screwdriver or a putty knife at the corner to get started. If using a screwdriver or putty knife, be careful not to cut into the spline or slice into the finish of the door frame.
- Leave the spline attached for the moment and just push or fold it out of the way.
Step 4 POSITION PET DOOR FRAME


- Place the pet door snugly against the frame at the chosen corner. Make sure the pet door is adjusted properly and operates smoothly while in position. It should be flush against both the bottom and side edges.
Step 5 Position Clips


- Place the metal screen retainer clips in the spline track of the people door evenly spaced around the pet door as shown. Depending on the size of the pet door ordered there should be between one and four clips in the bottom track and another one to four clips in the side track of the people door.
Step 6 Drill Hole


- Holding the pet door snugly against the people door frame, drill through the holes in the metal retainers into the frame of the pet door using the 7/64" drill bit provided.
Step 7 Add Screws


- Insert the #6 screws with a Phillips screwdriver or drill as shown.
Step 8 Apply Silicone


- Run a thin bead of silicone in the spline track on the people door along the side and bottom of the pet door running the silicone over the metal retainers as shown.
Step 9 Add Screen Mesh


- Lay the screen material back over the pet door. Pull the screen material taut. To hold the screen fabric around the pet door, insert the screen spline that you previously pulled out of the people door with a flat headed screwdriver or screen spline roller.
Step 10 Clean Excess Silicone


- Clean any excess silicone off the people door and the pet door with a paper towel, if needed.
Step 11 Remove Excess Mesh


- Using a razor blade, carefully cut the screen fabric inside the perimeter of the pet door near the weather stripping. Be sure to leave enough screen fabric to be pulled down into the track by the screen spline that came with your pet door. You can trim off any excess fabric after the installation is complete. Remove the square of screen fabric and discard.
Step 12 Insert Into Door Frame


- Insert the screen spline included with your pet door into the spline frame track around all four sides of the pet door being sure to pull the screen fabric taut to make the pet door more secure.
- This means that on the bottom and one side of your pet door you will have two pieces of screen spline: One in the people door track (black spline at top of picture below) and one in the pet door track (light gray spline at bottom of picture below) with a narrow strip of screen fabric between them.
Step 13 Remove Excess Spline


- Cut away any excess screen spline with a razor blade or scissors. Cut away the excess screen material with a razor blade being careful not to cut into the screen spline or the finish of the pet door. If you are installing a stabilizer bar (see next section), leave some excess screen material at this time. You can trim it later after installing the stabilizer bar kit.
- Re-install the screen door or screen window.
Step 14 Adjust Magnets

- After re-installing the screen into a vertical position, adjust the magnets in the pet door upward or downward if needed. The magnets are pressure fitted and can be adjusted downward by tapping lightly with the handle of your screwdriver. They can be adjusted upward by twisting a flat headed screwdriver below the magnet between the magnet and frame.
Optional Stabilizer Bar Kit for Screen Model Installation: Information and Installation Instructions
For our screen model pet doors, size Large and above, or if you have more than one pet, we recommend adding the optional Stabilizer Bar Kit for additional stability for your pet door and people door alike. The Stabilizer Bar Kit contains a spreader bar, 2 aluminum clips to attach the bar to the frame of your screen door, 2 metal screen retainers to attach the bar to the top edge of the pet door and a drill bit to drill the holes into the spreader bar for the retainers.

The spreader bar is designed to be installed as a brace across the screen door directly above the pet door to add rigidity and strength both to the screen door itself and to the unsupported edge of the pet door. This can be especially important for very large or very active dogs.

Videos
How to Measure
Hale Screen Mount Pet Door
Make sure it fits!
FAQ
|
Which side of the door do I stand on to determine which the installation corner? You should be standing inside and facing the screen door when determining which corner of your screen your pet door will be installed into. This is an important distinction as a pet door that looks like it's on the right hand corner of your screen door inside a kitchen will look like it's on the left hand corner when you're on the patio. Think of it as when you're trying to follow an workout instructor: your right is their left! |
|
Is this the entire thing? This is only the pet door, not a full patio screen door with a pet door pre-installed. Hale offers multiple installation options to fit all different types of screen doors. |
|
What is the flap made of on the Hale? The Hale Screen Mount Flap is made of vinyl. |
|
Why is this one more expensive than other pet door for screen doors? This is the best doggie door in screen door models because of how durable and sturdy it is. Also, larger dog doors for screen doors will cost more than smaller sizes. |
|
Why would I need the stabilizer bar for the Hale screen pet door? The Screen Mount Stabilizer Bar Kit adds an additional support across the top of the pet door. This is necessary for larger, active dogs, as it will help the screen and dog door stay in good shape for as long as possible by providing extra support. This is recommended for all large dog screen door installations, so it is included for Tall/Large size and above. |
|
What does it mean by "exterior" and "interior" for Hale screen pet doors? For the Hale Door "Exterior" and "Interior" are referring to where the screening material is located in relation to the frame. If the screen material is installed closer to the inside of the frame, then it is considered "Interior". If the screen material is installed closer to the outer part of the frame, then it is considered "exterior". If your framing is thicker than ½” then this is very important because it will determine how the manufacturer will need to modify it so that it will install correctly. |
|
Why does Hale ask about so many options on the screen mounts? There are many options for Hale Screen Doors because they are highly customizable, and they are very thorough about making sure they give you the right product. If the frame of the screen is over 1/2" in thickness, then it has to be modified.Options that are brought up when selecting a Hale pet door screen mount:1. 'Pet Door Installs in Which Lower Corner' - Specify whether you'll be installing the pet door in the lower left corner or the lower right corner of the screen when looking from the inside of the house to the outside. The terminology used by Hale is 'handing'. 'Handing Left' simply means that you'll be installing the pet door in the lower left-hand corner of the screen when looking from the inside of the house.2. 'Customer Screen Frame Thickness Options' - The Hale pet screen door will be modified at the factory to fit varying thicknesses of your screen framing if necessary. Here are the various situations:a. Your screen frame is thinner than 3/8". If you are considering a larger size or have a particularly vigorous dog, then your framing may not be sturdy enough and you might want to reconsider making this purchase. This option is not offered for that reason.b. If your screen frame thickness is up to 1/2" choose option 1. No further information is needed.c. If your screen frame thickness is over 1/2", choose the second option if your screen mesh and spline are located on the outside side of the screen frame-- 'exterior'--and the third option if they are located on the inside, or 'interior', side. Your pet door must be installed on the same side as the screen mesh and spline and the factory will ensure that the framing provided will accommodate that.3. Hale Pet Door Screen Mount Stabilizer Bar Kit - A normal Hale pet screen door is supported down one side and across the bottom by your screen framing. The Screen Mount Stabilizer Bar Kit adds an additional support across the top of the pet door. We think this is a very good idea for larger sizes and more vigorous dogs. Available bar widths are 36" and 48". Choose the size at least as wide as your screen and then cut the bar with a hacksaw to fit. All fittings needed are included with the kit. To order this kit, please go to the Stabilizer Bar Kit page. |
|
What is a spline and how do I know if mine is exterior or interior? The spline is what attaches the screen material to the frame, it is a tube of rubber like material. If the screen material attaches to the side that is closer to the inside of your home, it is referred to as an interior spline. If the screen attaches to the side of the frame that is closest to the outside of your home, it is referred to as an exterior spline. |
|
Can I lock the Hale Screen Pet Door? There are no closing covers offered for the Hale Screen Mount. |
|
Can it be installed on either side of the screen door? It can be installed on the bottom left or right corner of your door as long as the screen frame is 1/2" or less in thickness. |
|
Do I need to get anything else to install this through my screen, or is everything included? All hardware is included with the pet door. |
|
Can I install this myself, or do I need to hire someone? Screen door doggy doors tend to be easier to install than other pet door models. Tools that you will want include: Screen spline roller (handy but not necessary), Drill, Phillips headed screwdriver, Razor blade, Flat headed screwdriver and Needle-nosed pliers. Make sure that the framing is screwed in correctly so that it is firmly attached to the screen door. |
|
Does it matter what kind of material my screen is made of? Since the Hale Pet Door for screens attach directly to the frame of the screen, the strength of the screen material is not as critical as some other screen pet doors. Keep in mind that putting a pet door through your screen may encourage your pet to interact with the screen more, so sturdier material is still recommended. |
|
How do I know which size I need for my pet? You will want to measure your pets and determine how high off the ground the pet door will be installed. You want the top of the flap to be at least 1 inch above the tallest point of the dog or cat's back, and the flap needs to be wide enough that they can comfortably walk through. The bottom of the flap should also be low enough to the ground that your pet doesn't have difficulty stepping over it. |
|
Will this pet door keep out bugs? The fuzzy weather stripping around the Hale flap is great for keeping out bugs! It helps to fill any gaps around the edges of the flap between the magnets. |
|
Can I use this as a pet door for screen enclosure installation? Yes, this is one of the best, and the one that we highly recommend for screen enclosure dog door installations. For screen enclosures, you need to make sure to choose the custom cut over 1/2" option. |
|
Do they make a Hale screen door or screen doors with doggie door flaps pre-installed? No this is only the pet door. You need to purchase the screen door separately. |
|
What screen mount door is good for extra large dogs? The Hale Pet Doors for Screens come in a variety of sizes up to 15 1/2" wide by 27 1/2" tall. |
|
How much does shipping cost? Shipping is calculated at checkout. |
Warranty
Warranty: Lifetime Frame Warranty / 10-Year Parts Warranty Including Flaps
Duration: Lifetime for frame and 10 years for parts including flaps.
Coverage:
Hale Pet Door products and components are guaranteed to be free from defects in materials and workmanship from the date of purchase.
Flaps are made from the best vinyl imported from France using Hale's custom chemical recipe.
Coverage percentages for parts (excluding frame) decreases by 20% every two years over a ten year period.
Returns within 30 days due to dissatisfaction results in a full refund, but if the product is damaged upon return, only 50% credit is provided.
Exclusions:
Warranty does not include shipping to Hale Pet Door or field service labor.
Glass Breakage: 50% replacement cost in the first year if the glass breaks. No warranty on glass after the first year. Excludes in-glass models' glass.
Only 50% credit is provided towards the cost of a replacement Hale Pet Door if damaged due to no fault of Hale Pet Door (e.g., miscutting, mismeasuring) within 30 days of purchase.




 Product Details

